Sunday, January 26, 2014


Pork Saute Over Udon Noodles

Short and sweet, this meal is for when you have some personal time or for a dinner for two. This is just an oversimplified version of what I normally do, but, as I mentioned in my previous post, this is a pantry meal time for me, but I will let you know what I normally add to this meal later in this post.  I decided to make this on one of those days when I had had a long, tough day, and I was simply fried and wanted something simple and real quick to make.  Here it is, my Pork Saute over Udon Noodles.  

Ingredients:
1 pound package pork chunks  (cut into bite-sized bits, if needed)
2 - 3 eggs
2 teaspoons sriracha plus one teaspoon
2 teaspoons dried basil, halved
1 teaspoon cumin seed
2 teaspoons ginger powder
1 teaspoon coriander seed, crushed in your palms
4 tablespoons Ponzu, halved
2 tablespoons Tamari
1/4 teaspoon cayenne chili powder plus a half teaspoon
1 package udon noodles
1/2 teaspoon dried oregano
3 cloves garlic, grated or finely chopped
2-3 tablespoons grape seed oil


In a large skillet, add the grape seed oil and half of the garlic. Slowly bring the heat up to medium-high.  When the garlic begins to sizzle, add the cumin seed.  When it sizzles, add the pork.  Saute the pork until it begins to caramelize. Add half of the basil, the ginger powder, the crushed coriander seed, one half teaspoon cayenne chili powder, half of the sriracha and the rest of the garlic.  Saute for a few minutes to coat the pork with the spices. Add the Ponzu and Tamari and sriracha and coat the pork evenly.  It should begin to form an aromatic crust that will make you drool.  Seriously. 

 Delish, right???

Now bring 1.5 cups water to a boil.  Add all of the other ingredients, except the eggs, oregano and udon noodles.  Stir the broth for a few moments and allow the flavors to marry.  Add the udon noodles.  In about two minutes, crack the eggs and gently try to lay them into the boiling broth. Be careful, though, please! I like the eggs poached in the broth.  So flavorful!!!  Allow to simmer on medium-high heat for three more minutes.  Remove the pot from the burner, or, turn off the heat.  The eggs will continue to poach.  Remove the noodles and plate them, then top with the pork.  Drizzle with about two teaspoons or so of sriracha and crush the oregano and maybe a little more dried basil over the top.  Serve and enjoy!

Options: You could add intense and delicious flavor to the broth by adding some of the pork saute to the broth.  


Other options:  I like to add scallions, halved, to the broth, or, slivered yellow onions and sliced (disc) garlic into the broth.  Delicious!  For greens, I like to add escarole, as it does not alter the flavor drastically like spinach can do.  I am not a boiled cabbage fan, but I know family members who love to add that just as the broth is finishing, so it still has some crunch.  I also love to add bean sprouts for a healthy crunch. 

You could also simply add the meat or veg to the broth and noodles and eat it out of a bowl, or heck!  Why not eat it right out of the pot with hashi (chopsticks)???  So many options.  You know what that means?  You can make this many times and never have it the same way ever!

As you can see, this is one of those flexible dishes where you could use whatever meat you wish, or Not!  You could simply add all vegetables and fully enjoy the health benefits of a vegetarian meal.  Fantastic!  Change it up, make it yours.  And ENJOY!!!


Enjoy!!!  Thank You, gentle readers, for your time and consideration!


Beefy Rigatoni Pasta Bake

The last two weeks - and the upcoming week - have been very interesting to me from a culinary standpoint. A tough financial month - just going to say it - I have had to get creative in the kitchen and use the goodies in my cupboards and freezer to make dinners and lunches (which have become both).  This is one a several dishes that came together in a happy evening of culinary exploration and adventure.  Minus the adventure part because it turned out very well; but adventure sounds good, don't you think?  With a pound of hamburger, a bag of rigatoni pasta, pantry spices and eggs - yes eggs - I put together a meal that Rachael Ray calls a "BLD", a breakfast, lunch and dinner meal.  Ergo the eggs. Here's my starting line-up:

1 or more pounds of ground beef (I use lean ground sirloin)
1 large onion, chopped
3 cloves garlic, finely chopped
4 baby sweet peppers, finely chopped (love these!)
1.5 tablespoons Italian seasoning, half tablespoon separated
1.5 tablespoons paprika, half tablespoon separated
2 teaspoons dried basil 
2 teaspoons dried oregano
salt and pepper, plus a good two tablespoons or so for the pasta water
1 teaspoons cumin (seed or powder) I love the smoky warmth it adds
1.5 28 ounce cans crushed tomatoes (I love Cento!)
1 tablespoon tomato paste 
1 pound bag of rigatoni pasta
1 cup Panko bread crumbs
extra virgin olive oil1/4 cup parmigiano-reggiano cheese
1 cup mozzarella cheese 
*Quite optional:  6 eggs

Preheat the oven to 400 degrees.

Saute the vegetables in the olive oil in a high-sided pot over medium-high heat until the onions become just barely translucent with salt and pepper.  Move the veg to the sides of the pot and add one pound or more of ground beef. Brown the beef and incorporate the vegetables when that is done. Add the cans of crushed tomatoes and all but the separated parts of the dry spices and seasoning.  Incorporate well.  Add half a cup or so of water and stir well, bringing the mixture to a boil. Simmer on low heat for thirty or more minutes.  The longer you allow the sauce to simmer the more flavorful the marriage of the ingredients becomes. 


Fifteen minutes before the sauce will be done, boil the pasta water and liberally salt when the water boils.  Add the bag of rigatoni and cook just before al dente, or just before it is done.  Save half a cup of the starchy pasta water and add it to the sauce.  This will thicken it up a little and help the sauce stick to the pasta.  Drain the pasta and set the colander on a plate on the counter next to a 9 x 13 baking pan or dish that has been sprayed with non-stick cooking spray.  Add a thin layer of the sauce to the bottom, then spoon over that a good layer of rigatoni.  Add a layer of the sauce - a more hearty layer - and add half of the mozzarella and half of the parm cheeses.  Repeat this process with the remainder of the pasta, sauce and cheeses.

To make this a true BLD dish, I made a little well in six places before adding the top layer.  Then I topped that with the thin layer of cheese, and then with the rest of the pasta and sauce.  I am quite sure most folks would not do this, but trust me, if you do, you will not regret it. 

Add the remaining dry ingredients to the cup of Panko bread crumbs and mix together.  Top the mixture in the baking pan with it and drizzle extra virgin olive oil atop the bread crumbs. 


Place the completed baking pan into the oven, which should be set to 400 degrees.  Bake for 20 minutes.  The top will become crispy and brown and the aroma will fill your kitchen with pure delight. Remove, allow to cool and set for fifteen minutes before serving.  The cheeses will hold together the pasta so you should be able to remove neat little squares onto a dish and into lunch containers.  

Note: I did not wait like I mentioned above - my lesson learned - so my plated square began to fall apart. What can I say?  I was hungry!!!


You can see an egg, right corner.  Trust me, this is good. But of course, if you think that is just wrong, leave it out!  No worries!  Make recipes your own, which is much of the fun of cooking!

Thank You, gentle readers. for your time and consideration!


Saturday, January 18, 2014


College Foodie Series
Student Bag Meals

College students often eat on the run.  Parents of college students living away from home often send or take to their students bulk boxed items in addition to putting money on their meal cards.  Most universities have their own debit cards with which students can visit any store or restaurant on campus and use that card, just like a debit card.  Discounts and other perks are often associated with the cards, such as free bus transportation if you live off campus (to certain locations, such as local apartment complexes and shopping areas near campus).  Businesses on campus also accept bank debit cards, which makes eating on the go very easy and above all, convenient!  So why am I still thinking about bag meals?  Because, let's face it, parents, you Know This, we cannot be certain our students are eating their vegetables and balanced meals with such convenience afforded our kids on campus.  

I have put much thought into this, and I Know many kids will shrug their shoulders and roll their eyes (what else is new?) or stare at you (me) incredulously like a cartoon character, blinking blankly, but I think Bag Meals will help us parents help our kids eat balanced meals now and then, or have veggie snacks more often when they are home, whether that is a dorm room with a microwave or if they are living in an apartment.  

So parents, when your kids are home, or, when you are visiting next, think about putting raw or roasted veggies, chopped into bite-sized pieces, into freezer zip-lock bags. Send along their favorite dip.  Broccoli, cauliflower, blanched and roasted green beans, even fruits, such as grapes, strawberries, raspberries, blackberries and more are great to put into the bags.  Washed and chopped kale, spincach, chard, escarole, onions, roasted and chopped peppers, roasted corn with the kernels chopped off the cobb and more are candidates for these bags. Put together meal plans, such as roasted broccoli and cauliflower with garlic to go along with frozen pre-cooked pork chops or chicken, sliced, so that the kids can plate and easily microwave them with extremely minimal time and effort.  

Here are some photos I took when I stored some veggies for future use.  You can freeze veggies like beans, broccoli and cauliflower, which I why I keep repeating those nutritious veggies.  If you chop up partly roasted sweet potatoes, also a highly fibrous and nutritious tuber, into thick fries, which can also be frozen until used, the kids can add a little evoo and pop them into the microwave for five minutes and devour like french fries with sour cream or ranch dips.  Delish and healthy! 

Send cooked and sliced or shredded chicken seasoned with oregano, salt and pepper, paprika and coriander seeds or cumin seeds (ground) along with garlic and onions (see above) and tortillas to make easy tacos!  

Send chopped, sauteed hot dogs in salsa along with onions and roasted chiles to make tacos or enchiladas.  Do not forget the tortillas!

Cauliflower and kale can be ready to use for pasta or roasting (Kale chips are very popular:  toss in evoo, salt and pepper, and roast for eight minutes). 

These are just a few of the examples.  Some items cannot be frozen, such as some green leafy veggies, such as lettuce, but most can be frozen for future use.  Write with a Sharpie (TM) what veggie is in which bag, when you placed it in there, letting the kids know that most veggies have a three-five day refrigerator life-span.  Kale has the longest refrigerator life-span of all green leafy veggies. 

I know you may be asking: "Why doesn't my child just buy a frozen dinner?  Same difference!"   Nope.  By doing this for your child, even if it is just now and then, you have control over the freshness and quality of the ingredients, you have control over the seasoning (sodium and sugar) content of the bagged meals, and you know your child will be eating healthy.  

I am working on easy meals to bag up for college kids, such as my "ancient family secret", "Stuff on Fritos", Pasta in a Bag, Chops in a Bag, Chicken in a Bag and much more.  

Stay tuned! Please feel free to share with me your own ideas!  The more the merrier!

Thank You, gentle readers, for your time and courtesy.  
Enjoy Cooking!

Friday, January 17, 2014


Pantry Breakfast Pizza

Breakfast is one of those meals I could eat at any time of day or any day of the week.  This week, I have to "make due" with what I have in my pantry and on-hand in my refrigerator.  I wanted to make something I could have for dinner last night that was a bit substantial and that I could have for breakfast and/or lunch the following day. Breakfast Pizza is one of my favorites.  I have, in the past, used chorizo, but I had only chicken hot dogs for a protein product, so I used that, along with the staples I always have on hand, onion and garlic.  I also had some kale and basil left over from Monday, so "Pantry Breakfast Pizza" was born.  Er, baked, actually. 

And with that, here are many of the ingredients.  Let's get started!


How embarrassing! Yes, I am wearing my cushy slippers!

Ingredients:
1 ball fresh pizza dough, or, one cylinder Pillsbury whole wheat pizza dough
3 - 4 baby sweet peppers, seeded and ribbed, chopped
3 - 4 cloves garlic, grated or finely chopped  (yes, I used four!)
1.5 cups grated mozzarella cheese
1/2 cup finely grated parmesan cheese
1 package chicken hot dogs, or whatever meat or leftover meat you have on hand
1 cup fresh kale, chopped
1/4 cup fresh basil, torn (6 leaves, rolled and chopped or torn)
salt and pepper
1/4 cup diced, roasted green chiles
1 red or yellow onion, finely chopped
12-14 sun dried tomatoes
6 eggs
2 teaspoons cumin seeds, crushed
1 tablespoon dried oregano, crushed between the palms of your hands
1-2 tablespoons smoked paprika
dusting of flour 
extra virgin olive oil

Of course, you could add whatever you want to such a pizza.  Listing the ingredients, by-the-way, is the hardest part. 

Chop and grate the vegetables.  Prep all of the other ingredients for use.  

On a large cutting board or pastry marble, dust with flour.  Roll out your pizza dough.  I decided to use a rectangular baking pan, and I used a store-bought cylindrical whole wheat dough, so it came out of the container in that shape.  Easy.  Roll the dough out, after dusting the top very lightly with flour, to the length and width of your pan.  

If you are using a ball of fresh dough, separate it as needed, then, using your fingers, shape and form the dough into a circle as best as possible.  Place the dough atop a pizza stone, if you have one, that has been lightly dusted with flour or corn meal.  

Preheat the oven to 400 degrees.  No need to rush, due to the eggs!  

I like to drizzle the dough with a little extra virgin olive oil and toss some fresh garlic and a pinch of the cumin over it, lightly.  I bake it for five minutes and remove. 

Meanwhile, saute the chopped chicken hot dogs, half a cup of the fresh onion, 2/3 of the fresh garlic, the chopped sweet baby peppers, along with half of the remaining spices, and salt and pepper in a couple of tablespoons of evoo in a large skillet.  Do not cook the onions all the way through.  The pizza baking later will finish that up.  


I sprinkle some of the mozzarella over the pizza dough and make six congruent depressions, which I call "nests", in the dough.  Crack the eggs into the nests.  I like to place the sun dried tomatoes, two or three, around the nests, like a border.  I place some of the fresh onion, which ought to take care of the other half cup of fresh onion and the rest of the garlic atop the pizza dough, and sprinkle all the rest of the spices lightly over the pizza. 


Do not place the kale atop the pizza until the last five minutes of baking. 

Bake the pizza for 20 minutes.  After 15 minutes, add the kale. Leave the basil until the pizza comes out of the oven.  It will wilt due to the emanating heat by itself.  


Add the kale and some parmesan cheese the last five minutes of baking.  It will wilt nicely.

Upon completion, cut the pizza into squares (or triangular slices if you have made a rustic circular pizza) and serve.  You will love the balance of sweet from the sun dried tomatoes, the crunch of the crust and kale, the breakfasty (yes, breakfasty) flavor of the seasoned eggs, the aroma and flavor of garlic and spices.  This is just a complete comfort food meal.  Hope you enjoy it!


I like to drizzle a little sriracha over the pizza. 

Thank You, gentle readers, for your time!  Until next recipe.....
ENJOY COOKING!


Soccas!
Alu Gobhi and Caprese

One of my more recent dishes was raspberry filled crepes, which I absolutely loved.  The recipe I used was by Giada De Laurentiis, and this one, too, is one I picked from her.  This crepe, however, is a thicker, savory and spiced crepe called "Soccas".  Socca, singular. Giada had filled her soccas with a vegetable saute, which is great, but I have been hooked on Jason Wrobel's Cooking Channel show, "How to Live to 100" (via cooking vegan/vegetarian meals).  Incredibly funny, intelligent and informational show.  I think Jason Wrobel is hysterically funny.  The man gets several actual "LOLs" from me each episode. Now, Jason devoted an entire episode to cauliflower, and I fell in love with an Indian recipe, Alu Gobhi, featuring cauliflower, of course, along with potato, spices, and a little bit more.  Being a lover of uncomplicated recipes, yet, wanting to incorporate some of Giada's ingredients, and some of my own, I put together a conglomerate of vegetables, putting my own twist on Alu Gobhi.  I hope you like it, and I fully expect anyone who makes this dish will fill it with whatever vegetables they themselves enjoy.  Enough of my ramblings, here we go!

Socca batter ingredients:
3/4 cup chickpea flour
3/4 cup water
1/4 teaspoon cumin
1/4 teaspoon crushed coriander seed (or powder)  I used seeds
3 teaspoons grape seed oil

In a large bowl, combine the ingredients and whisk together, making sure there are few to no lumps.  Keep in mind, when you use the batter, whisk it again before using as the bulk of the chickpea flour settles and begins to separate from the water.  

I have a very small kitchen, I am sure you can tell.

To make the socca crepe, pour batter into a one-third measuring cup.  Add a teaspoon of grape seed or extra virgin olive oil to your small skillet or crepe skillet over medium-high heat.  When the oil begins to ripple, swirl it around the lip of the skillet. Add the batter in a swirling motion.  The socca crepe will be quite thin.  When it begins to bubble and the sides begin to solidify, use a soft spatula to separate the edges from the skillet.  When the entire socca begins to solidify, time to flip, very carefully! You may remember my epic crepe flip failure.  I have memory scars. Try not to let the crepe cook too long, only about two-three minutes per side, because, when it dries out - particularly in the center - it can easily fall apart. Experience, yes.  Take my word for it.  


Trust me, though, these crepes are quite savory.  Amazing aroma, great taste.  Now, let's get to one the fillings:  Alu Gobhi  (or, my quite tweaked version of it).  

Alu Gobhi is a flavorful, spicy Indian dish featuring cauliflower and potatoes.  It does take a bit of time, although the prep time is minimal.  Your kitchen will smell insanely aromatic.  Traditionally, Alu Gohbi features 3-4 tablespoons coconut or grape seed oil (because it has a high heat/smoke point), 1 tablespoon cumin seeds, 2 tablespoons tomato paste, two medium peeled potatoes that are chopped into two-inch cubes, 3 teaspoons salt, 1 medium head cauliflower cut into two-inch piece florets, 2 tablespoons ground ginger, 1 tablespoon ground coriander, 1 teaspoon turmeric, 2 - 4 pinches cayenne pepper, 1 cup chopped, fresh cilantro.  You begin by adding oil to a high sided skillet or dutch oven over medium-high heat, adding the cumin seeds and coriander to flavor the oil.  When the cumin seeds begin to pop, stir in the tomato paste.  After several seconds, add the potatoes and 1.5 teaspoons of the salt, stirring and reducing the heat, allowing the potatoes to cook for eight to ten minutes partly covered.  Afterward, add all the rest of the ingredients, trying to not damage the cauliflower florets when stirring the mixture.  The mixture will need to cook at medium-low heat for about minutes.  Add half a cup of the cilantro during the last few minutes of cooking.  You would garnish your final product with the other half cup of fresh chopped cilantro.  (This recipe is found on the Cooking Channel website).

I followed all of the same directions, but I added a can of white beans, kale, onion and garlic.  One of the things I should not have added was a half cup of white wine.  It made the mixture a little mushy, and the potatoes and cauliflower should be crisp, as if roasted.  Oh, and yes, I roasted my cauliflower with onion and garlic before adding it to the mixture.  That is just how I like cauliflower. Important lesson learned!  No unnecessary liquids!


Your kitchen will smell absolutely amazing! Here I am adding kale to the mixture, wilting it in. Don't forget! Keep an eye on those soccas!  Don't let them dry out!


 This is a completed Socca, filled with cauliflower, potato, onion, garlic and kale.  I garnished with roasted tomatoes and scallion and topped with a yogurt sauce which included cumin powder, ground coriander, lemon zest and a little lemon juice. Delicious! 

Make the Soccas.  Take one Socca, place filling in the center of it.  Fold the sides up and over so it looks like a package. Top with the yogurt spiced sauce and garnish with some roasted tomatoes (see the next Socca recipe) and scallion.  This is a Perfect Meatless Monday Meal!  It takes a good hour or so from beginning to end.  It took me longer, as I am often off task when I have help, which brings me to this:  my culinary partner in crime, Miss Maria, took all of the amazing photos for this and the next Socca recipe!  Wonderful job, Maria!  Thank You!!! 

Next!
Caprese Socca

My Caprese Socca is filled with traditional Caprese ingredients...sort of.  You know me, I change things up a bit based on my own preferences.  Here is my extremely simple line-up for my Caprese Soccas. 

3/4 cup chickpea flour
3/4 cup water
3 teaspoons grape seed oil
pinch salt and pepper
1/4 teaspoon ground cumin seed
1/4 teaspoon ground coriander seed
1 teaspoon dried or fresh basil
1 pint cherry tomatoes, halved
1 cup Oaxaca cheese (Delicious Mexican white cheese, known as the Mexican Mozzarella.  My FAVORITE cheese, ever!)
1/2 cup fresh basil,torn and, 1/4 cup fresh basil finely slivered
Balsamic vinegar (to drizzle)
*Yogurt sauce, if you wish, to top
3 scallions, cut for garnish at an angle (for pretty)

Halve the cherry tomatoes and arrange them on a baking sheet or in a baking pan.  Drizzle grape seed or extra virgin olive oil over the tomatoes, and top with dried basil or fresh finely chopped basil and a pinch of salt and pepper.  Roast for ten minutes in the oven at 400 degrees.  Remove and set aside. 


Meanwhile, chop or pull the ropes of Oaxaca (or, mozzarella, if you decide to use that)into one inch bits.  Tear fresh basil leaves, about half a cup, for the filling. Chop the rest into slivers; I stack and roll the leaves, then slice tip to stem.  

Make the Soccas.  Take one Socca, place some filling right in the middle, drizzle lightly with Balsamic vinegar, fold the sides up and over so the Socca looks like a package.  Top with sauce, if you wish, garnish with basil slivers, scallions and drizzle the top with Balsamic vinegar.  


 I have to tell you that this Socca is one of the Best things I have ever eaten.  It is one of those dishes that will be a favorite - not only due to its simplicity, but also its health values - for years to come. Maybe Forever!  

Thank You, gentle readers, for your time and consideration!
Enjoy cooking! 


Saturday, January 11, 2014


Verde Chicken Tacos

Alright, it had been a really long day, I was exhausted, but I wanted tacos and I wanted something with verde sauce, a green chili sauce, so I decided to go semi-homemade.  Okay, mostly not homemade.  As I began chopping a yellow onion, as well as roasting a serrano chili pepper along with pasilla chile powder, dried oregano, coriander and cumin seeds, I realized that this could easily become a college foodie recipe.  This simple recipe launched my foodie mind into full gear; how parents can help their kids eat healthy semi-homemade meals so the students have very little prep time and a lot of eating time. We all know that kids would rather pull something out of a bulk box and microwave it rather than spend time actually cooking, particularly if they are in a dorm with only a microwave.  I think I have the answer to that, but, more on that later!  Let's get back to this extremely simple yet potentially college foodie recipe.  

Not only could this be a college foodie, a single person, guy or gal, recipe, but a family recipe to throw together on a weeknight when everyone has had a very busy, tiring day.  Like mine had been. Here's my starting line-up:

Ingredients
1 package chicken tenders
1 yellow or red onion, finely chopped
3 cloves garlic, finely chopped or grated
1 serrano chile, seeded, ribbed and finely chopped
1 can roasted, diced anaheim green chiles (4 ounces)
4 ounces verde sauce (canned or bottled)
2 teaspoons smoked pasilla chile powder
1 teaspoon cumin seeds
1 teaspoon coriander seeds, crushed
1 tablespoon dried oregano
salt and pepper
evoo, about three tablespoons

You do not have to do this, but I roasted the finely chopped serrano, pasilla and chipotle powder, cumin and coriander seeds and the oregano until they became aromatic.  Your nose will tell you after about four minutes.  Roasting helps bring out the flavors and essential oils that bring incredible, smoky flavor to the dish. 

Slice the chicken into bite-sized slivers or chunks.   Mix together the roasted seeds, herb and powders and halve.  Add the evoo to a hot skillet over medium-high heat.  When the oil begins to ripple, add the chicken and saute'.  After a couple of minutes, as the chicken has begun to gain golden color, add half of the seasoning and a little salt and pepper, and stir to coat the chicken thoroughly.  Cook for another three minutes or so, then add the onion, garlic and the roasted serrano.

When the onion begins to soften and lose its solid color, add the diced roasted anaheim chile and the verde sauce.  Stir thoroughly, then bring to a boil.  Reduce the heat and allow to simmer partly uncovered for fifteen to twenty minutes.  


Some of the ingredients.

 
I apologize for this blurry photo.  All of the ingredients are brought to a boil, then allowed to simmer.

After about twenty minutes, having stirred the mixture now and then, the loose fluid has been reduced and a thicker, aromatic mixture remains.  Reduce a few more minutes over medium heat, then serve in your favorite tortillas with your favorite cheese and condiments.  It had been a late night for me, and I did not have any condiments on hand.  If I had, I would serve it with torn or chopped cilantro and finely slivered radish. Serve your way, and enjoy!
 
Thank You for your time and enjoy!


Saturday, January 4, 2014


Raspberry Preserves Stuffed Crepes

This has been a week of culinary firsts for me, which I am pretty excited about.  Okay, and there is a little bit of pride involved, too, but only because I did not burn the house down (knock on wood).  I was having a sweet tooth craving a couple of nights ago but, oddly enough, I did not want chocolate.  I am of the mind that chocolate should be a food group, so now you understand why that was a surprising sentiment that evening.  I had watched "Giada at Home" earlier in the day and she had made crepes filled with raspberry preserves, and I suddenly HAD TO have that.  I had all of the makings of the dish at home, already, so I got to it!  Thank You Giada De Laurentiis for this simple, easy and delectable recipe!

 Here are the ingredients that most people have in their pantry every day. Mind you, I added the lemon zest to the recipe to add aroma and flavor to the batter and preserves, myself.*

4 eggs
1 cup whole milk
1/2 cup flour
1 tablespoon sugar
2 pinches of salt (about 1/8 of a teaspoon)
zest of half a lemon*

These ingredients all go into a blender, which makes this a very easy, relaxed recipe.


The next set of ingredients, below,  can go into a cereal bowl and mixed together with a fork or spoon. Easy and flavorful!

1 cup raspberry preserves
1/2 teaspoon Vanilla extract (perfumes the preserves)
zest of half a lemon*

Blend the eggs, milk, flour, sugar, salt and lemon zest to form a smooth batter.  Have handy a 1/4 cup measuring cup to put just the right amount of batter into a crepe or small skillet. Place a tab of butter into a crepe or small skillet over medium-medium-high heat.  Fill the one-quarter measuring cup with batter and in a circular pattern swirl the batter around.  Do the same, picking up the skillet.  You should have a nice flat layer of batter over the skillet.  When it starts to bubble on the top, use a long bladed spatula to flip it over, unless you are a smarty-pants and can flip it professionally.  I tried. Epic Fail.  Working on it!  So, a long bladed spatula worked wonders for me.  When the crepe starts gaining that lovely golden color, time to remove it and plate it.  Repeat until you have used as much of the batter as possible. 


Now, using a spoon, swirl the raspberry preserves mixture (should smell wonderful!) over the crepe.  Simply roll it from one end to the other.  Try to make sure the fold is underneath for a better presentation.  

Regretful Hind Sight:  I thought I had powered sugar in my cupboard but I did not.  And if I were a smarter person, I would have had the bright idea to grate some of the chocolate stash I have on hand (Thank You, my precious students!!!  Lovely holiday gifts!) atop a row of filled and rolled crepes.  I truly love raspberry and chocolate together.  Oh well, I - once again - hope to learn from this experience and grow.  

This recipe is Very simple, very easy and goes so fast you hardly have time make mistakes (unless you are everyone who is me). But, mistakes happen for a reason: to learn from. I am a happy learner.  I hope you are, too, and enjoy this sweet tooth craving recipe as much I did .  And will.  A lot.  


Enjoy!


Friday, January 3, 2014


New Year's 2014

Flank Steak Bruschetta and Sausage, Cheesy Herb Popovers

Sampler plate of the popovers and bruschetta.

In my previous post I mentioned that I stayed home on New Year's Eve, no place to go.....but not to feel sorry for me! I actually stayed home to perfect the next two dishes for the New Year's Day party I'd been invited to by my long-time, oldest friend, Priscilla.  Not that we are old, but I have known her for at least 35+ years and we have remained "besties" for what seems like forever. I have been invited to the HUGE New Year's party she and her husband put on for friends and family and always have a great time.  I missed last year, so refused to miss this year. They provide the beautiful house and tons of amazing food (such as turducken, although that did not arrive this year, sadly), and all of the family and friends bring foods: delicious  salads, vino, chips and dips, tons of amazing hot and cold snacks, decadent desserts and much, much more!  I want to share with you the two dishes I brought.  Let's start with the flank steak bruschetta. 

I marinate flank steak from one hour to twenty-four hours before cooking.  The longer it marinates, the better.  The acids break down some of the connective tissues and cause the meat to be juicy and very tender.  That is your science lesson for the day!  Here are my marinade ingredients:

Juice and zest of one lemon
2 tablespoons apple cider vinegar
1 tablespoon sriracha
2 tablespoons Ponzu (citrus soy sauce)
3 tablespoons Pomegranate Balsamic Vinegar (or your favorite balsamic)
2 teaspoons Worcestershire sauce
2 tablespoons smoked paprika
2 teaspoons smoked pasilla powder
1 half onion, grated
4 cloves garlic, grated or finely chopped
1 Fresno chili and one Serrano chili, ribbed and seeded, finely chopped
2 teaspoons coriander seeds, crushed
1 tablespoon cumin seeds, crushed or powder
salt and pepper
3 tablespoons cilantro, finely chopped
1/2 cup extra virgin olive oil

You will also need a baguette, or your favorite bruschetta sized bread.

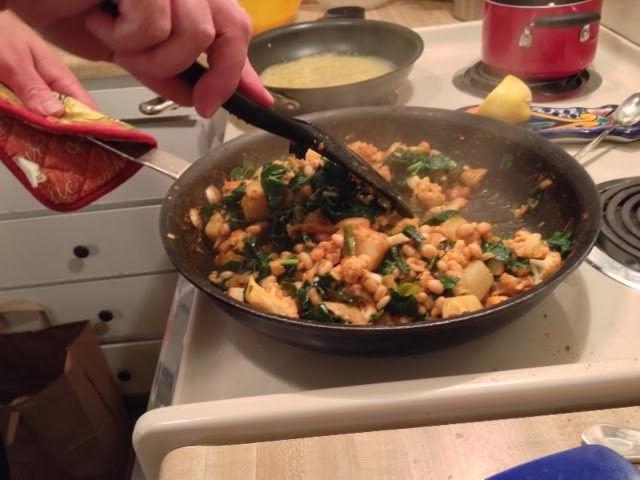
Bring the flank steak to room temperature.  Season the steak with salt and pepper.  In a large bowl, place one large gallon-sized zip-lock bag into another and fold back the zippers.  Place the seasoned steak into the bag. In another large bowl, add and thoroughly incorporate all of the above ingredients and pour the marinade into the bag with the steak.  Allow the steak to marinate as long as possible in the refrigerator.  I marinated my steak for sixteen hours.  When you are ready to cook the meat, whether you grill it or sear it on a griddle or skillet, bring it to room temperature again.  Add a little evoo to your grill or skillet over medium-high or high heat.  Remove the flank steak and allow the marinade to drip off of it before you place it on the hot grill or skillet.  When you do place it on the skillet, it will sizzle loudly.  That is perfect, just what you want to hear!  After about six minutes, check to see if the steak will release (perhaps after four minutes, depending on the thickness of the steak;  mine was very thick at one end), and turn it.  If it does not readily release, give it another minute or two, then flip it.  Look out for splatter!  You may be intoxicated by the amazing aroma, so be alert!  After another four to six minutes, your steak should be done.  If you want your steak more than medium-rare, then cook it longer, as you wish.  Up to you, but I like mine rare to medium-rare.  Remove the steak and allow it to rest for about ten to fifteen minutes.  Then, begin slicing with a sharp knife, against the grain.  


Beware!  You will be tempted to pick at the slices!  Try not to.  Much.  

If your baguette is small, like the small sourdough baguette bread I had selected, you will want to think about slicing each slice of flank steak into two parts, and each bruschetta bread slice will receive two small slices of steak.  But, we are not done with the bread yet!  I still have cheesy tricks up my sleeve!  I sliced my baguette at gentle angles, drizzled evoo over each slice over a baking sheet with a rack on it, sprinkled garlic powder over each one lightly, then toasted the bread at 400 degrees for about ten minutes.  Afterwards, I turned off the oven, but also put a teaspoon or good pinch of finely grated parmigiano cheese onto each slice and allowed the cheese to melt in the oven again for a few minutes. DeLish!
I like to set up an assembly line situation.  I placed the bread slices on a large platter, placed two steak slices atop each slice of bread, and when done, I garnished with sliced fresh scallion, shaved parmesan and basil. Beautiful!

Look out!  You will want to pick at this before you serve!  Be calm and leave the steak bruschetta alone!!!

Easy, right?  This is a crowd pleaser!

Next, I made a savory, cheesy popover.  The recipe is by Giada DeLaurentiis, and it is simple, fast and delicious.  Anyone with a blender can make this.  These popovers, especially when fresh from the oven, are also a true crowd pleaser.  Let's get to it.  
Sausage Cheesy Herb Popovers Ingredients:
2 links or one package of spicy Italian sausage
2 cloves garlic, finely chopped
1-2 cups smoked mozzarella cheese, grated
4 room temperature eggs
2 cups room temperature whole milk
1 1/2 cups flour
2 scallions, including greens, chopped
3 tablespoons fresh basil, chopped
pinch of salt and pepper


Note:  Please make sure the whole milk and eggs are at room temperature.  This allows the ingredients that go into the blender to incorporate thoroughly and not clump

Preheat your oven to 400 degrees. 

In a medium sized skillet, add a little extra virgin olive oil and thoroughly brown the sausage.  If the sausage is not spicy, perhaps you could only find mild Italian sausage, add a small pinch of red pepper flakes to spice it up.  Drain and set aside in a bowl for handy use soon. 

Grate the cheese. Now, i could not find smoked mozzarella at my local grocery store, which is unusual, so I used some grated mozzarella and grated a cup of smoked Gouda.  Flexibility is important when you cannot find exact ingredients. Place in a handy bowl and also set aside for now.

Next, in the blender, add the four room temp eggs, the two cups of room temp whole milk, the pinch of salt and pepper, the flour and the scallions and basil. Cover and blend or liquefy.  Remove the cover and set the mixture aside for a moment.  Now, don't freak out, but the batter is going to look pretty green.  Do not fear, it comes out golden brown from the oven.  It is green inside, but it is savory and delicious.  Of course, the basil and scallions cause the green color.  You have done nothing wrong.

Create another assembly line (like I mentioned for the bruschetta, above) with a regular sized (not mini!) muffin tin sprayed with cooking spray as the center.  You will want to do the following and repeat:

Take a little sausage and place it on the bottom of the muffin tin cup

Add a good pinch of the cheese over the sausage

Pour some of the batter into the muffin tin cup just before it reaches the rim

Repeat until all of the muffin tin cups have been filled.  

Place the muffin tin into the preheated oven and bake for 35 minutes. 

 
 If you look closely, you can see the batter is a little green.  Never fear, you have done nothing wrong. It is going to be amazing!


Beautifully golden brown, as promised. Yes, you can see a little green on the top, but it is quite flavorful and the cheese?  Wait until you get there....simply delicious!!!

Once again, both of these recipes are savory and very easy to put together.  Your guests will LOVE your dishes!  Enjoy and don't wait until New Year's to make these.  In fact, I have been planning on making the popovers for St. Patrick's Day due to the green interior of the popovers.  Perfect for that day! 

Thank You so much for your time and viewership, gentle readers!


One Skillet Hoisin Chicken Stir Fry Over Noodles

  One Skillet Hoisin Chicken Stir Fry      Over Noodles This is one of those "people who know me Know I am obsessed over Chinese food&q...