Tuesday, January 19, 2016


Roast Chicken Half Breast with Baby Yukon Gold Potatoes and Parmesan Dish Kale and Marinated Onion and Tomato Salad

BIG TITLE, delicious dish!  If you have been following my humble little blog as of late, you know I have been very much about time-saving and one-pot wonder dishes. This is one of my best, if you ask me.  I have made this twice, the first being featured in a previous blog, and this one, different from the last, was my favorite. During very busy times, one-pot or one-skillet wonder dishes are not only time-savers, but they can be delicious and healthy and flavorful with minimal clean up afterward. This dish is far simpler than the previous dish, and incredibly flavorful. Let me stop talking.  Let's get to it!  Come join me!

Ingredients:
1 package with two chicken half breasts, boneless (Mine also had the skin on)
1 large yellow onion, sliced into discs (or 2 medium onions)
3 cloves garlic, grated or finely chopped
1 tablespoon Herbs De Provence
2 tablespoons finely chopped rosemary and sage, and 6 thyme sprigs, leaves stripped
salt and pepper
1/2  pound baby Yukon Gold potatoes (1/2 pound for two servings)
6 baby sweet Italian chiles, slivered
3 tablespoons extra virgin olive oil


 Note:  Make the salad and vinaigrette before starting the chicken!*
Marinated Tomatoes, Onion and Kale Salad:
1/2 red onion, slivered or coarsely chopped
1 pint of cherry tomatoes, halved  (I used a baby tomato medley)
1 cup finely chopped kale
1 Fresno chile, sliced into thin discs
1 tablespoon Pecorino Romano cheese, grated

To a bowl, add 1 clove grated garlic, 1/2 teaspoon salt and pepper, 1 pinch red pepper flakes, 1 rounded teaspoon whole grain mustard with white wine (or, whole grain garlic mustard with white wine), 3 tablespoons champagne vinegar and 1/4 cup extra virgin olive oil.  Whisk vigorously to combine. Add the salad ingredients to the bowl and allow them to marinate for an hour*. 


Preheat the oven to 350-degrees.  

In a high-sided oven-safe skillet or a shallow oven-safe pot, add the onion discs and drizzle the extra virgin olive oil atop each disc. In its packaging or on a plate, season all sides of the chicken half breasts with salt and pepper. Add a pinch of the Herbs De Provence (or, Herbes De Provence) to each of the onion discs. Place the seasoned half breasts atop the onion bed. Sprinkle both sides of each chicken breast with some of the Herbs De Provence. Next, sprinkle the fresh herbs atop the breasts. Finally add the potatoes and the chile slivers around the inner perimeter of the skillet or pot. Drizzle those with evoo, season with salt and pepper. 


 Chicken, potatoes and chiles over onion bed seasoned and oven ready!

Place the oven safe skillet or oven safe pot onto the middle rack and slow-roast for 45-minutes at 350-degrees.  If you do not have that much time, roast at 375-degrees for 35 minutes.  I recommend the first. The chicken is done when you just barely poke it with a fork and the juices run clear.  the entire chicken half breast will be aromatic and quite moist. The hotter and shorter the temperature, however, the drier the chicken breast. 

So, if you have the time to slow roast, as I recommend, which means the entire dish can be done in just under one hour, prep time included, you will have an amazingly aromatic dinner for two.  It looks and smells fantastic right out of the oven!


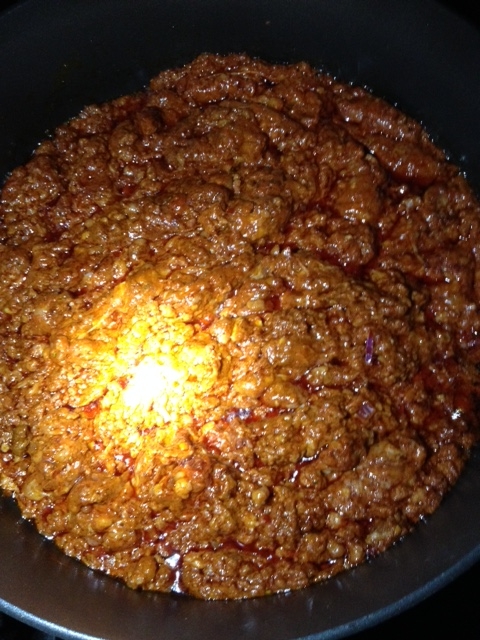
This next step is entirely optional, and I truly went with it the last time I'd made this, but if you have another fifteen minutes, crank up the stove top to medium-high, remove the potatoes, chiles and chicken, skim or pour off some of the fat, by at least half, add half a cup or so of wine and a drizzle of balsamic vinegar to the onions, bring it all to a boil, then reduce the heat to low.  Simmer for another fifteen minutes to reduce the wine and condense the flavors.  You can serve the caramelized onions with the chicken, as I did in my last recipe. I did not do that this time, but I did save them for another dish.  That's a whole other blog.  

One thing that I had wanted to put in between the oven ready skillet and the fresh and hot right out of the oven is the salad dish, but I just did not want to interrupt the continuity. So, let's make a parmesan salad dish! 

You have seen me in previous posts make parmesan discs for burgers and salads, as well as parmesan bowls.  I love them. They add a buttery, salty bite to everything. For this meal, I made a shallow dish.  I followed the same procedure as usual.  Since the oven is preheated to 350-degrees, I had the oven do double-duty.  On a baking sheet lined with parchment, add 2/3 cup of grated parmesan cheese in a mound. The cheese will melt and form a patty. When the edges begin to brown and the disc bubbles, about eight to ten minutes, remove the baking sheet.  Allow the disc to cool for about three minutes.  Meanwhile, cover a small bowl with foil and spray the foil with non-stick cooking spray or evoo spray. Using a narrow spatula, carefully remove the parmesan disc from the parchment and place over the rounded top of the upside bowl. Allow to cool about ten minutes before removing the parmesan bowl. Upon serving, add the marinated salad to the parmesan dish.


Now, finally!  It is time to serve!


 It is now time to eat!  A little elegant, completely flavorful, good for your health and waist line, this dish is easy and clean up is a breeze.  Whether you make this as a fancy date meal for two, or add more potatoes and two more chicken breasts for a dinner for family or friends, this is one winner of a chicken dinner!

Ok, I could not resist the pun!!!

I hope you enjoyed this post, friends!  I hope you make this dish and enjoy as much as I did!  Now, go cook something for someone you love!

As always, thank you for your readership and for spending some time with my humble little blog!  I am grateful for your time and consideration!


Thursday, January 7, 2016

Welcome to ANOTHER Episode of ...
What I Have Been Up To 
In My Kitchen!

I do not cook amazing dishes every day.  There are meals I have no plans to blog about, but some turn out better than expected, and I thought I'd give some of them a shout out.  You may pick up on the idea and make it better, make it healthier or add something to it that alters its science or ingredients list altogether, enhancing the meal's experience, and I completely welcome that.  One of the most important things I have learned on this culinary adventure is:  make it your own.  I have, for fifteen years - but especially in my early years of teaching - taken strategies, ways of doing and implementing certain things, organization techniques and much more and tweak these things to make them work for me.  I am rather like a sponge, in that respect, both in teaching and cooking' I take what I have learned from others and tweak them until they work for my teaching style and my palette. 

If you read my One Pot Pasta on a BBQ post from a couple of days ago, you found out that I reworked my brain as to how to cook a pasta dinner on a bbq. In my mind, it was like cooking on a gas stove; you cook with actual fire. I did that.  In this next dish, I made yukon gold hash browns, Mexican scrambled eggs and Sicilian Chicken Sausages in my Rachael Ray cookware, on a BBQ while camping.  Oh, yes I did! 

I did not do anything out of the ordinary.  I grated six yukon gold washed potatoes, I added evoo (extra virgin olive oil), three tablespoons, to a medium skillet, added the grated potatoes into the skillet once the oil began to ripple, added salt and pepper, and simply let it sit atop the fire for about six minutes until the bottom part had become a beautiful golden brown. I took a plate and flipped the skillet over onto the plate, and slid the uncooked side down into the bottom of the skillet.  I did not need to add any additional oil, but one might want to.  It took another eight to ten minutes before the other side was done, at which point I simply slid the potato cake, you might say, onto the plate and put it inside, covered.  Next, I broke nine eggs into a bowl I'd brought with me, broke the yolks with a fork, added a little onion leftover from the One Pot Pasta the night before, added half a can of fire roasted diced green chiles, two big tablespoons of Salsa Ranchera, a little salt and pepper, not much because the salsa has plenty of salt in it, and whisked it altogether thoroughly.  I'd added two tablespoons of evoo to the same skillet the potatoes had been cooked in and let it sit on the fire for several minutes.  I gently broke up the slow cooking eggs using a heat resistant spatula, scraping the cooked egg away from the edges of the pan.  Eggs have a tendency to get stiff and crunchy stuck to the sides of the skillet, so I continuously move it away to keep a nice, moist consistency in the eggs. I may just be OCD, I don't know, but it is what I do.  While I let the eggs begin to cook, I took on the Sicilian chicken sausages.  Let me just say, those were the best I have ever tasted!

I took a smaller, lower-sided skillet, added a good tablespoon of evoo and placed it over another hot part of the fire.  I added the sausages, which soon began to sizzle.  The aroma was fantastic! But, they were not browning evenly enough and I did not want to lose the moisture of the sausages, so I came up with a wild idea.  I added white wine to the skillet, a tiny pinch of crushed red pepper flakes and let it go, allowing the flavor of the reducing wine to geld with the sausages.  I was truly not disappointed.  The additional condensed flavor was incredible.  I said to myself:  "Self.  Ya done good this time!"  Don't you ever congratulate yourself when you discover something awesome?  In any event, here's half of the end result.  

And an English Muffin to top it off!


Poblano Bacon Burger with Parmesan Disc
and maters in a green basket

This burger was savory and an eclectic. I used both Hispanic and Italian elements.  I made a parmesan crisp, or, disc, seasoned with dried thyme, and roasted two poblano chiles in the oven at 400 degrees, sealed them in a paper bag (as I had run out of both foil and cling wrap), removed the chiles' skins, and seeded them. I baked up some bacon until crispy, which I'd seasoned with Chipotle powder, another twist, yes, and created a yogurt based garlic and sriracha aioli.  One of my colleagues is a farmer at heart and gave me those brilliant tiny yellow, sweet and tart tomatoes; I wait for him to drop a box of them off at my classroom every summer.  This year, he brought a big box of those, as well as baby heirlooms and romas.  I was in mater heaven!  This was just as I was getting into the micro greens movement, and I made a little basket of micro cilantro greens for the tomatoes.  The burger itself was seasoned very simply with salt and pepper, a tablespoon of smoked, sweet paprika and a tablespoon of dried Italian seasoning (herbs).  As I mentioned above, very eclectic burger. But, a good one!!!


Thyme seasoned parmesan disc. 


Up next, a BIG BURGER with Cherry Tomato and homemade Tzatziki dressing salad. 


 I made this burger very recently.  I made two large burgers, each about a half pound each, and formed to fit on large, long sourdough toast. I added half an onion, chopped, two cloves garlic, grated, three tablespoons Worcestershire sauce, salt and pepper, two tablespoons smoked paprika, ground mustard, thyme, oregano and an egg. Prior to frying the burgers, I had crisped up twelve slices of sopressata, my new favorite spicy dry Italian salami. I had melted mozzarella atop the sopressata which topped the burgers. I did not make a special sauce this time, but I did load it up with mixed micro greens, including arugula and kale. I'd halved half a pint of ripe cherry tomatoes, garnished them with a little bit of the micro greens and topped them off with some leftover homemade tzatziki dressing. 


 Halved BIG BURGER view. 

And Finally, something a little elegant and surprising.......


Roasted Half Boneless Skin-On Chicken Breast topped with Balsamic Caramelized Onion,  Roasted Tomatoes on Micro greens bed.  

I used one skillet for this one.  I sliced one onion into discs to act as a bed for the halved, skin-on boneless chicken breasts. I simply seasoned them with salt and pepper and dried Italian herb seasoning. I added half a pint of cherry tomatoes about the skillet on the exposed parts of the onion bed, and slow roasted the chicken for 45 minutes at 375-degrees.  I removed the chicken, and tomatoes afterward, and finished the onion caramelization on the stove top, adding two tablespoons of balsamic vinegar and a teaspoon of sriracha. The remaining process took about fifteen minutes.  Meantime, I plated the chicken and the mostly burst cherry tomatoes on a plate, the tomatoes on a mixed micro greens bed.  I added champagne vinegar to plain Greek yogurt and some dried dill as a salad dressing. I topped the chicken with some of the caramelized onion, and the dish, I'd say, turned out a bit more elegant than I'd even thought it could.  


 Almost forgot!  I'd added some pepperoncinis to the the tomatoes!


I  have one more dish to share with you, and I promise!  I will keep it brief!
So, what do you do when you have a 5 quart dutch oven full of delectable beefy bison chili and two hamburgers leftover?  Uh, yeah!  You make an open-faced beefy bison chili burger!

 As you can tell, I had a lot of tomatoes this week.
 I added some Fritos to act as chili dippers!

This one needs no real introduction nor explanation.  
 See?  Brief!  I told you!

THANK YOU, Friends, for your time and patience and your viewer and readership!  I am always grateful for your taking the time to visit! 

Tuesday, January 5, 2016


Beefy Bison Chili

Winter.  Cold, rainy, all you want to do on the weekend is bundle up on the couch and watch sports or movies or nap. But, then you need to eat.  What to eat on a chilly, wet wintry day?  How about chili?  Hot, hearty, a little goes a long way in the filling department.  Ya know, I have made a lot of chili in my time, some beefy, some vegetarian, and I love them all, but I truly love my bison or beef and bison chili.  Ground bison is sweet, soft and adds a wonderful flavor to the savory chiles and aromatics we add to chilis. If you do not think you would like bison, give it a try in chili before anything else (I do love it in burgers, too, as well as carne asada-like in tacos); it does not have a gamey flavor like venison can have.  If you are game, let me share with you how I make my chili.  I go all-out for this.  Ready?  Let's work.

Chili spice blend:
2 tablespoons smoked paprika
2 tablespoons coriander seed
1 tablespoon cumin seed
1 tablespoon dried thyme leaves
1 tablespoon dried oregano
2 smoked chile pods (I used one chile ancho and one pasilla)
salt and pepper
*Normally, I would add termeric, but I was out of it 

I seeded and stemmed the pods after toasting. I used two pods for my spice blend. 


 Onion and garlic are always a part of my chili. 

After toasting the pods and spices, and as I mentioned above, I stemmed and seeded all of the pods, and used two of them for my chili spice blend. I ground the coriander, chopped up the two chile pods and added it all to my spice grinder.  In the meantime, I also added the rest of the stemmed and seeded chile pods, a tablespoon of chopped onion and half a garlic clove, grated, to a half cup of water I'd brought to a boil, and reconstituted the remaining chile pods. While the chiles were reconstituting (soaking up moisture and becoming pliable) I chopped the remaining onion and garlic.  I will share the ingredients list for the rest of chili momentarily. 


Chile Paste:
4 roasted chile ancho pods, toasted, seeded and stemmed
1 tablespoon chopped onion
1 teaspoon finely chopped garlic
salt and pepper
1/2 cup water

Reconstitute the chile pods by bringing half a cup of water to a boil in a small sauce pan. Add the onion, garlic and pods, salt and pepper (pinch, each) and cover and remove from the heat once the water boils. Allow fifteen to thirty minutes. 

Add the chile pods, another tablespoon of chopped onion, another teaspoon of garlic and two tablespoons of the liquid to a mini food processor or blender.  Pulse until a paste forms. It should not be really thick, so add another tablespoon of the liquid, if needed.  It should not be a glob, nor should it be runny.  Go from there. 


Chili Ingredients:
1 large yellow onion, chopped, 1+1 tablespoons, separated
1 clove garlic, grated and halved = 2 cloves, grated or finely chopped
1 28-ounce can Cento crushed tomatoes
2 tablespoons Cento tomato paste (Note, I am not a spokesperson for Cento, but I love their products)
1 14.5-ounce can fire roasted tomatoes
2 cans black beans, rinsed
1 can red kidney beans, rinse 
*Or, you can  purchase 1.5 pounds dry pinto beans, rinse and soak them overnight.
Chili spice blend*   (Mine, or your own favorite)
1 pound lean ground beef (97% lean)
1 pound sustainable, prarie grazed bison
1 20-ounce bottle of Mexican beer (You already know which one I chose!)
2 tablespoons Worcestershire sauce
1 tablespoon liquid smoke
3 tablespoons evoo (extra virgin olive oil)
salt and pepper
1/2 cup pickled jalapenos with its juice
chile paste


Let's get cooking, shall we?


Add the evoo to a dutch oven over high heat. When the oil ripples, add the ground beef and the ground bison, a teaspoon of garlic and a tablespoon or two of the chile paste.  Reduce the heat to medium-high. Break up the meat and add salt and pepper and a heaping tablespoon of the chili seasoning. This may take a good 8 - 10 minutes to break the browning meat. While you do not want it chunky, you do not want it too loose, right away, either, as it will loosen, or break up further, when the wet ingredients are added and it simmers. 

Once the meat has browned and has a good crust on it, add the onions and garlic and stir them in well and allow it to cook about three minutes. No need to add salt with the spices already in with the meat. When the onions just begin to become translucent, add the tomato products, the rest of the chile paste, the jalapenos with juice, the Worcestershire sauce, the liquid smoke, but not the beer.  Not yet!

Thoroughly mix everything together, bring it all to a boil, and add another heaping tablespoon of the spice mix. Allow the flavors to marry over medium heat for several minutes.  

 Chili prior to adding the beans.


In the meantime, using a strainer or colander, open and add the cans of beans and thoroughly rinse all of the starch off of them.  Add the beans to the dutch oven and gently fold into the chili.  This will bring the temperature of the chili down temporarily.  Bring the mixture to a boil over high heat again, and add 3/4 of the bottle of beer.  Hey, you get to have the rest as a reward for all of you hard work!  Stir gently to fully incorporate the beer into the sauce.  Once it comes to a boil, reduce the heat all the way to low. 

Now, I followed in my dad's footsteps (he was a master at making chili; he made the best chili I have ever had in my life and I cannot fully duplicate it) and let it simmer on low-low for two hours, at least.  My dad sometimes let it simmer for upwards of four hours on the lowest heat setting, but I went with two hours.  I removed the lid after two hours and let it simmer another thirty minutes.  Then I turned off the heat and let it steam another thirty minutes, which allows the unnecessary moisture to escape, leaving  concentrated, incredible flavors. 


Serve in a big bowl with whatever your favorite garnishes are.  I used Fritos chips and micro cilantro greens.  

Thank You, once again, friends, for your time and consideration.  I hope you will make this dish this cold winter and enjoy it as much as I have!  


One-Pot Farfalle in Chorizo Pasta Sauce
.....on a BBQ!!!

Yes, friends, the title of this dish tells it all!  Last week, for a breather after having had Christmas Dinner at my little humble apartment, I went, how would you call it....?  Glamping? My friend and I stayed in a nice little rustic cabin out in the Delta alongside the Sacramento River. The cabin did not have a stove top, but it did have a bbq on the deck outside.  I had brought with me the Rachael Ray cookware I had purchased over the summer, and, undaunted, I wrapped up the pot and skillet handles in foil and went at it.  Here is our  "glamping" dinner, a one-pot pasta meal made on a barbecue!  This one was very simple, interesting, very easy and again, I made it one pot! Here's how I did it.


Here is my starting line-up: 
1 pound pork chorizo
1 onion, chopped
3 cloves garlic (you know how I Love garlic!), grated or finely chopped
3 large basil leaves, rolled, chiffonade (thin ribbons)
1 teaspoon dried oregano 
1 tablespoon of smoked paprika
1 teaspoon thyme
1 pound farfalle (or your favorite pasta) pasta
2 tablespoons evoo (exra virgin olive oil)
1 7-ounce can Salsa Ranchera
2 - 3 tablespoons red wine vinegar or red wine (Let your mood be the judge!)
1 28-ounce can Cento (my favorite) tomato puree
1 14.5-ounce can fire roasted diced tomatoes*
*1.5 cups water


Add evoo to a medium or large pot over medium-high heat.  Add a half a teaspoon of garlic to the oil when it begins to ripple.  Stir vigorously for a few seconds to flavor the oil, then add the onion and remaining garlic.  Stir the aromatics occasionally for about four or five minutes more, allowing the onion to sweat.  Add the chorizo once the onions begin to soften and appear translucent. Cook, stirring occasionally, for five minutes. Afterward, add  the fire roasted tomatoes and tomato puree and stir thoroughly to mix everything in the pot very well. Now, add the wine or red wine vinegar and the dried spices and stir in well.  You will add the basil, dried or fresh, toward the very end.

 I had to shine a flashlight into the pot to see what I was doing.

 
 You will will you had smellaphone or smellaputer looking at this!

Now, add the box of farfalle to the pot and smush the pasta down into the sauce.  Add water to the can of fire roasted tomatoes and add that to the pot and incorporate very well.  Between the loose sauce and water and how long the pasta will simmer on low heat, this moisture and incredible flavors will be absorbed by the pasta. 
Adding the pasta to the sauce and looking out for what I was doing by flashlight.  Tricky business! My friend was a great help!
 
 
 Bring the sauce to a boil, stir one last time, lower the heat to low, cover and simmer for 1.5 hours.  Uncover and simmer for 30 minutes more.  You could simmer for only half an hour, but I really wanted my flavors to marry. During the last thirty  minutes, add the fresh chiffonade basil to the sauce, stir it in. 

Serve in a bowl and grate some parmigiano-reggiano or Romano cheese and any other garnishes you wish.  Enjoy fresh and hot from the pot! 


Enjoy with a glass of your favorite wine, enjoy the company of your family and friends.  Serve with bread to sop up some of that meaty sauce!

Thank You for your time and consideration, friends!


Sunday, January 3, 2016


'Tis the Season!


Hello Friends!

I am more than terribly late in writing.  I am mortified that my last post was from very early October! Circumstances consumed my attention and my time, and I have to be honest, when I had a break, while I absolutely love my job, I was simply at home, like crawling into a warm bed on a very cold night, when I made Christmas dinner for my family.  I was proudly going to display my dishes, but I decided on focusing on a couple of the more fun dishes.  Most were your regular family dishes:  roasted vegetables, roasted garlic buttermilk smashed potatoes, marinated roasted tri-tip.  I wanted to share with you a couple of new additions to Christmas dinner:  Yorkshire Pudding and Caprese skewers.  I will be sharing a how-to Lumpia recipe early next week so please stay tuned for that!  I served pork lumpia rolls as snacks for Christmas dinner.

Before we get started, I just want to wish ALL of YOU a most HAPPY NEW YEAR!!!!  I wish you all love, happiness, good health and fun with food!  

First, Fudge.  This easy fudge is one cup sugar added to a medium sauce pan, 10-ounces of sweetened condensed milk, a 12-oumce bag of Nestle mini chocolate chips and a small bag (1.5 cups) of mini marshmallows.  Start by adding the sugar and the milk over medium heat and stir until the mixture begins to boil.  Remove from the heat and add the chocolate chips and marshmallows and stir until completely combined. Add to a greased 8x8" pan (I lined it with foil and sprayed non-stick baking spray to the foil) and allow to cool several hours or overnight.  Bring to near room temperature to slice into bite-sized squared or rectangles. 


After cooling overnight, I sliced up the square of fudge into a lot of bite sized pieces, lined a holiday tin with parchment paper and filled it up.  


Next, a simple snack that takes only minutes to assemble and hours of flavorful happiness to enjoy!  My Caprese Skewers. 


Now, I Know you are looking at the photo and saying...."Uh, where's the basil?"   Confession:  I went to three grocery stores to find nice-looking basil and two had none, yes, none, I said, and one had one bundle that I would not use as mulch.  That was two days before Christmas.  I went Christmas Eve, both in the morning and then late afternoon.  NONE.  So, I went to plan b.  I have a beautiful rosemary growing in my kitchen window and I finely chopped it and sprinkled it atop the skewers. There! Green!  I simply, as you can see, staggered ripe cherry tomatoes and halved mini mozzarella balls and drizzled aged balsamic vinegar atop the skewers. 

Have another look!

Next, my mother's Yorkshire Pudding.  This was an all-new experience for me, and my mom supervised, and I apparently was quite entertaining in making my mess of things, as my mom laughed and laughed.  But, it all turned out wonderful. I made a simple honey butter to go with it, which my mom thought was crazy, as it is usually used for savory meat dish purposes, but she loved it, and said my Nana would have, too, so that made it all worth it. 


Odd but beautiful and flavorful!  Let's get started on my mother's Yorkshire Pudding. 

Ingredients
1 cup sifted flour
1/2 teaspoon salt
3 eggs
1 cup milk
1/4 cup oil or meat drippings*

In one  medium bowl, sift the cup of flour and salt together. 

In a large bowl, add the three eggs and, using a mixer, I use a KitchenAid hand mixer, beat the eggs until they are quite airy. Now, add some the milk and some of the flour and continue to beat the mixture until all of the  milk and flour have been added to the bowl. Make sure the mixture is airy!

Meanwhile, if you are making a roast, add 1/4 of  a cup of meat drippings* to an 8'x8' pan and oven heat. Swirl the oil around the pan to coat.  Add the mixture to the pan and bake for 30 minutes at 400 degrees. 


I made honey butter to go with this.  I have done my research, and I have learned that you can add so many things to Yorkshire pudding to make it either sweet or quite savory.  I am going to experiment in the near future and perhaps write a short series about it.  Thanks Very Much to my friends, Alex Kenyon and Jack Knight, both of Britain, for their help in the creation of this very yummy holiday dish. 

Thank You, friends, for your readership and patience with me.  I hope you will see me at least once a week from now on!  Part of a New Year's Resolution; let's hope I can make it work!  Wish me luck!  
Again, HAPPY  NEW  YEAR!!!!!


One Skillet Hoisin Chicken Stir Fry Over Noodles

  One Skillet Hoisin Chicken Stir Fry      Over Noodles This is one of those "people who know me Know I am obsessed over Chinese food&q...