Monday, June 13, 2016


A Labor of Love....
Ricotta, Ground Turkey and Fresh Herbs Ravioli 
in Three Sauces

This recipe has been a three-months long labor of love.  I have made ravioli previously and have blogged the recipes, a couple of the sauces I used then I made for this blog post, too, only, I have progressed in my learning and understanding of the nuances that go into making delicately flavored sauces. I hope you will enjoy this rather lengthy (but complete with many photos) recipe post, make one or more of the sauces, whether you use homemade or semi-homemade ravioli (mine was semi-homemade) and simply enjoy them.  

I started off by saying this was a labor of love for three months. I started researching how to make simple yet flavorful ravioli, knowing that just a little bit of filling goes into the "usual" sized ravioli;  I wanted a big flavorful bite for each ravioli.  I finally found my blend of ingredients (see above the title).  However, I should have said "fresh" turkey sausage in the title because I had gone to my butcher who had just brought in fresh ground Italian turkey sausage; their Italian products, imported and specialty in-house products, are what they are known for.  It had not even been fully refrigerated yet before I'd purchased it. I was fully invested in making the filling and using fresh Round Wraps to make my ravioli.  I had planned on making the filling on a Friday as May quickly approached, then make the ravioli themselves on Saturday, but life got in the way and I had to do the unthinkable.......yes, I am deeply shamed.....I had to freeze it.  But, I have to say, even after an entire five or six weeks of being frozen, it still had the same kick of flavor as day one. Whew!  (Wiping embarrassingly dripping brow with a huge towel). 

Now that my confessional is over, let's move on to the good stuff.  Here is my list of filling ingredients.  Very simple, very delicious. 


Ravioli Filling Ingredients

1 bunch chives
four fresh basil leaves
1 bunch fresh thyme sprigs
1 bunch fresh oregano sprigs
6 - 8 fresh sage leaves
1 pound (fresh) ground Italian sausage
1 lemon, zest and juice
salt and pepper
1 tablespoon white balsamic vinegar
1.5 cups ricotta 
1/5 plain yogurt
1 clove garlic


I sauteed up the sausage and drained it completely. Meanwhile, I had coarsely chopped the basil, chives and sage as well as zest the lemon and juiced it.  In my mom's old 1970's food processor, I added half of the ricotta, a drizzle of extra virgin olive oil, half of the herbs, the yogurt and half of the lemon zest and juice and pulsed the mixture until thoroughly combined. 


When the turkey sausage had thoroughly cooled, I added half of it to the processor and thoroughly combined that.  Finally, I'd added the rest of the ingredients to the processor and completed the task. In my mind, I was wondering how people back in the day before kitchen electronics did this? What utensils and pots or even an Italian version of a molcajete might have been used, if such a thing existed? Hmmm, further course of study!  


Not the best picture, large, but this is what the mixture looks like, thickened by the sausage. 

Now, on to the sauces!


Sauce one is my basic tomato and basil marinara.  For my sauce I used:  1 28-ounce can Chef's Cut San Marzano tomatoes (Cento), three scallions (vs. red or vidalia), two cloves garlic and three fresh basil leaves, fresh oregano and thyme leaves, salt and pepper.  I placed the ingredients into my blender and streamed in two tablespoons or so of extra virgin olive oil.


Adding the fresh herbs to the tomatoes. 

I wanted the sauce to be smooth, so I blended it until it was very smooth. I cooked it over low-medium heat for nearly thirty minutes to allow the flavors to marry in a gentle manner. Well worth it, although I should have allowed it to simmer for about ten to fifteen minutes more.  When I served it, there was still a little bit of loose liquid associated with it. Lesson learned!   

Next Sauce!  Roasted Red Pepper Sauce


Roasted sweet red pepper with scallion greens, two garlic cloves and fresh oregano, one tablespoon champagne vinegar, two teaspoons mirin, salt and pepper make up this simple, delightful, gently sweet sauce.  I have, in the past, added crushed red pepper flakes to give it a bite, but I wanted to use some gentle flavors, such as the scallion and champagne vinegar as opposed to red win or cider vinegar. 

One more view before blending smooth and silky, by adding a drizzle of evoo to the blender. 


Final sauce product on the stove top simmering gently on medium-low for ten minutes. 

Finally, the Grande Finale....
Brown Butter Sage Sauce....


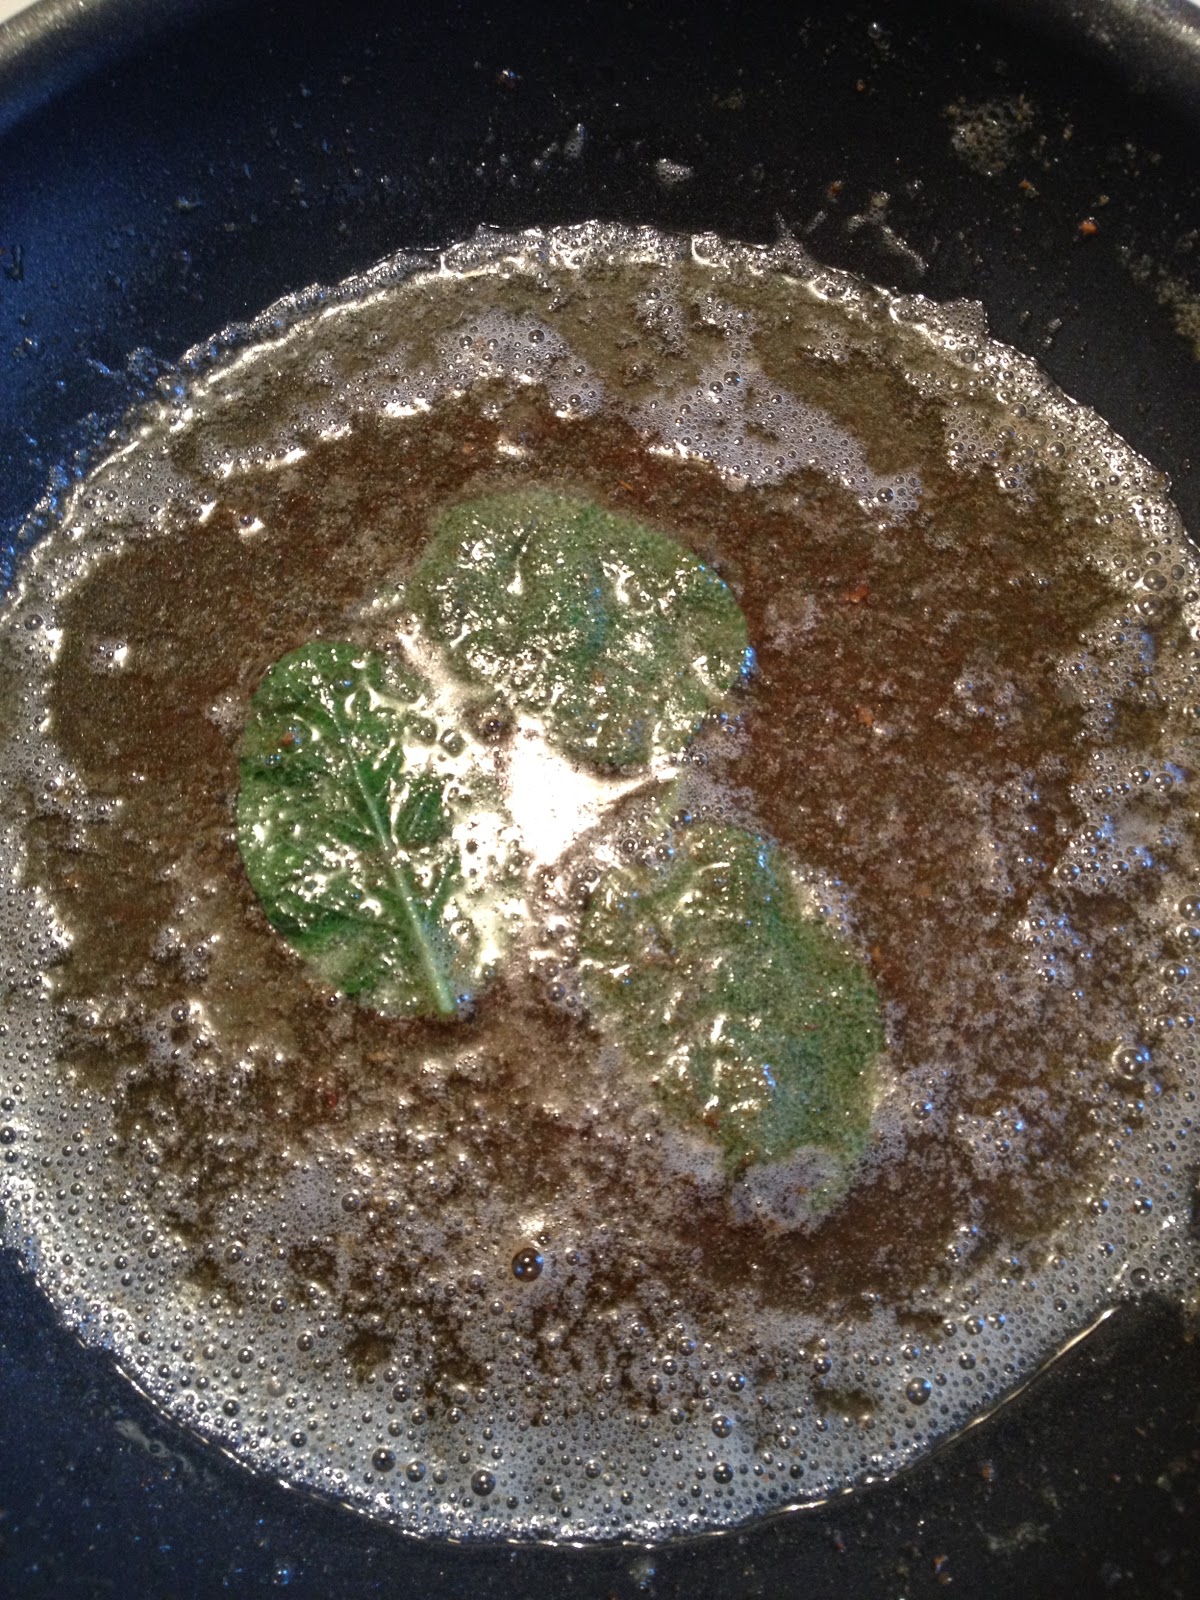
For this final sauce, I used 2/3 stick of unsalted butter and three large sage leaves from my potted patio kitchen herbs garden. I gently allowed the butter to melt on medium-low (seems to be a theme today) with one crushed clove of garlic.  Once warm enough, I added three roughed up sage leaves.  Much of the flavor is found in the stems of the leaves, so I roughed them up with the blunt end of my chef's knife.  The aroma, once I'd placed the leaves in the steadily warming garlic-infused butter, was amazing.  I'd allowed the leaves to basically fry, removed them before serving the ravioli, and placed the fried leaves atop the ravioli as garnish.  The salty, piney crunch of the leaves was perfect!

My skills at filling and creating the perfect ravioli wraps, however, is a whole other story, and we must never speak of it.  It is not unlike, if any of you gentle readers recall, my first attempt at making tamales with my dear friend, Miss Maria.  More masa and filling ended up on the walls than in the tamales I made, as opposed to Miss Maria's most expertly formed and wrapped tamales.  My ravioli experience yesterday was much like that.  I did learn, however, that using one ply dough wraps is not enough.  They become extremely flimsy and break very easily.  Two-ply is perfect, and one can form nice, delicate shapes, and they still cook evenly and sturdily.  It was certainly trial and error.  Again, we must never speak of it.  


I simply put down a wrap round down on moist parchment paper, added a teaspoon of filling, moistened the round's edges and folded it in half, pressing out any air from the sides.  I tried making ridges (like a pie) and was successful with some, but dreadfully awful with the single-ply rounds, as you can see above.  Chalk it up to the concept of "live and learn".  

I brought four quarts of water to a roiling boil and generously salted the water.  I dropped in the ravioli one-by-one and, when they floated to the top, meaning that they were done, I used my strainer-spider to remove them and let them drip dry, which takes very little time. I added a few ravioli to each sauce, tossed them in it, plated them, and generously drizzled the sauce over them.  I topped the ravioli with my tomato basil marinara with Parmesan, Fontina and fresh basil.  I went a bit silly with the roasted red pepper sauce and placed a baby sweet Italian red pepper atop the ravioli as a garnish, and as mentioned previously, I placed the fried sage leaves atop the ravioli in brown butter sage sauce.  

The following are the ravioli plated.  Please enjoy the photo essay.  


I hope you have enjoyed this all-hands-on-deck ravioli with three sauces recipe blog post.  I also hope you decide to make one or all of them.  Tweak them to make them yours, as you please, as that is what recipes and cooking for loved ones is all about.  Making incredible flavors yours, made with love for them. With that, Go Cook For Someone You Love!!!

As always, Thank You for your time and consideration, gentle readers! 


Friday, June 10, 2016


Chipotle Sausage and Seasoned Bacon Ends Pizza with Roasted Green Chiles

As a food recipe blogger, someone ever striving to learn all I can to improve, I realize that I cannot always post dishes that I hope are "amazing" and "fantastic".  Real people do real cooking, with minimal ingredients and minimal time and sometimes, with minimal energy.  This was one of those meals.  Someone commented today that it is "Blah"; no problem, as it IS NOT the greatest pizza Ever.  But if you are someone who needs to make a flavorful, filling meal for people quickly with what you have on hand without much advanced planning, this pizza may be just the thing for you.  

Most people have hot dogs, hamburger, sausages or favorite meats in the freezer for surprises or future use. I like to have sausages and meats, such as sopressata, coppa and Spanish Chorizo in my freezer to use for last-minute breakfasts or pizza or pasta, should I have the need to produce more filling meals for unexpected (but always happy) guests for a meal. I oftentimes try to have fresh greens, such as basil, cilantro and flat-leaf Italian parsley on hand when planning upcoming meals. 

Back to the pizza.  My pizza was made with the meats and cheeses I had on hand.  You can make pizza, a casserole, a calzone or pasta with the meats and fresh greens you have on hand. That is the point of this blog. You can make a delicious, savory, filling and flavorful meal with what you have on hand! Spices included!

At the beginning of the month, I had purchased two fresh pizza rounds and I froze them. After having had a very long, hectic day, yesterday, I decided I needed to make something swift, easy and yet filling and which could be used as leftovers for a day or two afterward. Success! 

This is what I did. 

I thawed out the fresh pizza dough (that was purchased fresh), along with Chipotle sausages. I decided to bake it in my cast iron skillet (even cooking), cleaned it, sprayed it with non-stick spray (just my preference) and, after kneading the dough and spreading it, I placed it into the skillet.  I drizzled and spread about a little extra virgin olive oil seasoned with garlic all about the dough and baked it at 405-degrees for five minutes.  

Afterward, I added a layer of cheese and diced, roasted green chiles and a little Tapatio sauce and dried oregano I'd crushed between my palms.  


Next, I added a layer of sliced Chipotle and bacon ends which I'd seasoned with smoked paprika and chipotle powder and had sauteed. I'd added another layer of cheese and roasted green chiles and my favorite Tapatio sauce. 


Pizza is oven ready!


Fresh out of the oven!  


Love by the slice!

Thank You, gentle readers, for your visit and your time! I hope you take my message with you:  You can make a hearty, savory meal for one or for several with items you just about always have on hand.  Thank You and enjoy!

Now, Go Cook For Someone You Love!!!!

Tuesday, June 7, 2016


Short and Sweet Post....
Steak with Garlic, Gorgonzola Butter, Spicy Baby Sprouts with Halved Grape Tomatoes with Vinaigrette and Roasted Fingerling Potatoes with a Surprise!

No need to stress, my friends, the title is far longer than the actual blog post.  Well, mostly. For the end of the school year, which is what I am calling the reason for this dinner, though there is a different story behind it, we must never speak of it, I decided to have a nice Rib Eye steak with special treatments. This is what I did....Join me, won't you?

I simply seasoned the steak with sea salt and fresh cracked black pepper 30 minutes prior to cooking, seasoning both sides, allowing the meat to come to room temperature.  A room temperature steak sears without seizing. This makes for a tender, juicy steak. 

Meanwhile, I allowed a stick of butter to come to beyond room temperature. Stay tuned! 

I simply tossed fingerling potatoes in extra virgin olive oil, salt and pepper and grated garlic (one clove) and roasted them in a small cast iron skillet (Thanks for the skillet, Miss Maria!) at 400-degrees for twenty minutes. Boom!

In the meantime, I made up a little vinaigrette of evoo, balsamic vinegar, thyme, salt and pepper and mirin. I created a little bed for the halved grape tomatoes out of spicy baby mixed sprouts. I drizzled the vinaigrette over the salad and let it alone. 

Finally, I heated up my full-sized cast iron skillet on high heat and added the steak to it when it was screaming hot. The sizzle was amazing and the aroma to-die-for, just with salt and pepper.  I seared the steak for four minutes per side, which was perfect for the carmelization to occur to develop its sugars and release easily.  Whew! I say that because I often play it safe and add a little oil to the skillet; not this time, though!  I added the skillet to the oven to finish to medium-rare at 350-degrees for eight minutes.  I removed the potatoes skillet when I added the steak. 

During the busyness above, I somehow managed to grate a clove a garlic into a ramekin with crumbled gorgonzola and added a half a stick of butter and mixed it all together and set it into the freezer to set. 

When I removed the steak skillet, I'd added the other half stick of butter, a crushed garlic clove and fresh thyme and braised the steak over medium heat.  The aroma was simply incredible.  This is the way to go, I assure you.  

Please enjoy the photo essay below, along with the surprise recipe afterward!


Ready for the Surprise???

I purchased a small sourdough round loaf and cut into cubes (still intact).  I made up a mixture of butter (also room temperature), mozzarella cheese and three cloves garlic, which I had roasted in the skillet with the fingerling potatoes. I stuffed the bread with the buttery, garlicky cheesy mixture, stuffing each cut and cube with the delightfully aromatic mixture.  I wrapped it in foil and baked it with the potatoes for twenty minutes. Just a delightful addition to the steak dinner!!!  Take a look!


I hope you enjoyed this fairly brief post.  Now, Go Cook For Someone You Love!!!  Now, shoo!  Go! 
There ya go!  

Monday, June 6, 2016


Salsa Verde and Beef Chorizo Tacos

I oftentimes plan out a recipe in my head based on flavors or cuisine I am craving.  It is also no secret how much I love breakfast and tacos, so I decided to put them together.  I have never made salsa verde before, and in my research, I have learned that there are several methods to making the perfect salsa, some fresh and uncooked, some cooked.  I chose, as I often do, to roast my aromatic veg.  After deciding to make the salsa verde, I decided on a chorizo and egg breakfast taco.  I am now on summer break and I have time to play! Let's get started, shall we?

My Salsa Verde Ingredients
6 - 9 tomatillos
4 - 6 limes
3 cloves garlic
1 cup coarsely chopped cilantro
4 - 6 sprigs fresh oregano and thyme
1 tablespoon coriander seed
1 teaspoon cumin seed
1 teaspoon dried thyme
1 rounded tablespoon of lemon pepper
salt and pepper
2 serrano chiles*
1 - 2 jalapeno chiles*
1 8-ounce can fire roasted anaheim or pasilla chiles
2 scallions, coarsely chopped

* I remove the ribbing and seeds from the chiles as I like my salsa verde more tangy rather than hot, but, if you like it hotter, you may want to leave the ribbing and seeds intact. 


I halve the tomatillos and half of the lemons and arrange them on a baking sheet. Tomatillos are not green tomatoes, but rather, they are related to gooseberries, and have an oily, sticky residue on the tough skin of the round fruit. I rinse remove the outer paper-like skin and the stem, halve them and lay them out. I halve the chiles and do the same.  The garlic is left whole, but peeled. I drizzle the veg with extra virgin olive oil, sprinkle with salt and pepper, and roasted for 15 minutes at 400-degrees.  

While the veg are roasting, I add the rest of the ingredients, along with fresh lime juice (about 2 tablespoons) and a tablespoon of apple cider vinegar to food processor.  I used my mom's old 1970's food processor.  I was feeling a little nostalgic because, when I was in 7th grade, my neighbor and I decided to make salsa verde using a molcajete which we'd borrowed from our neighbors.  My family and the family across the street were close friends with our immediate neighbors.  Mrs. Hernandez loved to cook, was an amazing, generous lady and her food was authentic and absolutely and impeccably delicious.  Well, Mrs. Hernandez lent us her molcajete and we boys ended up with our eyes burning because, although she warned us not to touch our eyes once we started grinding the jalapenos, we touched our eyes, noses, lips and it was just awful.  It was then that I learned that milk helps soothe that type of heat inflammation as ice cubes were not helping at all.  It was then that I gained a very healthy respect for chiles and how to handle them. 

After the veg has finished roasting, I let it cool several minutes and add it all to the food processor.  I pulse it and try to not liquefy it.  I like my salsa verde thicker rather than looser.  If you like it looser, add a little evoo.  


Pulse all of the ingredients until smooth.  I like my salsa verde a little on the chunky side, so I do not pulse it too smoothly. 


My mom's old 1970's food processor.  Seemed perfect for this revisit to my junior high days. 


Final Product!

Now, on to the Beef Chorizo and Egg Taco, featuring my fresh Salsa Verde. The taco filling itself is very simple.  I finely chopped one yellow onion, grated 2 cloves garlic, I put together a base spice blend of cumin, pasilla powder, dried oregano and dried thyme. The beef chorizo has many spices already in it, so this base spice blend, a level tablespoon each, is meant to enhance the spices already in the chorizo. 

In a skillet over medium high heat, with no oil added, saute the chorizo until thoroughly crumbled.  Drain the fat the chorizo will render. I add the chorizo to a colander and allow the fat to drain whilst I add the onion and garlic to the skillet with the residue chorizo rendering.  I add the spices and, after about four minutes, I add the chorizo back to the skillet and thoroughly combine the mixture.  The aroma is going to knock your socks off!

Add some fresh chopped cilantro to the mix, reserving some for the eggs, and remove from the skillet.  Add four eggs to a bowl and whisk together with a little salt, pepper and cilantro. Add the mixture to the skillet over medium-high heat. As the sides of the egg begins to solidify, reduce the heat to medium and break up the eggs to scramble. Once done, about four or five minutes, add some egg to a tortilla (I used small green chile corn tortillas), top with the chorizo, add some cilantro and drizzle with the fresh salsa verde. 


Time to roll and enjoy!  

On that note, I just want to Thank You, my readers, for your loyal readership, patience and friendship.  I appreciate it so much. Life is a series of lessons to learn, and I do my best to learn as much as I can.  Once more, I very much appreciate you all.  Martin

Now, Go Cook for someone you love!


One Skillet Hoisin Chicken Stir Fry Over Noodles

  One Skillet Hoisin Chicken Stir Fry      Over Noodles This is one of those "people who know me Know I am obsessed over Chinese food&q...