Friday, July 28, 2017

Fresh Rosemary and Garlic Chicken and Fresh Herb Quinoa


Rosemary and Garlic Chicken with Fresh Herb Quinoa

I have enjoyed this week's simple but flavorful meals. I will share two of them with you here, one of which I did not make, myself.  My wondrously techy bfff, Sonja, made a fantastic luncheon for us yesterday! I created this simple dish a few days ago that gave me two more nights of a delightful, healthy dinner. There is certainly no remorse devouring this dish, nor serving it to family and friends. Flavorful, healthy, easy peasy, this meal is one for your recipe file!  

Fresh rosemary, fresh garlic oven roasted boneless, skinless juicy chicken thighs and reduced sodium chicken stock which steeped fresh rosemary and fresh garlic quinoa.  The theme is pretty clear, right?

Let's get to it shall we? That way you can get to your own healthy meal!


Preheat the oven to 375-degrees. 

Ingredients
6 pieces of boneless, skinless chicken thighs
4 cloves garlic, finely chopped or grated, separated
3 rounded tablespoons fresh rosemary leaves, separated
1/4 cup extra virgin olive oil
2 tablespoons red wine vinegar or lemon juice
1/4 teaspoon salt
1/4 teaspoon ground black pepper
4 sprigs fresh thyme, for flavorful garnish
parmesan, if desired
1 1/2 cups low sodium chicken stock or broth
non-stick spray (canola or olive oil) 

In a roasting pan lined with foil, better with a rack inside for more even heating, spray with non-stick spray. 


In a large bowl, add the olive oil, vinegar, the separated rosemary and garlic and whisk together. Add salt and pepper to both sides of the chicken thighs. Add the thighs to the marinate and toss the thighs well with the marinate.  Allow them to marinate as long as you can, but if only a few minutes is all that is possible, then that is fine!  I marinated the thighs only about twenty minutes, and they turned out amazingly flavorful!

Chicken thighs marinating in a bowl. 


Lay out the chicken thighs in the roasting pan sprayed with non-stick spray.  Add the pan to the oven and set the timer for 15-minutes. After fifteen minutes is up, reset the timer for 20 minutes and set up a small saucepan on the stove top over medium-high heat. 

Add two tablespoons of extra virgin olive oil to the sauce pan, add a package of quinoa (about 5 ounces for four servings) and stir, allowing the quinoa to toast for about two minutes.  Add the fresh rosemary and garlic and stir for another two minutes.  Add a tiny pinch of salt and black pepper (less than 1/4 of a teaspoon each) and stir for another minute.  Now add the 1 1/2 cups reduced sodium chicken stock or broth (listen to the sizzle!) and bring it to a boil, stirring.  


Bring the quinoa liquid to a boil, stirring so the seeds will not stick to the bottom of the saucepan, and then reduce the heat to low. Simmer for 15 minutes, stirring occasionally.  After 15 minutes, remove from the heat and cover, and allow it to steam.  Afterward, use a fork to fluff up the quinoa.  It has a couscous-like consistency, so if you have never made quinoa before, it is as simple as preparing couscous or rice. 

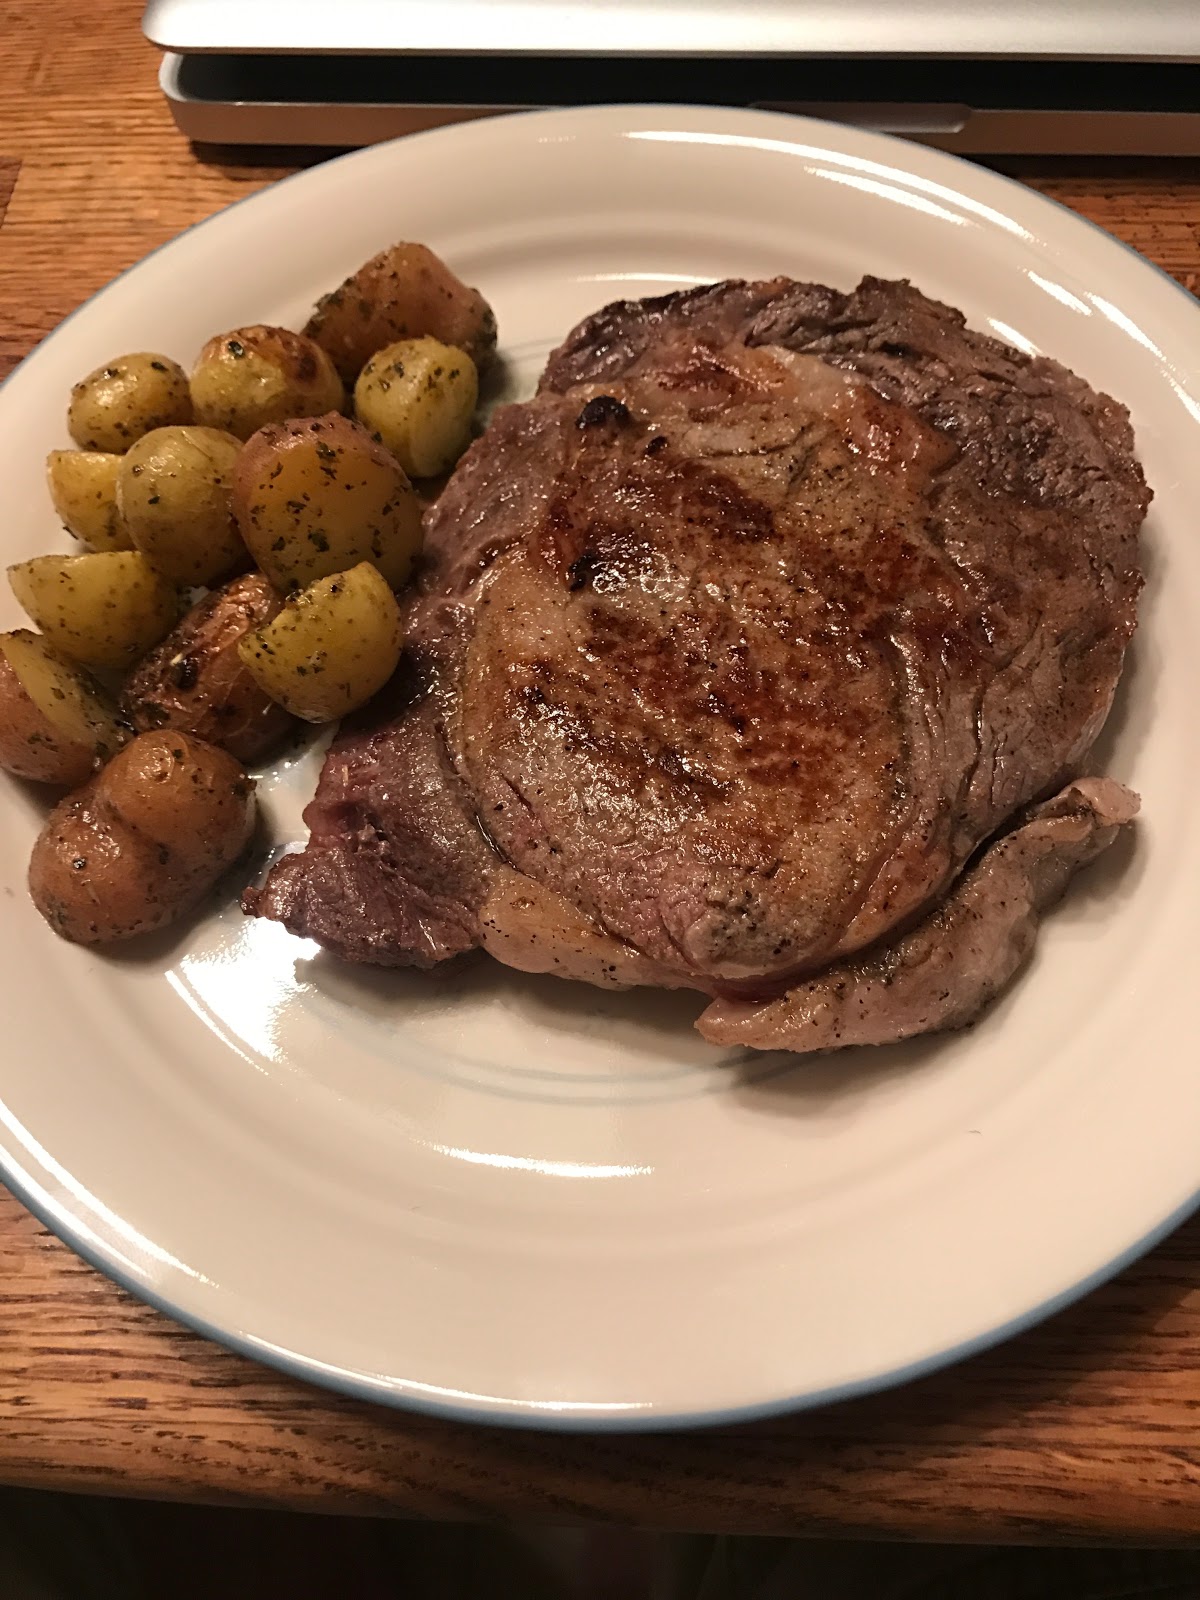
By now, the chicken timer should be going off, too. Remove the roasting pan from the oven, remove the thighs to a plate and allow them to rest a few minutes. On a side note, you Could use boneless/skinless chicken breasts, too.  Chicken thighs are my preference because they retain their moisture better than chicken breasts do. But it is completely your choice, whatever you like best!

To plate, use your imagination.  I place quinoa in a bowl and turned it upside down to form a base for my chicken thighs.  I added a small salad of halved baby tomato medley, the thighs on and around the quinoa base, drizzled the plate with aged reduced balsamic vinegar and added grated parmesan to the plate for the fun of it.  I could have added it to the quinoa, but parmesan is pretty salty, and I wanted to limit the sodium content of this dish.  


I simply garnished with fresh thyme and sprinkled fresh thyme leaves around the plate. 


Final View.  

As always, I want to the Thank You, my gentle viewers and readers, for your time and consideration!  I so appreciate your visit to my humble blog site. But guess what????  I am NOT DONE!

My dear technology goddess guru bestie, Sonja, came to visit my classroom yesterday to help me add  links to my existing classroom tech, and she brought us a homemade, very healthy, balanced lunch!  She added a sliced wedge of cheese (she said next time she will add two, rather than one, a couple of delicious layers of sliced turkey to wheat tortillas and made healthy, delectable wraps.  I added halved cherry tomatoes to mine, which she'd also supplied.  She also brought us both a banana and a small bag of jerky.  So incredibly satisfying this lunch was!  


My techy bestie, Sonja, and I.  

NOW, Friends, go cook something healthy for someone you love!  Their hearts will thank you for it!  

~Martin
In-House Cook


Saturday, July 22, 2017


Pita with Peanut Butter and Fresh Fruit 

It is incredibly nice when friends provide me with suggestions for dishes, for fun and for life. I have, admittedly, been wishy-washy about my health, until the last few months. For years, I put off my own health in the service of others.  But I have learned the hard way, I cannot care for my students or my mom as I do, without first being in good health, myself.  I changed my insurance company and I love that and my doctors and they take exceptionally great care of me.  But one of the things I need to change, for myself, is my own diet.  

Now, I am often asked:  "Do you eat like that Every day?"  Meaning, do I eat delectable, rich, indulgent, decadent foods every day?  OH heck no!  You have often heard me say "Everything in Moderation".  I struggle to follow that advice, sometimes, however. But I do not eat like my blog posts every day.  There is only me at home, so when I post food, 8 - 10 times, I am cooking for someone else and at their place (ergo the name, In-House Cook). This summer I have made friends with some amazing Twitter folk and we have, admittedly, been both good and bad influences on one another.  It is incredibly fun to chat with my friend, Lee Henry Styles, about food and moderation.  He has asked me the same questions I mentioned above and in my previous blog post.  The fact is, I do not eat terribly decadently but not terribly poorly, either.  Lee brought up the point, "But how do we (my readers) know that when I only post the usual decadent meals?" 

Talk about a "Boom!" Mic Drop Moment!!!

Both Lee and another one of our friends have prompted me to take things lighter, not only for myself but for you, my gentle readers.  So the next several blog posts will be about lighter fare, BLDs, Breakfasts, Lunches and Dinners that I normally eat when I am working.  I already post dishes that I call "Pantry Meals" which I make with bare bones pantry items at the end of the month (paid once a month). 

To start my quest to show you how I normally eat, I have decided to start a daily food diary. When working, to be honest, I often eat the school lunch, but when at home, I want to eat well, with flavor and decadence, but without decadent calories and without ingredients leading to my health's degradation. My mom will be happy to read the following blog posts over the next couple of weeks because she always asks me about what I eat. 

If I am not eating with my youngest son, this dish is very normal for me.  I love fresh fruit, particularly berries.  My friends and family know that I love berry pies best.  I am not into the puddings and cream pies.  Something not many people know about me, I am a toast-a-holic.  I love toast and English muffins. Sourdough, French, Hawaiian sweet bread, Italian...I love toast. Hello....my name is Martin, and I am a toast-a-holic.  Now, I do not eat toast all day long, 24/7/365, but I do love it. Tortillas fall under this catergory, as well, particularly organic wheat tortillas. 

Today, I used a Pocketless Pita, also known as Flat Bread, and I spread a thin layer peanut butter over it, arranged strawberries and blueberries over it, and sprinkled Saigon cinnamon over it.  I have frozen berries in my freezer at all times, as I love to eat berries for dessert.  That does not mean it is always so healthy.  I love to soak berries in frozen, slushy Prosecco and eat it with a spoon.  No, I do not have that to show you today. 


But, to wrap up this first "Here's to Our Health" blog post, here is my Pita with Peanut Butter and Fresh Fruit lunch.  Half for lunch, half for dessert or breakfast. 

Enjoy the photo essay, my dear gentle readers, and as always, Thank You for your time and consideration!  


Now, go cook something healthy for someone you love!  

~Martin
In-House Cook


Burger Night! Cheddar Burger with Ponzu Seared Pork Belly with Mayo Garlic Ponzu Aioli!!!


Burger Night!

Cheddar Burger with Ponzu Seared Pork Belly and Mayo Garlic Ponzu Aioli

We all have our favorite burger, whether it is a fast food burger or one we make at home, or one we can order at a restaurant.  The fact is, however, I am never contented with a burger unless I make my own at home. While I have made dozens of different versions of burgers, I fully enjoy playing around with ingredients, spices, buns, greens vs. no greens and toppers, such as cheese discs, bacon, salamis, pork belly, eggs, chiles and many other items.  I have used them all.  Last night, I made one of my most favorite burgers, one that was simple and easy and delicious, and best of all, there is no slicing, dicing or chopping. This is one is fast and furious and delish!

My favorite burger blend is 93%+ lean ground sirloin and 85% lean ground chuck.  The ground chuck provides moisture the lean sirloin does not offer. I made a spice blend specific to this Asian Inspired burger.  I use one pound of each. You could, of course, use whatever meat combinations you prefer, and of course, you are not limited to beef. 

Let's get to the burger ingredients!  The spice blend is found throughout the meat and most of the wet ingredients are found in the burger meat, as well.  

This weeknight or fast weekend recipe does not call for any slicing, dicing nor chopping, as I mentioned above. It is perfect for unexpected guests or one of those nights where you just do not feel like greatly involved cooking. 

Ingredients List: 
1 pound lean ground sirloin
1 pound fairly lean ground chuck
1 small block pork belly (salt pork), sliced
2 tablespoons smoked paprika
1 tablespoon ground or fresh (diced) ginger
1 teaspoon granulated onion
1 teaspoon granulated garlic + 1 teaspoon, aside
1 teaspoon ground cumin
1 teaspoon fresh or dried thyme leaves
1 teaspoon hot chili sauce or 1/2 teaspoon red pepper flakes
2 tablespoons Ponzu + 2 tablespoons
1 teaspoon Hoisin sauce
2 tablespoons Worcestershire Sauce
1 package Brioche buns
3 tablespoons vegetable oil

Add all of the ingredients - except one teaspoon granulated garlic - to a large bowl and mix thoroughly with your best kitchen tools:  Your Clean Hands. Form the number of patties you wish to make, make a depression in the center of each on on side.  This enables to burgers to reshape while frying or grilling to an appropriate shape; otherwise, they puff up in the center too much and do not finish cooking in the center properly. 

In a large skillet, add three tablespoons of vegetable oil over medium-high heat.  When the oil begins to ripple, add the pork belly slices.  They should put out a good sizzle.  After three or four minutes, turn the pork belly slices.  Add two tablespoons of Ponzu and allow a dark caramelization to form, which will only take a couple of minutes.  Turn one more time to allow the same on the other side.  Remove the pork belly slices and set aside.  


I'd added a little of  the remaining spices to the pork belly.  

Ponzu caramelization on the pork belly slices. 

Next, fry up the burger patties over medium-high heat, about 6 minutes per side. Meanwhile, heat up the broiler, add a little olive oil spray to the buns, sprinkle with some granulated garlic and broil until golden brown, about four minutes. 

Now, if you wish to make my garlic ponzu may aioli, this is simple, simple, simple.  Two or three rounded tablespoons of mayo, a tablespoon of ponzu and half a teaspoon of either fresh minced or granulated garlic. Whisk and chill, so it will thicken.  

I added slices of sharp cheddar cheese to my burgers, but you should use whatever your favorite cheese is. You have known me to use Oaxaca, mozzarella, pepper jack, smoked white cheddar, fontina and provolone.  I am not real partial to Swiss cheese on burgers.  I do not know why.  Sorry, folks. I like it on sandwiches, for sure, but not burgers. 

Now, simply put your burger together the way you would love it.  Food is love, so I mean love it.  I slathered some of the aioli on both buns, placed the burger on the bottom bun, the cheese was already melted over it, I placed three pieces of pork belly slices atop the burger and finally, the top bun. Place greens wherever you love it to be and enjoy!!!!


Ready to Eat! I did not serve it with a side as it was just for me, but I'd serve it with oven roasted fries, onion strings, or oven roasted potatoes.  

As always, my gentle viewers and readers, Thank You so much for you time and consideration!

Now, go cook something - like a simple yet flavorful cheesy burger with pork belly - for someone you love!

~Martin
In-House Cook


Friday, July 21, 2017

30, 60 or 90-Minute Pasta Sauce


30, 60 or 90 Minute Pasta Sauce

My mom always had tomato sauce, tomato paste and a packet of spaghetti mix to make pasta sauce as I grew up.  You may recall, in my earliest blog posts, that I had stated that my mom was not the biggest fan of Italian food.  She still isn't, but it did not stop her from making "spaghetti" sauce and her own marinara for "little pizzas".  Remember one of my early blog posts was my recreation of my mom's "Little Pizzas", sliced pepperoni and salami over mozzarella cheese and my mom's marinara on oven toasted English muffins. Despite the simplicity of how my mom made the sauce, those two dishes were among my favorite meals my mom had ever made. Also, as you know, I have made a bazillion pasta sauces and have used just a many different kinds of pasta.  This post, however, I want to share with you how to make a delicious pasta sauce within thirty minutes, but, if you want to simmer it low and slow for a much more sophisticated marriage of flavors, you can simmer for sixty to ninety minutes or longer, to suit your own palette, using both dried and/or fresh ingredients. This sauce is versatile for whatever pasta or marinara uses you may have for it. Let's get to it!

A Study of Spices and Herbs
I am often asked, "Why shouldn't I just buy a bottle of pasta sauce?"  True!  Why not?  I am not a nay-sayer about jarred sauces, but, if you have diabetic or cardiac dietary restrictions, just read the labels. Most jarred pasta sauces are high in sugar and sodium, both.  If you make your own sauce at home, you control not only the quality of the ingredients but what ingredients you use. 🌿🌿🌿

The same applies with purchasing packets of seasonings.  My mom almost always used seasoning packets for tacos and spaghetti. They taste great! No problem with that!  Problem is, however, there is almost always more sodium than I or my family needs in each packet.  Why not use it for emergencies, or extra last-minute guests? Why not use a bottled pasta sauce for those situations?  Or, consider this....double or triple the sauce, divide it, and freeze the extra sauce!


🎤 Drop. Boom!


I love to cook with fresh herbs but I often use dried herbs, as well.  The two offer different layers of flavor.  Fresh herbs season quickly but not intensely. Dried herbs contain condensed, intensified flavors as they naturally dry and heat up.  I often combine them when making particular sauces or braising liquids. Layering each flavor of your dish is extremely important.  


Here are my dry go-to spices and dry herbs for pasta sauces:

Salt
Pepper
garlic powder or granulated garlic
onion powder or granulated onion
paprika
oregano
cumin
thyme
Italian parsley
Italian seasoning mix  (dried herbs)*
Crushed red pepper flakes**


I use crushed red pepper flakes when I want to make a spicy arrabbiata sauce***. I also add Fresno chile, julienne sliced or discs.  

Dried Italian seasoning, added to other dried spices, kicks up the aroma and flavors you are looking for in a pasta sauce. We'll talk more about this a little further on in this article. 

Fresh Aromatics and Herbs:  

1 large red or yellow onion, chopped
2 - 3 shallots, finely chopped if you prefer less onion aroma and taste
2 large or three medium garlic cloves, grated or finely chopped
6 - 10 fresh basil leaves rolled, chiffonade or finely chopped (chiffonade: ribbon cut, good for sauce flavorings and garnish)
2 sprigs fresh flat-leaf Italian parsley, finely chopped
4 fresh thyme sprigs, leaves peeled off backwards
3 - 4 fresh oregano sprigs,  leaves pulled or plucked from the woody stems

Now, on to the actual sauce.......


Canned tomatoes
I use Cento products as much as possible.  Cento is not a sponsor of my humble blog, I just Love their products, is all.  I use a 28-ounce can of crushed or pureed tomatoes and a smaller can of fire roasted or Italian style diced tomatoes, 14.5 or 16-ounce cans (when I can find the 16-ounce cans).  

I also use 3 tablespoons of red wine vinegar or a third of a cup of red wine, such as a cabernet.  I sometimes use both and have a little left over for me! 🍷  Cheers!

I made a double batch of my simple but flavorful pasta sauce.  The prep time takes the longest, actually, because I intentionally use fresh ingredients as much as possible.  

Chop the onion, grate or finely chop the garlic, prep the fresh herbs. Now for a time-saving spices and dried herbs tip:  create your own Italian Pasta Spice Blend.  Place all of the dry herbs and spices in a spice grinder.  

1 teaspoon salt and pepper
2 tablespoons paprika (rounded tablespoons)
1 rounded teaspoon of thyme, parsley, oregano and a quarter teaspoon cumin seed
1 rounded teaspoon basil

You can double or triple these amounts for future sauces or if you plan to make double or triple the amount of sauce now.  If you have leftover spice blend, place it in a mason jar, lid tight, in a dark cupboard for up to three months. I do that, and the same with my Mexican Spice Blend. 


Next, bring four quarts of water to a roiling boil. Generously season the water with sea salt, as, you know this, it is the only chance you get to season the pasta.  In addition, add three tablespoons of extra virgin olive oil to a large pot or high-sided skillet over medium-high heat, depending on how much sauce you intend to make.

Note:  Add and caramelize whatever protein you want to use prior to sauteing the onion and garlic.

You can certainly make the sauce without meat and add it when you desire to in the future!

When the oil begins to ripple, add the onion, a little salt and saute for about three or four minutes, until the onions begin to soften and discolor. Add the garlic and stir that in well.  When the onion and garlic are very aromatic and are beginning to caramelize, add the red wine vinegar splash and, using a wooden spoon, scrape the burnt bits from the bottom of the pot.  If you browned up a protein, scrape up the browned bits on the bottom of the pot or skillet. The red wine vinegar or wine works to loosen up burnt bits, making it easier to scrape up those burnt bits which are full of flavor! 

Once the onions begins to soften and appear translucent, add the 28-ounce can of tomato puree and the can of Italian-style diced tomatoes, or, all four cans if you are doubling the recipe!  Bring the mixture to a boil, and as it comes to a boil, add another tablespoon of your spices and herbs, dried or fresh, and incorporate well. 


I added fresh herbs at the start along with a rounded tablespoon of my spice blend.  

The rest depends on your plan.  You can simmer the sauce for fifteen minutes and serve your pasta or you can simmer it for thirty, sixty or ninety minutes, or more, if you wish!  Fifteen minutes before serving, add a good sprinkle of the dried herbs mix, stir well, and serve a few minutes afterward.  

Toss with pasta with the sauce, however long you simmer it, and grate a good amount of parmigiano-reggiano over it, garnish with fresh basil or Italian Flat-Leaf Parsley and serve!


One more view!!!


Thank You for your time and consideration - and patience - with this rather long post.  I seem to have made it far more complicated than it really is.  The big idea, double the sauce ingredients and freeze it for a later meal or two!

Once your recover from this long post, go cook something for someone you love! 😍

~Martin
In-House Cook


Sunday, July 9, 2017

My Great Virginia Beach Trip: Beach Fun, Climate Change and Food!


My Great Virginia Beach Trip:
Beach Fun, Climate Change and Food!

Early in June, I took a six hour flight to Virginia Beach to visit my dear friend, Morgan. When I stepped off the plane into the portal, I was shocked by the warmth (at 12:45am) and at the humidity. The day after, we had lunch at one of Guy Fieri's restaurants, which was excellent, by-the-way, and then toured the USS Wisconsin, a battleship, and oh my lord, I was soaking with sweat!  Mind you, I am used to California's relative "dry heat", just like they say in Arizona.  92 degrees f with 88% humidity was quite a climate change for me!  Later in the week, however, a series of thunderstorms made their way through, as they are today, and the lightning and thunder and downpours reminded me of Arizona's monsoons.  Very warm, very humid but great fun to watch and listen! 


While I was there, Morgan took me to a couple of different beaches.  One was a very popular beach and I enjoyed taking my photo with the iconic bronze statue of Poseidon.  


In addition, Morgan took me to another beach where I swam in Chesapeake Bay and Atlantic all at once.  I think, anyway.  The water was like bath water and we witnessed a small, beautiful wedding on the beach.  I swam and played in the water like a little kid.  


Those who know me well, know that I love the beach, which is my happy place. And now you know, too!

Now, as a daily Thank You to my hosts, I made dinner for my hosts each night.  I seared steaks and oven roasted potatoes the first night. Delightful, filling and we had leftovers for another night.  Simply seasoned with salt, pepper, garlic powder, dried rosemary and thyme and tossed in extra virgin olive oil, I oven roasted the potatoes (baby new potatoes cut in wedges) for 25 minutes at 400 degrees until crisp and golden.   


Isn't this the cleanest oven you have Ever seen?


I simply seasoned the ribeye steaks with salt and pepper and let them come to room temperature. I seared them and plated them with the potatoes after they had rested a few minutes and served. 

But first, I seasoned the oil in the skillet over low heat with crushed garlic cloves. 

The seared steaks resting.


And Served!  

Next, Seasoned, Seared and Oven Finished Chicken Breasts with Mrs. M's rice pilaf and southern green beans. 


I only have two photos of this dish. I lost the photo of the plated dish.  So sorry!  I halved and quartered chicken breasts and seasoned them with evoo (extra virgin olive oil), salt, pepper, Italian dried seasonings and a little extra dried rosemary. I seasoned the evoo in the skillet with crushed garlic cloves over low heat, removed the garlic and raised the heat to medium-high.   I gave each piece of chicken a good sear until golden brown on both sides, then oven finished.  Tender and juicy interior and flavorful exterior crust is the delicious result. 


This was a tag team meal.  Mrs. M made rice pilaf (above, which smelled insanely delicious and tasted just as awesome!) along with green beans sauteed in butter and garlic. The aroma was just like My Grandma P made.  Simply amazing. 

I wish I had a plated photo for you.  I took one but seem to have lost that.  My apologies.  I am sure you can imagine how beautiful the plating was, chicken resting atop the pilaf and the beans cascading down the other side of the pilaf.  

Finally, my crowning dish!  

Steak Fajitas!


This dish, too, was a bit of a team effort.  Morgan and I purchased an onion, guacamole and salsa.  We already had the steak, leftovers from Wednesday night and, Mrs. M had halved red and green bell peppers left over from a recent meal.  Incredible pantry and team meal!

While I sliced the onion and steaks, Morgan sliced the peppers expertly. I added some evoo to mister skillet, the same skillet I'd been using all week, Thanks, Mrs. M, over medium-high heat and added the onions and peppers seasoned simply with salt and pepper. I sauteed those for three minutes to allow the onions to sweat their sweet juices and then I added the thinly slivered steaks. I added dried oregano, thyme, paprika and cayenne powder, just a half teaspoon of each.  We were going for mild that night, not on fire.  


I'd added the onions and slivered peppers first with salt and pepper.  Sauteed for three minutes over medium-high heat. 


Next, I'd added the slivered steaks and sauteed the mix until the onions were getting translucent, the peppers starting to soften and the steaks just a little pink.  


We'd added some of the fajita mixture to a flour tortilla (that was my choice, btw) with a dollop of guacamole and a couple of drops of salsa. All of this was put together in 30 minutes.  A true thirty minute meal!  

I hope you enjoyed my trip down memory lane.  I had a great time and loved cooking for my hosts. Y'all know me, I cannot go Anywhere without cooking!


As always, Thank You for your time, viewer/readership and consideration.  

Now! Go cook for someone you love!  


*Note: Coca Cola Company is not a sponsor of my humble blog.  This big chair was on the beach sidewalk.  


One Skillet Hoisin Chicken Stir Fry Over Noodles

  One Skillet Hoisin Chicken Stir Fry      Over Noodles This is one of those "people who know me Know I am obsessed over Chinese food&q...