Tuesday, October 6, 2015


Welcome to Another Episode of "What I Have Been Up To In My Kitchen!"

Toward the end of September, I was feeling a bit like Old Mother Hubbard; my cupboards were bare.  Embarrassingly bare!  I had a small bowl full of red baby new potatoes and a package of two bone-in pork chops available, along with three eggs and a partially consumed box of Cheez Its TM.  Since payday was the next day, and my cupboards and freezer would soon be full, I got a bit creative. I added some dried thyme leaves and the pinch of dried oregano I'd had left, a little salt and pepper and two cups of the Cheddar Cheez Its to my food processor and created a darn good coating for the pork chops, if I do not say so, myself!  Don't judge until you have had this....it really is good!  I was completely surprised!

I set up a dredging station, seasoned the chops lightly with salt and pepper, dipped it into the egg wash, coated it with the crusty mix, and fried the chops in vegetable oil over medium-hih heat. 

I fried one chop at a time until golden brown and finished them off low and slow in a 250-degree oven on a wire rack over a baking pan. 
 
In the meantime, I grated the baby new potatoes (tedious process when they are that small), added onion and garlic powder, half a teaspoon of each, to the fresh potato hash, and added one last egg to it.  I hand mixed the ingredients and formed little potato patties and fried them in a separate skillet also with about 4 tablespoons of vegetable oil.  I was able to make ten little (half dollar sized) potato crisps, or, patties, which I'd dried on paper towels on a rack to drain the excess oil. This helps to keep them crispy. 
 
By having the chops finish low and slow in a barely hot oven, they were fully cooked, moist on the inside and still crispy on the outside.  Best of all worlds!
 
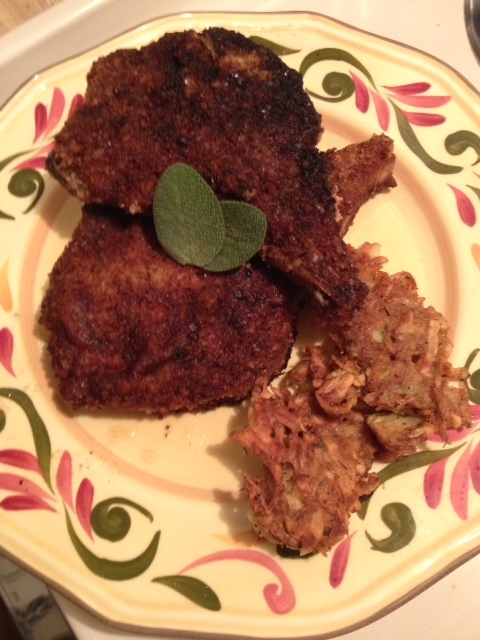
I served two chops with fresh sage garnish and two potato crisps.  For an extreme budget pantry meal, this was good!  
 
 
 Thank You AGAIN for your visit, your consideration and time!  These are all extremely important things, and I appreciate your spending them with me for a bit! 
Now!  Go cook something for someone you love!


Seared Chicken with Fusili and Fresh Veg and Herb Pasta Sauce

There are times when one just wants it all, both meat and pasta with a killer fresh sauce, not a jarred or canned sauce.  I am especially proud of this dish because it is a one-pot-wonder.  Sure cuts down on the number of dishes you have to clean later!  This will feed a family of four on a budget a healthy and filling meal, also great for lunch leftovers. Let's get started!

Chicken Seasoning:
2 tablespoons smoked paprika
2 teaspoons cumin seed
1 teaspoon fennel seed
2 teaspoons palm-crushed dried oregano 
1 teaspoon dried thyme leaves
salt and pepper, about a teaspoon each

Season four-to-six boneless, skinless chicken thighs on both sides and set aside to come to room temperature. Add a good two tablespoons of extra virgin olive oil to a large skillet and sear about four minutes per side. Place on a wire rack over a baking pan and finish at 350 degrees for 15-18 minutes in the oven. Remove and allow to rest. After ten minutes, cut the chicken into bite-sized pieces. 


Fresh Pasta Sauce Ingredients:
1 red onion, sliced into slivers
2 pints halved grape or cherry tomatoes
salt and pepper
fresh flat-leaf Italian parsley and torn fresh basil (about a half cup, together)
fresh or dried oregano and thyme (about two teaspoons of each)
1/4 cup of sun dried tomatoes
1 tablespoon tomato paste
1/4 cup red wine vinegar or wine (I use Cento, my favorite!)
3-4 tablespoons extra virgin olive oil 
3 cloves garlic, grated or finely chopped


 I went a little backwards, but I wanted to get you excited about the pasta sauce and how fresh it all it and to let you know we do not want to cook it down to a puddle; we want it chunky and fresh, almost putanesca style. More on the sauce in just a little bit!

Before the sauce goes into the pot, bring 4 quarts of water to a roiling boil.  Add a generous amount of salt to the water (it is the only chance you get to season the pasta) and add a box or package of short fusili pasta to the water.  Boil/cook the pasta to just before al dente (just before done).  Strain it in a colander and let it sit for a few moments.  

Immediately add the 3-4 tablespoons of evoo to the pot and add the onion and garlic over medium-high heat.  Add a little salt to onions to help them "sweat out" and release their sugars.  Add the halved tomatoes and herbs and stir after about three or four minutes to the onions and garlic, which, by  now, should be incredibly fragrant! 


After five minutes of stirring and simmering over the medium-high heat, reduce the heat to medium-low and add the pasta.  Toss the pasta and the veggies together constantly to coat all of it with those fresh flavors.  Note:  I added a second round, but not as much of it, of the fresh herbs to add a bit more fresh Italian flavors.  I also added a hand full of grated pecorino romano, which is great for a pasta toss. 

After a good five minutes of tossing and heating, the pasta will be ready to be served on a plate or a bowl, topped with some of the chicken, garnished with fresh herbs and cheese.  

 
 One more, you ask for?  Sure!


 Thank You again for your time and consideration!  I hope you enjoy this simple, fragrant, flavorful and extremely easy pasta dish!  
Now, go cook something for someone you love! 


Breakfast of Champions

Okay, I do not know about champions, but this breakfast is a champion, if I have ever eaten one. I fried up 8 slices of bacon to start with, saved the rendered bacon grease for another day, then added herb infused extra virgin olive oil leftover from pizza night the previous night and sauteed leftover red onion and red pepper slivers. I added a splash of white wine and balsamic vinegar.  I simmered low and slow for a good thirty minutes before serving it with micro greens and goat cheese.  

I have fallen in love with my parmesan crusted eggs and served them in this delicious breakfast sammy.  I simply add about 2 tablespoons grated parmesan cheese to the skillet over medium heat, crack open my egg over it and immediately use a spatula to keep it from spreading far.  I try to get to the egg to surround the plate of cheese.  I add another generous amount of parmesan to the top of the egg and, when the egg is ready to release, I easily can flip it over low and close to the skillet.  Not an Olympic skill, but it is important to keep the cheese and the egg together.  I add the cheese to the top of the egg so it assimilates into the egg white, making it easier to keep the cheese and the egg together. 

To serve, I simply toasted the English muffins I'd separated, added grated fontina cheese to one of the halves, topped it with an egg, added bacon to the egg and gave the other muffin half a splash of stone ground mustard (I love it!) and topped the sammy.  I served the sauteed veg with micro greens and crumbled goat cheese with dots of sriracha for dipping.  

 
 But what if you want to serve a loved one a breakfast to remember?  Just to show your love and appreciation?  I have just the simple breakfast for you!

 Simply cut out a heart from the center of a piece of toast.  Just like you are going to make grilled cheese sandwiches, add a little butter to a skillet, add the bread and crack and egg into the heart shape.  Allow it to cook as the bread crusts.  Flip it carefully and allow the same process.  This takes about five minutes per piece of egg toast.  I serve with fresh fruit and fresh ground seasoned sausage (love fennel and sage sausage with red pepper flakes).  I garnish with fresh herbs (finely chopped basil is shown above).   

So many ways to show someone you love, a significant other, a child, a friend....just how much you appreciate their contribution to your life. 

Now, Thank You for your time and go cook something for someone you love!!! 

Friday, September 18, 2015


Tacos are NOT just for Tuesdays!
Three Days of Different Tacos!
 
 I absolutely love tacos. It is clearly not a secret.  I have so many taco recipes on my humble little blog it'll blow your mind!  I just did not have a lot of time nor patience, nor money to lend toward incredible dishes to blog about. I just had this insatiable need for tacos and a freezer full of different meats and pantry seasonings just waiting to season different meats for tacos.  That is exACTly what I did!  Three Nights, Three Different Tacos. Your family will absolutely love you, too!!!
 
Let's get to it.  For some reason I did not take photos of the pollo, chicken, tacos, except for a brief video showing me saute chicken.  I cannot share it with you for some reason. My apology! Actually, I cooked the chicken on Monday, then, decided to use the leftovers for tacos on..when else?  Taco Tuesday!  I then went a bit taco overboard and made them Wednesday and Thursday.  Sorry...not tonight, Friday night. Pork loin roast tonight with onion and potatoes tonight. 
 
Alright.  I digress.  Let's get to it!  First, let us start with my Mexican Seasoning Spice and Herb Blend.  This can be used for ANY Mexican or Spanish dish you wish to make. 
 
My Mexican Spice and Herb Blend:
2 heaping tablespoons smoked paprika
1 tablespoon pasilla powder (or your favorite chili powder)
1 tablespoon garlic (granulated or powdered)
1 tablespoon granulated onion
1 tablespoon cumin seed (toasted and freshly ground)
1 tablespoon coriander seed (toasted and freshly ground)
salt and pepper
2 teaspoons dried thyme leaves (or six sprigs fresh thyme leaves, stems stripped of the leaves)
2 teaspoons dried, crushed oregano leaves (or, 4 sprigs fresh oregano leaves, diced)
 
This is just my spice and herb blend.  You can mix and match and make it your own! You can make enough for an entire jar that will last several weeks in your cupboard, in a dark, dry space.

I had prepared the pollo, chicken, for sandwiches on Monday night, and, as I mentioned, made tacos with the leftovers Tuesday night.  I seasoned and seared both sides of the chicken in evoo.  I removed the chicken once they'd attained a good golden color to a plate.  I added onion and garlic and sauteed them until the onions just began to turn translucent. I added a bottle of Modelo beer and a couple of tablespoons of roasted garlic Mirin.  I added a quarter to half cup of water, stirred, brought the liquid to a boil and snuggled the chicken into the (braising) liquid.  I reduced the heat to low and allowed the chicken to simmer for 25 minutes. I removed the lid for another 15 minutes. When I returned to it, the chicken practically fell apart as I tried to remove it with tongs.
 
For tacos on Tuesday, I added the leftover chicken to a skillet with a slight drizzle of evoo (extra virgin olive oil) and sauteed it over medium-high heat to crisp up the pollo.  I was able to separate larger pieces with tongs very easily due to the braising process the night before. I'd added a little more fresh onion and garlic to the skillet.  Such awesome flavors!  My little kitchen was a very happy place!
 
Moving along to Wednesday's Tacos. I had removed thick pork cutlets which I had planned to butterfly, pound out and fry Milanese style with sage from my garden. Oh no.  Taco Mania took over and I sliced them into slivers, seasoned them, sauteed them, and braised them in salsa verde.  How flavorful is that?
 
 
 I had liberally seasoned the sliced pork cutlets, sauteed them in a light drizzle of evoo, onion slivers, garlic and then braised them for thirty minutes in salsa verde and a quarter cup of water.  
 
 
Incredible color and flavor. After braising, I placed the puerco, pork, back into the skillet and crisped them up a little to serve as tacos. 


I'd garnished with fresh oregano leaves (cuz, pretty) and added Mexican blend cheese and drizzled my favorite salsa, Tapatio, atop the the Pureco Tacos. 

Deeeeelish!

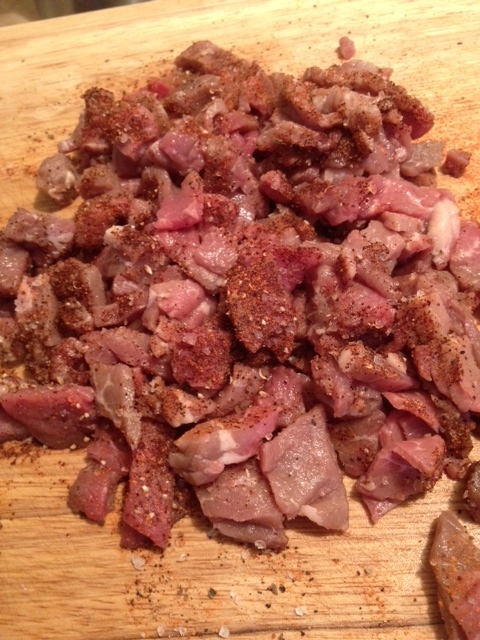
Finally, on Friday, carne de res, beef.  I sliced and chopped carne de res, beef, into small bits and liberally seasoned them with the remainder of my spice blend. I let the meat sit until it came to room temperature. I added a drizzle of evoo, about a good tablespoon, added one finely chopped onion and two cloves garlic, finely chopped, along with some fresh thyme and finely chopped fresh oregano to the skillet with a little salt and fresh cracked black pepper. I sauteed the onions, garlic, fresh herbs and s&p until the onions began to turn translucent.  I removed that and added the meat. 
 
Sauteing fresh onion, garlic, fresh thyme and finely chopped oregano, salt and fresh cracked black pepper. 

 
 Liberally seasoned carne de res, beef, and allowed it to reach room temperature to saute for Carne Asada Tacos!  I sauted the meat about eight minutes over medium high heat before serving, just enough time to get a carmelization without overcooking. 


 Carne Asada Taco. 

Dos Carne Asada Tacos. 

I hope you enjoyed my Taco Week blog and possible recipes for you! 
Now, go cook for someone you love! And remember, ANY night is Taco Night!  It's NOT just for Tuesdays, anymore!

Thanks for your time!


Sunday, August 23, 2015


Welcome To...
Another Episode of... 
What I Have Been Up To In My Kitchen!

I have had only a few rare opportunities to cook substantially since my return to the school year, so the event and the couple of recipes I am talking about today have been extremely fun and therapeutic for someone who misses his kitchen during busy work times like one does a special loved one.  My goal this year is to prep cook-ahead meals, such as the roast featured above, to slice to use for sandwiches.  I also prepped a potato and egg pie with bacon, cheese, green chiles and jalapenos for breakfasts at work or for lunches. Let's get to the roast and "brekky pie"  before the event. 

Pork Loin Roast seasoned and roasted over an onion bed with fresh herbs:
*Bring the roast to room temperature

1 pork loin roast, about 2 pounds
1 large yellow or white onion
fresh herbs (I used oregano and thyme, as I grow them in my potted patio garden)
coarse sea salt
fresh cracked black pepper
garlic powder
paprika
3 tablespoons stone ground mustard

I used about 1.5 teaspoons of each of the dry seasonings and several sprigs of the fresh herbs and about 2 or 3 tablespoons of the stone ground mustard.  The more white wine in it, the better, I say!  

I simply rubbed the roast entirely with the dry seasonings, drizzled mustard on the flat bottom of the roast, then placed it atop the onion bed (just onion discs) with tongs, then drizzled more mustard to the top and sides of the roast.  I roasted the pork loin roast for 50 minutes at 375-degrees.  I removed it after that time, allowed it to rest about fifteen minutes.  It is very important to NOT slice into a turkey or a roast of any kind until the meat has "rested".  This allows the meat time to finish cooking, reduce in temperature which allows the juices to redistribute.  If you cut into it immediately, the juices run out onto your cutting board and it will be tougher than it needs to be. Rule of Thumb:  Let it rest.  


 When you do slice into it after about fifteen minutes, the meat will be juicy, not your cutting board.  That is exactly what you want; juicy, tender meat.  I used this for sandwiches last week and it was incredibly flavorful.  The oregano dried up which gave me a great idea for the next segment!

*********

 Fresh Garden Herbs

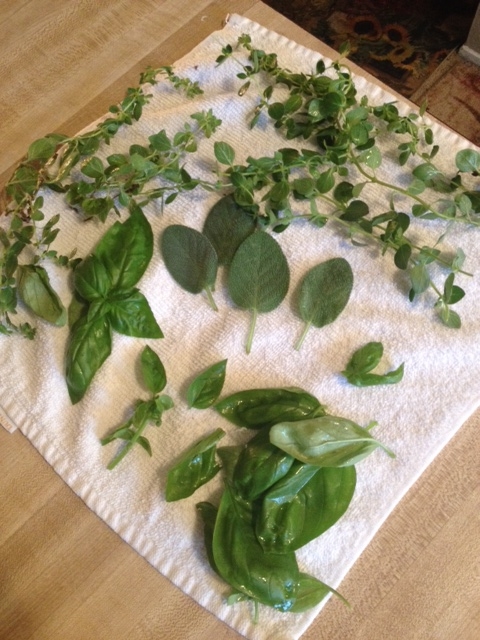
I grow thyme, basil, sage and oregano in my herb garden container.  These are herbs I use weekly.  I am very upset, however, because my rosemary, which I grew from seeds and have had for years perished in the intense summer heat when we had 105-108-degree weather a few weeks back.  I will grow another next spring.  I do not have thyme featured above because I had used it on the pork loin roast I started off this post with.  It needs time to grow back.  In the  meantime, I harvested several of my plants.  By pinching plants back, you are also stimulating new growth.  You can wrap the herbs separately in moist paper towels and store them in zip- lock bag not completely sealed for upward of a week and keep them fresh.  Oregano, sage and thyme, however, you can let sit on a towel in a cupboard to naturally dry out, or, you can place them, washed, of course, on a piece of parchment paper and dehydrate them in the oven at 100-degrees for about three hours.  I prefer to just let them dry naturally, but, if you have a large, full in-ground herb garden that produces a great deal of foliage, the oven method would be quite preferable.  You could always tie them into bunches and hang them, foliage side down from some kind of indoor rafters, as they did in the old days.  

I love using fresh herbs as often as possible, but the great thing about using your own dried herbs is that you know where they have been, you know their quality and you control the environment.  
If you have any questions, hit me up here, on Twitter: @grnmn1 or on FB at my blog FB page:  In-House Cook!  Thanks!

*********
Rustic Potato and Egg Breakfast Pie

As I mentioned in my introduction, I have decided to make breakfasts and lunches as often as I can to help alleviate my budget woes.  Yes, I have that, too.  I made an incredibly filling brekky pie.  This is a monstrosity and will take care of your breakfast needs for more than a week, so freezing in containers is strongly urged.  Let's get started.  Simple, though only slightly time-consuming, this dish will keep you full and you will not even think about lunch and you will dwell on the flavors all morning.  
 
Here is my starting line-up:
*3-4 large or 6 medium russet potatoes, washed but unpeeled, sliced into thin discs
12 eggs, cracked in a large bowl
1/4 cup pickled, sliced jalapenos
1/2 cup roasted, diced green chiles
1 cup parmesan cheese, halved
1 cup your favorite cheese (I used an Italian four cheese blend)
butter, non-stick spray 
extra virgin olive oil
salt and pepper
chipotle or pasilla powder 
onion powder
half pound cooked bacon, crumbled, or half pound of sausage (I used bacon)

Note: *The number of potatoes used will also depend on the size of your oven-safe skillet or round baking dish!  I used a very large oven-safe skillet.  As you can see from the photo, I used 4 large russet potatoes.

Preheat the oven to 400-degrees.

Using a mandolin (mine broke, so I had to do this by hand), slice your potatoes into thin discs, but thicker than potato chips.  The potatoes make up the crust and need to hold up to the weight and moisture of the eggs and cheese and not get mushy. 

Butter the large skillet or whatever large baking dish or dishes you will be using, or, use a lot of non-stick spray on every surface your pie will be engaging.  Spray it again just before you add the potatoes.  Starting on one side of the skillet, begin laying the potato discs in a circular pattern, like scales, layering one partly over the other.  When you have the entire bottom of the skillet covered, it will be pretty beautiful (take a picture for you to share your good and hard work with your friends, which is what I did not do this time!) begin adding them to the sides of the skillet or baking dish, like shields.  

Crack all of the eggs, add a good teaspoon of both salt and pepper, half a palm full of chipotle or your favorite chile powder and a rounded half palm full of onion powder (or, finely chop a quarter of an onion) and whisk thoroughly.  Next, add the bacon, jalapenos and the roasted green chiles and stir to incorporate with a spoon or spatula to avoid pieces catching in the whisk. 

Now, drizzle evoo gently over the potatoes and add a little dusting of salt and pepper and half of the parmesan cheese.  Place the skillet into the oven for five minutes.  

Once removed, add the egg mixture to the large skillet carefully, so as not to disrupt the potato crust.  Top with the white cheese (as I said, I used a four-cheese Italian mix I bought at the store) and topped that with the remaining parmesan cheese.  

Place the skillet into the oven for exactly one hour.  Do not open the door until one hour has passed.  When you do open the oven door, your senses will be overwhelmed with aromas, and you will see a gorgeous golden brown pie.  Be careful removing it!  It will be heavy and, of course, extremely hot!!!  But this is what you will see....


 To make sure the pie is completely done, stick a chop stick or tooth pick (though tooth picks will only go half way down); if it comes out clean, the breakfast pie is done. Allow to rest for fifteen minutes, at least, before serving or slicing for future use. 

Here, however, is what it looks like when I decided to have some for lunch that day!  I added some mixed cheeses and pickled jalapenos.  Beware, this WILL cause droolage!!!


 As you can see from the side view above, the egg slips into those open spaces from the layering of the potato discs.  That is what you want!  I think I did good work this time. 

Breakfast, anyone???

How about a burger event???  That is next!!!  

***********************************************************************


The finale of this episode is a true In-House dinner event.  My dear friend, Anne, (pronounced like "Annie") and her mother asked me to cook dinner at her mother's newly remodeled kitchen.  I tell you, it was an amazing pleasure cooking in that pristine, gorgeous kitchen!  As you know, I have just a little tiny kitchen, so whenever I am asked to cook at someone's home who has a huge, fantastic kitchen, I feel like a kid in a chocolate store!  


 Not an extremely clear picture, but this is Anne and I,  besties. 

The menu for dinner at Anne's mom's was burgers. Her mother wanted to roast potatoes with rosemary and garlic (fantastic cooking idea and flavors!) and I made Italian Bistro Blue Cheese Burgers and traditional Caprese.  

I used one pound of lean ground beef, one pound of chuck and one pound of mild Italian sausage to feed 4 guests,two burgers each.   I asked Anne to finely chop red onion and garlic which I added to the meat, along with a half palm full of dried Italian seasoning and some fresh oregano and thyme from Mrs. B's garden. I threw in a half cup of grated parmesan cheese, as well. I mixed all of the ingredients together in a large bowl and scored the meat, as seen below. 


 Each burger was topped with blue cheese when cooking and topped with cooked-ahead pancetta discs I had purchased from my local butcher and sliced fresh. I formed the patties, cooked them in my cast iron skillet for even cooking, added the blue cheese once the burger had been flipped to allow it to soften and permeate the awesome salt and pepper crust of each burger. 


 Burgers and prepped dutch crunch buns at the ready!


Meanwhile, Anne sliced the tomatoes and the mozzarella to make the Caprese.  Next, she added extra virgin olive oil and a drizzle of aged balsamic vinegar.  My favorite salad!  I have to tell you, I made a drizzle for the Caprese, but I cannot for the life of me remember what was really in it, except for balsamic vinegar, stone ground mustard, evoo, salt and pepper and thyme. We had one traditional caprese, and one with my drizzle, which also went over the pancetta and blue cheese topped burgers.  

Now, I also fried up eggs, and Mrs. B showed me how she baked her potatoes.  She took out a full-sized muffin tin, cut potatoes into wedges and placed them in the muffin cups with whole clove peeled and crushed garlic and a sprig of fresh rosemary.  Evoo was drizzled over them and baked at 400-degrees for thirty minutes.  The aroma and flavors were simply incredible. 


Here is the final dish.  Great friends, fun conversation and drinks, good food, and folks simply a pleasure to cook for in true In-House Cook style.  Thank You for the invite, Mrs. B and Anne!

Thank You for joining me for another episode of What I Have Been Up To In My Kitchen!  I have a fantastic pasta recipe, short and simple, to write up for you soon!  Stay tuned!

Now, go cook something for someone you love! 

*Sorry folks, thought I had edited very well, but upon reading after publishing, I found some glaring things to fix.  I hope I have done so.  Thank you for your patience!  Martin


Saturday, August 22, 2015


Pork Chow Mein with Egg

It is the end of the month, and, as I have talked about before, as a teacher, I get paid once a month.  My usual motus operandi is to splurge at the beginning of the month, then create and enjoy pantry meals at the end of it.  This is one of those dishes.  I had been craving Chinese food, but I was exhausted and I just did not want to drive to the other side of my town (and to be fair, I live in a pretty small town, so it was me being lazy) to my favorite Chinese take-out restaurant.  Therefore, I decided to make my own.  I love pork fried rice and pork or chicken chow mein.  Having had pork thawing in the frig, and no rice, I decided to combine the two.  I  made chow mein with items I had on hand in my frig and pantry.  This was a one-wok dish and I am a bit proud of it. 

I have been hearing about one-pot wonder dishes, but many of them take a slow-cooker all day to make some pretty amazing dishes.  I was hungry and did not want to take hours to do it.  I experimented, and this dish came out very well.  May not look as pretty as I could have made it, and I know what I will do very differently next time to make the aesthetics more appealing, but in flavor, this was awesome, and as you know, I do not often "toot my own horn" about my own dishes.  I'd rather let others do that, if they are at all going to.  

Let's get started.  Dudes, if you want to impress your date with your culinary prowess, this is a great one!  Your date may think you just went to the take out, but you can honestly say you made this meal in about thirty minutes in one pan or wok all by yourself.  Here is what I did, to get you started.  
I used half of a bag of frozen varied colored slivered bell peppers.  I coarsely chopped one large onion, and slivered four cloves, garlic. I took half a pound (or, package) of angel hair pasta and broke them in half.  I set aside the following:

3 eggs, whisked
1 pound diced pork dark meat (from the shoulder)
1.5 cups chicken stock
1/4 cup Tamari Soy Sauce
2 teaspoons sriracha sauce
1 teaspoon chili in garlic oil
2 tablespoons toasted sesame oil
1 tablespoon evoo
1 tablespoon fresh-frozen grated ginger (I keep the bulbs in my freezer)
2 tablespoons slivered almonds
 1 rounded teaspoon of tamarind paste (I love the tart sweet taste)


Pork seasoning before cooking:
1 rounded teaspoon coarse sea salt
pepper
 1.5 teaspoons coriander seed
1 teaspoon ground cumin, or cumin seed
1/2 teaspoon ground cloves

I began by adding half of the garlic chips and a pinch of cumin seed to the toasted sesame oil and evoo over low heat in my wok.  You could easily use a high-sided saute skillet/pan.  The garlic and cumin infuse the oil in the wok with their oils, causing an amazing fragrance to emerge in your kitchen. 


Once the garlic chips begin to sizzle, I add (and all of my stir fry dishes start out this way, by-the-way), I add a half teaspoon of the chili in garlic oil and stir.  After two  minutes, I remove the garlic chips and set aside.  In this case, I then brought the oil to elevated heat over medium-high, added the seasoned pork and began to saute it, tossing the pork around in the oil to evenly coat it with the intensely flavorful oil.  Once it began to caramelize, I added the onions and tossed it around for a few minutes to also coat the onions with the increasingly flavorful oil.  Next, I added the pepper and repeated, just for a couple of minutes.  Finally, I moved the pork and veg to the sides of the wok and added the chicken stock, soy and sriracha sauce and stirred it briskly over high heat.  I added the halved angel hair pasta to the center and allowed it cook, or boil, for five minutes under my watchful eye before I incorporated the rest and tossed it for several more minutes.  I reduced the heat to medium and allowed it to simmer briskly for seven minutes more, tossing every couple of minutes.


Now, I elevated the heat to high, added the whisked eggs and tossed continuously as the egg solidified onto the pasta, pork and veg.  This took several minutes of continuous tossing.  Great for working out the arms!  I used tongs for this, you a wooden spoon or heat resistant spatula works just fine.  (I know this, as I tried to find the best utensil to use; I found the tongs worked best, but the others were fine).  

I served simply, with only coarsely chopped cilantro and almond slivers in an udon bowl.  Simple, flavorful and filling!  Who could ask for more?  Dudes and Ladies who want to impress their dates, I tell you, this is so easy to do!  The only chopping is the onion and garlic!!!  So easy and flavorful!  And, one wok or high-sided skillet, cutting board and utensils for easy clean-up afterward!  I hope you try this, families or singles!  Great for a family week day or weekend meal for families on the go!  

 
As always, Thank You for your time and consideration!  
Now, Go Cook Something for someone you  love!!!


My Waaayyy Overstuffed Baked Potatoes

  My Waaayyy Overstuffed Baked Potato Last Thursday my spouse and I went out to run errands and we ended up eating at a local eatery. As we ...