Tuesday, November 29, 2016


Drunken Braised Short Ribs and Vegetables

Life can sometimes be hectic, especially this time of year, the Holidays, so it is important to have some slow-cooker recipes in your arsenal to feed your family and friends.  Previously I shared a chili recipe. In this episode, I am sharing a rather grown up recipe here, where, after searing boneless beef short ribs (though bone-in would be preferred), I braise them with a vegetable medley and finish them by braising them in an entire bottle of wine.  Now, I ask you, who wouldn't want this?  Densely flavorful, hearty, warm and comforty, just what we want in winter!

One of the benefits of this recipe is, you do the hard work in the morning and enjoy the fun part in the evening. Boom! Now, let's get to it, shall we?

Ingredients 
2 packages of beef short ribs
2 large carrots, peeled and sliced into discs
1 large onion, quartered
4 cloves garlic, smashed and peeled
1 pound small potatoes, halved or 2 large russet potatoes, cubed
fresh herb bundle: rosemary, sage, thyme and oregano (and whatever your favorite herbs are)
salt and pepper
1 bottle of cabernet sauvignon
1 16-20-ounces chicken stock
1-2 cups water
3 tablespoons extra virgin olive oil
3 tablespoons Balsamic vinegar

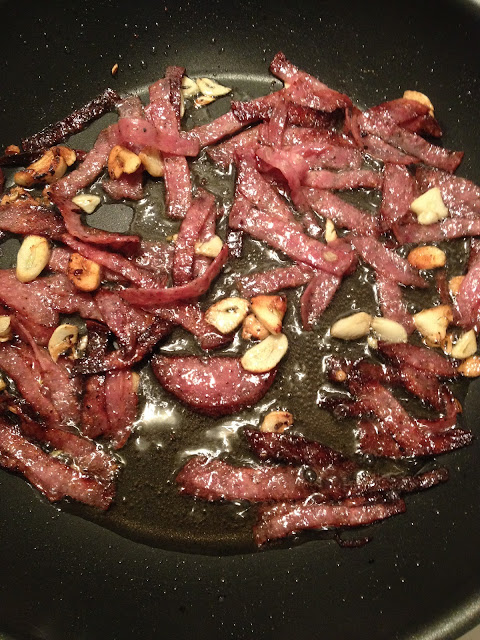
In a large skillet, add the evoo over medium-high heat. Season all sides of the short ribs with salt and pepper. When the oil begins to ripple, add the ribs to the skillet.  Sear on all sides 3 - 4 minutes and allow a crust to form. Add some of the fresh herbs to the skillet to develop some fresh flavors. Remove the ribs and set aside.  


I like to add some of the fresh herbs to the skillet to develop some fresh flavors. 

Now, please, please, please pay attention to the next five steps. They are extremely complicated!  Ready?  

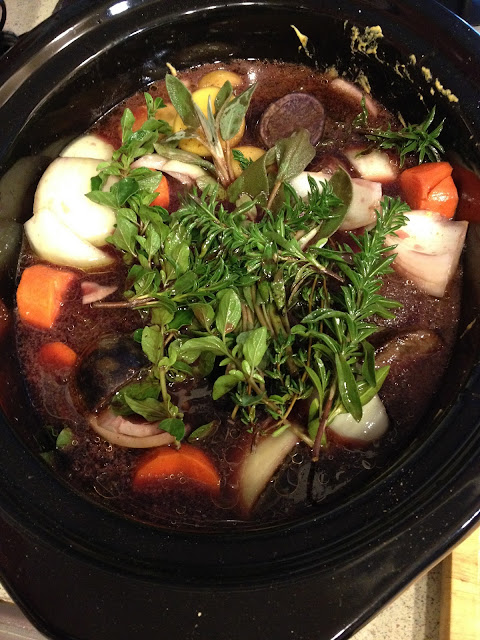
Add the vegetable medley to the slow-cooker.  Add the bottle of wine and balsamic to the slow-cooker.  Add the chicken stock to the slow-cooker.  Add the water to the slow-cooker. Snuggle the ribs into the vegetable medley.  Alright, alright. So I lied! Not complicated at all, right? Now, set it to low and 7-hours and go about your business. All day!  The hard part is done!  In 7-hours, the fun part for your family and guests!  This recipe feeds six easily.


Normally, I would have created an herb bundle, but, as I was cooking at someone else's house, I did not have twine or string, so I simply placed the herbs atop the ribs and veg, and allowed them to be absorbed by the slow cooking process.  Their aroma was sinfully wonderful. 


 See Ya in 7 Hours!


I do not have any "finished product" photos for you as I made this for friends for dinners this week. I will tell you that the aromas were amazing throughout the day.  In addition, I would serve this perhaps with garlic mashed potatoes or rice.  After removing the meat, which, by this time, is fall-off-the-bone tender and delicious, and the vegetables, strain and pour the liquid into a sauce pan over medium-high heat and reduce by at least half.  This will condense the flavors and make a fantastic sauce, or gravy!

As always, friends, Thank You for your time and consideration. I am appreciative of your visit!

Now, go cook something for someone you love!!! 

~Martin
In-House Cook
Monday, November 28, 2016


Another BLD 
A Breakfast for Lunch or Dinner Meal
Sausage and Potatoes with Egg and Salad

Growing up with two hard-working parents, stretching a buck and creating time-saving meals after working a long day was important. My mom would get home about five-thirty in the evening and want to have dinner on the table for our family by six or seven, at the latest. My mom became proficient at the BLD:  breakfast for lunch or dinner. (Rachael Ray may have coined the phrase, and much respect, but my mom was the epitome of it).  I grew up loving breakfast for dinner. Sausage and potatoes with egg was one of my favorites and continues to be. Here is a simple, quick recipe for a balanced BLD meal. This meal, by-the-way, feeds four easily!  ðŸ˜…

Sausage and Potatoes
1 pound Red New potatoes, quartered
1 or 2 Sausages (I used Beef Smoked Kielbasa), sliced into discs
salt and pepper
1/4 red onion, finely chopped
2 cloves garlic, finely chopped
2 tablespoons extra virgin olive oil
1 tablespoon your favorite seasoning

Saute the sausage with your favorite seasonings (I used Chipotle powder) in 2 tablespoons extra virgin olive oil. Once a crust begins to develop, remove the potatoes and set aside. 

Toss the New Potatoes, onion and garlic in two tablespoons extra virgin olive oil with your favorite seasonings and add to the same skillet in which you'd sauteed the sausage over medium-high heat. This will add incredible flavor! When a crust begins to form on the potatoes, add the sausage back and toss together and saute over medium heat. That crust equals flavor!  Allow the flavors to marry by tossing every couple of minutes. 

Marinated Tomato, Cucumber and Onion Salad
Halve a pint of cherry or grape tomatoes and place them in a bowl. Finely chop or cut into slivers one red onion or shallot. Cube one cucumber.

 Make a vinaigrette:
1/4 cup extra virgin olive oil
1 clove garlic, grated
3 tablespoons red wine vinegar or apple cider vinegar (whatever your wish)
2 tablespoons Mirin
pinch of salt and pepper
1/2 teaspoon thyme, fresh or dried 
*For a fresher vinaigrette, add the zest and juice of a lemon or two limes rather than a vinegar

Toss the tomatoes, cucumber and onions in the vinaigrette and set aside in the refrigerator to marinate. Serve over greens or microgreens. 

Now, once the potatoes and sausage have developed good crusts, remove the mixture and set aside.  In the same skillet over medium-low heat, crack eggs and fry them to your liking. One or two eggs per serving. I like to add parmesan to one side of the eggs to develop a salty crust, but, since you are sauteing in a seasoned skillet with fat renderings from sausage, this may already be sufficiently salty for you.  Plate the sausage and potatoes and place the egg atop that.  Plate the marinated salad either separately or on the same plate, whatever you like!! 


Now, enjoy a hearty, savory, balanced meal with your family!  Easily a thirty minute meal, this is a simple, tasty and fun meal.  

Now, go cook something for someone you love!

And as always, Thank You for your time and consideration!

~Martin
In-House Cook


Tuesday, November 22, 2016


Roasted Salsa Chili 

I am sitting at my computer at my coffee table wearing sweats, bundled up in a blanket, dog curled up at my side, cat curled up behind me on the couch. It is 51-degrees outside and getting cooler, and clouds are drifting lazily overhead.  It is snowing in some places, frigid in others, mild in yet other locations, as in my area in California.  With that, what does one do when it gets chilly and you want a comforty, warm dish without a ton of work?  Oh yes, one makes this simple chili, my roasted salsa chili. Stay with me, this one is simple and incredibly delicious. It starts with fresh roasted salsa as the base. Let's get started, shall we?

To an oven safe skillet or pan, add a quartered red or yellow onion, three large or five small cloves garlic, two Fresno chiles, three serrano chiles or two jalapenos chiles or a combination there of.  I add a little vegetable oil to a pan or oven safe skillet, I toss the veg in it, sprinkle it with salt and pepper, and roast it for 18 minutes at 400-degrees.  

After roasting, allow the veg to cool.  Seed the chiles and add the onion, garlic and chiles to a food processor. *Be careful to not touch your eyes after you seed the chiles!!! Now, you can roast larger chiles, too, such as Anaheim or Pasilla chiles, seed and add to the processor, but, I bought a can of whole fire roasted green chiles (by mistake) and so I added that to the processor.   


I pulse the roasted veg, add the juice of two limes, a splash of apple cider vinegar, salt and pepper and a pinch of ground cumin, along with a bit of fresh cilantro.  


I like my salsa a bit chunky, so I did not pulse into a puree.  I wanted the salsa to reveal its incredible flavors amidst all of the rest of the ingredients, cooking low and slow. 

And guess what?  This was the hard part of the entire meal!  Now let's get to the rest!

Here's what I used, simple and easy:

2 cans kidney beans
1 can black beans
1 14.5-ounce can corn
1 cup diced pork belly or thick bacon
Chili or Mexican spice blend*
1 28-0unce can tomato puree
1 14.5-ounce can diced tomatoes
2 tablespoons Worcestershire Sauce
1 cup water or 1 beer


My Mexican Spice Blend*:

1 rounded tablespoon Pasilla powder
1 level tablespoon onion powder
1 level tablespoon garlic powder
1 level tablespoon ground cumin
1/2 teaspoon cumin seed
1/4 teaspoon cloves
1 rounded tablespoon dried or fresh oregano
 1 teaspoon thyme
2 rounded tablespoons smoked paprika
salt and pepper
 1 rounded teaspoon coriander seed


Rinse the beans and corn.

Saute cubed pork belly or thick cut bacon with a 1/2 teaspoon of cumin seed and two tablespoon extra virgin olive oil over medium-high heat.  When the pork begins to caramelize, add the small can of diced tomatoes and the roasted salsa and stir and half of the spice blend. Saute three minutes.  Add the large can of tomato puree and and stir to incorporate well.  Now add the beans and corn and thoroughly combine. Add the remaining spice blend, stir, and add the water or beer and stir very well to thoroughly combine the ingredients.  Bring it to a boil, reduce the heat to low and cover.  Simmer on low for at least thirty minutes, but if you can, allow it to simmer, covered, for one hour, and thirty minutes uncovered.  

You can do this in a crock pot or slow cooker, set on high for up to eight hours.  Either way, this will be an incredibly comforty dish the whole family will love you for.  Just prior to serving, 


Now, go cook this or something for someone you love!  This dish took very little time to prep and get going.  It is flavorful and filling and can be garnished with whatever you wish, chips, fresh cilantro, whatever your favorite garnish is. Now, again, GO and cook for something for your loved ones!

And as always, Thank You for your time and consideration!

~Martin
In-House Cook


Wednesday, November 16, 2016


Fresh Veg and Pasta Tossed with Marinated Chicken

In the nearly four years since I began writing this humble blog, I have found my culinary niche. Comfort food.  That being said, comfort food is often comprised of heavy and not exceedingly healthful dishes.  I am working on ways to create dishes with all of the comforts of Grandma's or Nonna's down home cooking without sacrificing flavor, but also lightening up the caloric count. This dish does just that.  It is my marinated cubed chicken thighs, fresh tomato, onion and garlic saute garnished with garlic crisps and crispy salami.  Oh, and do not forget the shaved parmesan!

Let's get started, shall we?

Chicken Marinade
4 chicken thighs, cubed
1/4 cup extra virgin olive oil (evoo)
3 cloves garlic, finely chopped
1/4 red onion, grated or finely chopped
1 tablespoon fresh finely chopped flat-leaf Italian parsley
2 tablespoons red wine or white wine vinegar
1 tablespoon lemon juice
1 teaspoon lemon zest
salt and pepper
1 tablespoon finely chopped rosemary, thyme and oregano (or dried)

Place the chicken in a gallon-sized zip lock bag with the marinade and allow to marinate for thirty minutes to two hours.  

Slice 2 cloves garlic into discs, and sliver 6 slices of your favorite salami, coppa or sopressata and crisp up in two tablespoons extra virgin olive oil (evoo). Dry on a paper towel.  


Meanwhile, chop the remaining 3/4 onion into crescents, two Fresno chiles sliced into discs, finely chop two more cloves of garlic (garlic does a body really good!!!), halve the larger of two pints of tomato medley and take out a half pound or pound of your favorite pasta.  I used angel hair pasta for this dish.  

Bring about four quarts of water to a roiling boil.  
Annnnd.......


 Add two tablespoons of evoo to a large high-sided skillet or sauce pan over medium-high heat.  Add the onion and saute about three minutes with a pinch of salt.  Add the garlic and Fresno chiles and saute three more minutes. Finally, add the marinated chicken and saute together for eight to ten minutes. 


Add one tablespoon of dried Italian seasoning to the saute. 


Drop the pasta when the water is at a full boil and liberally salt the water.  It is the only chance you get to season the pasta.  Cook the pasta for eight to ten minutes until just al dente.  Either remove the pasta and to the high-sided skillet with two tabs of butter. Butter helps to add a sheen and brightens the colors and adds flavor.  Toss the pasta with the vegetables and aromatics until coated with the evoo and the bursting tomatoes, those left whole. 

Plate together, garnish with finely chopped flat leaf Italian parsley and fresh shaved Parmesan, and, top with some of the crispy salami and garlic crisps. 


One more for the fun of it....


This an also be served Family Style or individual, as above.  

Now, I know that the salami is not exactly heart healthy but it offers a crispy crunch and, along with the parmesan, a salty bite. By not having an actual sauce, by tossing the vegetables with garlic-infused evoo this dish is lite and healthy and diverse in flavors. The cubed chicken thighs, flavorful from that delicous marinade, are caramelized from the saute yet juicy and a perfect addition to the comfort food part of the pasta.  IF you prefer, you can always leave out the chicken and salami to create a perfect meatless Monday pasta dish. What a versatile dish!

Now, Please go and cook something comforty but healthy for someone you love!  And as always, Thank You for your time and consideration!

~Martin
In-House Cook


Tuesday, November 15, 2016


Salsa Pollo Arepas

I have been enamored by arepas for a year now and I am on the way to making them correctly.  The first time I made them I had to experiment; I have six or seven different versions of how to make them:  bake, skillet fry and deep fry.  The skillet fry was tasty, but crumbly. My first attempt at baking was slightly more successful but equally crumbly. The secret to keeping them together?  Eggs. 

This last attempt proved much better and my pollo, or chicken, filling was mixed with fresh twice-roasted homemade salsa. Let me share with you how I made this dish come true. 

First, I added 2 cups of fine corn flour to a large bowl, along with (and this was new) a teaspoon of baking powder and a quarter teaspoon of baking soda.  I added 1/4 cup vegetable oil, two eggs and 2 tablespoons of cold water.  In addition, to make it a bit savory, I added 1/2 teaspoon of chile molido (chile powder), a pinch of salt and pepper and a 1/2 teaspoon of ground cumin to the mix. I thoroughly mixed the masa and formed it into a ball.  I sliced the ball into four equal parts and wrapped them in plastic wrap and set them in the refrigerator to rest thirty minutes. 

In the meantime, I'd purchased a half bone-in chicken (cut directly down the middle). I ground and blended my Mexican spice blend and rubbed the chicken with it. I set it in the refrigerator, uncovered, to let the spices flavor the chicken under and above the skin. 


In a large pot, I seared the half chicken.  This enabled the spices to marry further and get some color and crispness onto the skin and meat. 

Meanwhile, I preheated my oven to 400 degrees. I quartered a red onion.  To my small cast iron skillet, I added the onion quarters, 4 cloves garlic, two serrano chiles and two Fresno chiles. I added some extra virgin olive oil to them and sprinkled with a pinch of salt and pepper prior to roasting for 18 minutes. I turn them about ten minutes in to get a good blister on the chiles and color on the garlic and onion.  


I added a little salt and pepper, fresh cilantro and a drizzle of extra virgin olive oil and a splash of lime juice as I pulsed the onion, garlic and chiles into a warm fresh salsa in my little food processor. 

I added the warm fresh salsa to the chicken over an onion bed and roasted at 375-degrees for forty minutes. The salsa under and above the skin permeated the meat and filled the kitchen with an incredible aroma. 


When finished roasting, I shredded and chopped the chicken meat after removing the skin, and tossed the meat with the roasted salsa topping.  Delicious!

At this junction of time, as the salsa flavored the meat, I brought the dough to near room temperature and, after placing parchment paper on a baking sheet and spraying it with non-stick spray, I placed the dough balls on the areas I sprayed.  I then brushed the top of the dough with a mix of evoo and granulated garlic.  I baked the rolled areapa dough balls for 18 minutes until golden.  


Oven ready!


Now these turned out great!

While still warm, I sliced the buns open (so not really a true arepa) and stuffed them with the chicken, cilantro and cheese.  Between the warm spices in the buns, the flavorful fresh roasted veg and herb salsa and chicken and the cool of the cheese, this was one comforty and delectable arepa.  One of my amazing Chef friends reminds me that these are not true Venezuelan arepas, which is very true.  Some day I will learn now to make them authentically Venezuelan. In the meantime, I hope you might take a chance, do something different and daring and make this, whether you use my recipe or find one of your own.  Regardless, this is an amazing arepa.  Bun.  Sandwich, whatever we are going to call it.  


As always, THANK YOU for your time and consideration!  Now, go cook for someone you love!
~Martin
In-House Cook

My Waaayyy Overstuffed Baked Potatoes

  My Waaayyy Overstuffed Baked Potato Last Thursday my spouse and I went out to run errands and we ended up eating at a local eatery. As we ...