Saturday, December 7, 2013

Pomegranate Balsamic Glazed Pork Shoulder Steak with Chimichurri and a Host of Scintillating Sides

I thought that would get your attention! Scintillating sides.  Well, they are!  My culinary partner, Maria, and her son came over Friday evening and I made them a delectable dinner.  Well, it was in my opinion, anyway.  I had found huge pork shoulder blade steaks and immediately realized how great they would be seared with a pomegranate balsamic vinegar glaze.  Maria and I had barely eaten that whole day, so we created snacks and sides to add color, freshness and incredible flavor to the main dish.  First, however, I want to tell you how I kept the pork steaks tender and juicy. Also, before I move on, stay tuned at the end of this post for a wonderfully flavorful and easy way to use leftovers!

Marinade for the pork steaks:
  4 large, thick pork shoulder blade steaks or 6 thin steaks
1/4 - 1/2 cup Pomegranate Balsamic Vinegar
1 tablespoon citrus Ponzu
1 tablespoon Worcestershire sauce
1/4 cup extra virgin olive oil
3 cloves garlic, grated or finely chopped
2 tablespoons smoked paprika
1 teaspoon dried, crushed oregano
salt and pepper
*Optional:  add the juice and zest of one lemon or lime

In a medium bowl, add all of the ingredients and whisk thoroughly. Season the pork steaks with salt and pepper, both sides. Add half of the marinade to a large roasting pan and place the steaks in the pan.  Pour the rest of the marinade atop those and allow them to marinate for thirty minutes to an hour; more than an hour is best, but thirty minutes will be just fine if you have company coming over and you are pushed for time.  You can leave them out if it is not longer than thirty minutes, otherwise, place them into the refrigerator until thirty minutes before cooking.  

When it is time to cook, add two tablespoons of extra virgin olive oil (evoo) to a large skillet over medium-high.  Sear for three minutes per side for thin steaks, and six to eight minutes per side for steaks thick as or thicker than one inch.  Remove from the skillet and cover with foil and set aside. Thick larger steaks can be halved easily after cooking. This enables easy plate service.  You will want to top your pork shoulder steaks with my cilantro chimichurri.  It's up next!


Cilantro Chimichurri to top the Pork Shoulder Blade Steaks
1+ cups fresh cilantro
2 cloves garlic
1 teaspoon sriracha
3 - 4 tablespoons extra virgin olive oil
2 tablespoons parmesan cheese
1 - 2 tablespoons apple cider vinegar
salt and pepper (to taste after processing)

Combine all of the ingredients in a food processor and pulse until you have a thick mixture.  You may want to add more cilantro or more evoo until you reach the desired consistency of the chimichurri.  Let sit a good hour to allow the flavors to marry.  

Ready for the sides and Snacky Snacks?

Herb Roasted Fingerling Potatoes:
In a large bowl, toss the 2 pounds of fingerling potatoes in the following mixture:
3 tablespoons extra virgin olive oil or grape seed oil
1 rounded tablespoon of fresh or dried rosemary
1 tablespoon grated onion
3 cloves garlic, grated or finely chopped
1 teaspoon crushed dried oregano
salt and pepper to taste
Place the potatoes in a large oven safe skillet or roasting pan at 400 degrees.  Roast for 18 - 25 minutes, until the potatoes are soft inside and crispy on the outside. 


Garlicky Cheesy Baguette Bites for Snacking
Slice a baguette into several half inch slices. Spread the slices out over a baking sheet and drizzle with evoo.  Sprinkle them with smoked paprika and finely grated garlic, above two or three cloves.  Roast at 400 degrees for eight minutes.  Remove and top with a good pinch of grated parmesan cheese and if you like, mild cheddar jack cheese.  Place back into the oven until the cheese melts.  For fun, drizzle a little of the chimichurri over some slices arranged on a plate.   So good!


 And to top things off......!!!

Frisee Salad with Corn, Black Beans and Spicy Vinaigrette
Wash and shred Frisee greens, removing the thick stems.  Arrange on a serving platter.  Rinse and combine corn and black beans and spread over the frisee.  In a mall bowl, combine two or three tablespoons evoo, one tablespoon red wine vinegar, two cloves grated garlic, one teaspoon sriracha, two tablespoons grated white or red onion, pinch of salt and black pepper, one teaspoon worcestershire sauce, a teaspoon of Ponzu, and two tablespoons pomegranate balsamic vinegar.  Add one pinch of dried, crushed oregano and whisk to incorporate thoroughly.  Set aside and allow the flavors to marry, about twenty to thirty minutes. Upon serving the salad, drizzle the vinaigrette over the salad and serve family style.  Garnish with shaved parmesan and chopped scallions.  The flavors and textures are comforting but with a spicy bite.  DeLish!  

 
READY TO SERVE IT ALL UP?

Plate up your pork shoulder blade steak, top with my cilantro chimichurri, and add both the roasted fingerling potatoes and the salad.  Savor the mixture of complimentary aromas and enjoy the flood of savory flavors!


Oh!  One more thing!!!
You may have leftovers.  I used a nice slice of San Francisco Sourdough Bread, spread garlic herb cream cheese atop the bread and placed some thinly sliced pork steak over that to create a delectable bruschetta.  I spread some leftover chimichurri (better day two!) atop the meat and added some leftover salad and more shaved parmesan.  So good!  Great for lunch or for dinner as easy leftovers!


 Thank You for your time and I hope you enjoy these recipes.  They are easy and the flavors are fantastic. Enjoy!


Saturday, November 30, 2013


My Thanksgiving Turkey and Side Dish
Thanksgiving is a day when we get together as a family and share our gratitude for our abundance in life.  I know that my mom is grateful that I help her so she can remain independent.  I know that I am grateful for my amazing job, which is a privilege to go to every day, that I am self-sufficient and that I am surrounded by many incredibly talented and brilliant people, both friends and colleagues. With that said, I will share with you my turkey from beginning to end, and the side dish I contributed to the meal. 

Part One:  Butter
 I use one stick of butter 
1/2 cup mayonnaise
3 cloves garlic, finely chopped
1 rounded tablespoon smoked paprika
1 tablespoon fresh, finely chopped sage
1tablespoon fresh, finely chopped oregano
1 tablespoon fresh, finely chopped rosemary
1+ teaspoons fresh, finely chopped sage
zest of one lemon
Juice of one lemon
salt and pepper

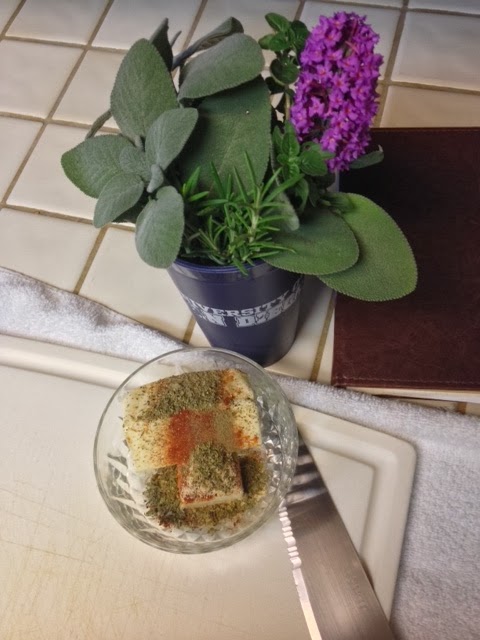
Fresh herbs and seasoned butter.  The flower is just because it was pretty.  Just for looks.  The fresh herbs came from my former residence.  Thanks, Spinner, for letting me cut fresh herbs!

Part Two:  Stuffing
 I stuff the turkey with slices or discs of peeled orange and lemon.  I also stuff it with one onion, quartered, three smashed and peeled garlic cloves and fresh sprigs of rosemary, thyme, sage and oregano. 

The Bird:
After removing the insides of the turkey, I thoroughly wash it and pat it dry with paper towels. I bring my seasoned and herbed butter and mayo mixture to room temperature and rub the mixture inside the cavity, under and thoroughly over the skin.  At this time, then, the turkey is ready to roast. I let it side that way overnight, however, to allow the herbs to flavor the butter mixture and the turkey.  


The turkey is oven ready.  I placed a foil tent over the top for the first three hours. 


 After the first three hours at 375 degrees, I remove the foil tent. 

The next half to full hour, or so, is where things went awry for my turkey.  The little red device that pops out alerting you that the turkey is done never did pop out.  I untied the legs and allowed it to roast a bit more, as the meat between the thigh and body was just not fully cooked.  I stuck a thermometer in between the thigh and the body after a bit more time, and the temperature was still not where it should have been.  I removed all of the stuffing (which smelled fantastic) and allowed it to roast yet again for a bit.  The thermometer never ever reached where it was supposed to.  Absolutely not sure why.  I realized two things, however. First, I should have rotated the turkey so both sides roasted evenly.  Due to other things going into the oven, the turkey was lopsided.  Next, I realized I more than likely overstuffed the turkey, thwarting its full potential to cook thoroughly. Finally, I should have followed my gut and my nose and I should have removed the turkey and let it rest after removing the stuffing and allowing it to roast for another twenty minutes.

The most important things I learned this Thanksgiving:  Follow your gut and your nose, as they know when things are done even when technology fails to support that instinct.  In addition, despite that cute tv commercial where the lady rearranges her living room, kitchen and dining table to make everyone happy, you may not be able to please everyone.  It is statistically impossible.  Finally and most importantly,  Cook what You like.  The rest will fall into place if you allow it to.  It sure can help alleviate the stress.  I have decided that next year I am not going to have turkey, instead, I am going to prepare a hefty prime rib roast.  It is clear that turkeys and I are unmixy things, so beef it is next year!!!


The turkey is done.....Finally!!!  Yes, it looks much like a mummy, I know!

My Side Dish:  Prosciutto Wrapped Green Beans:
I started by washing and blanching about four cups of green beans.  I blanched them for about three minutes and then let them chill down and stop the cooking process in an ice bath.  They remained quite bright green!  I tossed the beans in a medium bowl with extra virgin olive oil, three cloves of garlic, finely chopped, and seasoned lightly with salt and pepper.  I wrapped the green beans in prosciutto and sopped up the oil mixture at the bottom of the bowl with my little packets of beans.  I sprinkled the packets with some of the leftover garlic and roasted for 18 minutes at 400 degrees.  They were just Delicious, if I don't say so, myself.  


I hope your Thanksgiving was full of happiness, gratitude and the sense of belonging to something wonderful, regardless of how wild and whacky your family might be.  We all have that going on, I am quite sure, in some form or another.  I hope you take Christmas dinner, if you have it or celebrate it, easy and enjoy making what pleases you.  Your joy of cooking will come out in your food like a shard of light piercing dense clouds after a storm.  Sounds silly, I get it, but it is true.  That is when you will have no stress over cooking and your guests will simply see your love coming through to them in your food and your relaxed smile.   Enjoy!!!


Friday, November 29, 2013


Chile Verde Pollo Tamales
Green Chile Chicken Tamales

My dear friend, Maria Paz, my partner in culinary crime, came over on Tuesday and showed me how to make Green Chile Chicken Tamales, or, Chile Verde Pollo Tamales. We had so much fun, had such incredible conversation, laughs - mostly at my klutzy expense, and tasted amazing tamales.  We both agree that the only way it might have been more fun is if we had wine to go along with the tasks.  Alas, I had to drive out of town to pick up my son for Thanksgiving after his classes at CSU Sacramento let out, so I refrained from any drinking.  I know, responsible.  It's what I do.  

Maria brought the chicken already marinating in its luxurious verde sauce which she had made completely with fresh ingredients; nothing canned in this recipe! She also brought a huge pot that was almost as big as she is, and don't let me forget to talk about the fiasco with the steamer grate!  I purchased the corn husks and the masa.  What an experience, masa!  I felt like a gardener (which is one of my passions, as well) getting my hands full of masa. Why I did that will be explained a little later.  Let's just say, it feels good, like dirt to a gardener. 

Enough foreshadowing, let's get to the recipe!

To make the Verde Sauce:
2 pounds of tomatillos, peeled and washed
2 medium white onions, quartered
2 jalapenos
16 garlic cloves, peeled
2 tablespoons vegetable oil (or your favorite high heat oil)
salt and pepper
1/4 cup chicken or vegetable stock (we used homemade chicken stock)

2 bunches cilantro  (about a cup)

Preheat your oven to 400 degrees. 

On a cutting board or chopping block, quarter and peel the onions and smash and peel the garlic cloves.  Toss the vegetables, minus the cilantro, in the oil and spread out over a large roasting pan.  Sprinkle with salt and pepper to season.  Roast the vegetables in the 400 degree oven about 18 - 20 minutes.  You will know when the vegetables have finished roasting;  your nose will tell you, as the aroma will envelope your whole space.  

Remove the roasting pan and allow the roasted vegetables to cool about six to eight minutes before transferring over to a large blender or food processor. Now add the cilantro to the food processor.  Pulse until the mixture becomes a loose pesto consistency.  Not too loose, not too thick.  Taste and season again, if needed.  If it is great, set the sauce aside for a moment. 


While the vegetables are roasting, shred the meat from two roasted chickens.  Place the meat in a large pot.  Pour the verde sauce over the chicken meat and stir in the pot over medium heat.  Allow the mixture to simmer on low about twenty minutes.  Remove and allow the mixture to cool overnight.

Now we must attend to the dried corn husks.  The husks must be soaked in water for about thirty minutes before they can be pliable enough to use.  Keeping them submerged took some high tech work, but we made it happen.  
In the large pot, add the husks and try to separate them a bit.  Pour water over the husks until the water covers them, much like you would cover potatoes in order to boil them.  


 Told you it was high tech!!!

In the large pot, you see two red cans. They are olives.  Maria says olives are oftentimes traditional in tamales.  She halves them.  That was fun, because you would think I had been drinking as they kept rolling off of my cutting board and my dog kept trying to devour them.  Fiasco.  Plain and simple. And not my first one!

One of the most important challenges we faced - other than my bout with klutziness - was how to set up our assembly line in limited space.  My birthday present last year from my good friend and former colleague, Mr. V, a culinary cart, provided much-needed extra counter space.  In front of us, we had a large bowl of the prepared masa.  We had a large metal pot with the Chile Verde Pollo filling, spoons (my undoing), a large roasting pan, a bowl of Maria's homemade chicken stock, a bowl with the olives (what was left of them) and a plate for me. 

Now, Maria is an expert at making tamales.  She looks like a master pizza dough maker, only making tamales.  She flattens the palm of her hand, she places a husk, smooth, soft side up, then uses a spoon to slather masa over the front third of the tamale like she is spreading peanut butter.  She then places the filling in the center, folds one side over to the other, then over the original fold, and then folds the narrow end of the husk forward.  She efficiently and quickly makes a beautiful tamale packet.  I, on the other hand, in my first several attempts, flung masa all over the place, much to my little dog's delight, until I decided to use my fingers.  The spoon was just not it for me.  Not my friend!  While I was not quick and efficient, using my fingers - which Maria said was more traditional than spoons - was much better for me. I kept that small bowl of chicken stock beside me so I could dip my fingers in it in order for the masa to stay on the husk and not on my hands.  That strategy worked pretty well for me. 


Using my fingers was much better than the spoon for me. Doesn't that Verde Pollo filling look enticing?  Delicioso!


Another view of my handy work. 

After spreading masa over a third or so of the wide, flat part of the corn husk, we placed a spoonful of the verde chicken filling in the center of the masa. We folded the lower side over the filling, rolled it inward, then folded the top (or, from where I was sitting, the right side) over the left, then folded the narrow end up over the top.  I know this is repeated information, but I wanted to reiterate that below the photos. 

Now I have to tell you about another fiasco we had happen.  After we removed the corn husks and placed them in a separate bowl, it was time to put the steamer grate into that large pot you saw above. Maria got it in there, but it stuck below the lip it rests on.  I was able to partially lift it but not pop it out from where it was stuck.  Maria, always clever and smart, used one of my chopsticks to leverage it out of its wedged-in place. We had a good laugh about that, too.

With the screen firmly in the correct place in the large pot, the water boiling nicely, Maria placed the tamale packets, folded-up side down, onto the grate. 

 
 After that first batch finished steaming, about thirty minutes later, we plated a couple of tamales to try.  One a piece became four for me.  I was happily stuffed for the rest of the day.  It was so tasty, tangy, flavorful and warm.  It was perfect comfort food for a busy, but fun day with my friend. 

Sadly, we ran out of corn husks, so we could not complete a third batch of tamales.  Yes, a second, just like the one above, was repeated.  Such amazing aromas during steaming and delicious flavors upon eating!  Miss Maria wanted to offer a nearly vegan option, in which the filling included slivered and sauteed white onions and jalapeno chiles, and, to be the crowning glory over the onion-chile mixture, a sliver of mozzarella cheese (ergo the almost vegan version).  Here is a photo log of Maria working on that filling.  

 Maria cutting vegetables on my culinary cart!  I love it!


 Above: the onions and jalapenos before and after saute'.  


A section of one of the tamales.  The olive is incredible with the green chile and chicken mixture.  


Invite your friends and throw a tamale making party!  There are literally dozens of different fillings, from spices to fruits, to different meats and a plethora of different amazing flavors.  One of my favorites has the pineapple.  DeLish!  I have to tell you, however, I truly LOVE the Chile Verde Pollo tamales.  Love that tangy, rich flavor!  What a fun party idea, don't you agree?  Try this recipe. You cannot go wrong, and you will fall in love with it. I know I did.  Enjoy and Thank You for your time!


Sunday, November 24, 2013


Roasted Veggie and Salami Pasta

Among my favorite pasta sauces is a spicy Arrabbiata. I love the aroma and the taste of roasted vegetables in the sauce.  If you have not done this already, Arrabbiata as a pizza sauce is amazing.  You will love it.  In this dish, I used roasted vegetables to make a fresh, from-scratch sauce that is warm, inviting and particularly a cool autumn-winter favorite.  It is one of the simplest, least time-consuming sauces I have ever made.  Let's get started!
Starting line-up:
1/2 cup of your favorite salami  (I used Italian dry and Sopressata)
1 yellow or red onion, quartered
6 large cloves garlic, crushed and peeled
2 pints of cherry or grape tomatoes (washed)
1 Fresno chili
1 serrano or sweet Italian chili
2 tablespoons extra virgin olive oil
2 teaspoons Italian dry seasoning or, 2 fresh sprigs of oregano and 6 - 8 fresh basil leaves  (or both!)
salt and pepper
1 pound (for 4) of your favorite pasta or, 1/2 pound for two people
Parmigiano cheese to grate over the plated pasta

Preheat your oven to 400 degrees.  Toss the prepared vegetables in a bowl with one tablespoon of extra virgin olive oil.  Place the veggies into a cast iron skillet or an oven-safe skillet.  Season with salt and pepper. Place the oven-safe skillet into the oven and roast for about 18 minutes, until the tomatoes begin to pop open.  Your nose and ears will tell you, especially, when this process has occurred. 


Remove the two peppers and remove the stem and the seeds.  If you want your sauce extra spicy and hot, leave the seeds in.  This sauce is already smoky and spicy with the seeds removed, but I leave that up to you.  Afterward, place all of the roasted vegetables into your food processor or blender.  Puree the vegetables and set aside.  

Ready to add the rest of my roasted tomatoes!

Meanwhile, in a high-sided skillet over medium-high heat, add the other tablespoon of extra virgin olive oil.  Slice the salami into slivers and sear up in the hot oil. Reduce the heat to medium-low and add your blended sauce.  Bring the heat back up until the sauce boils.  Add the dry seasonings now. Stir thoroughly.  

Bring a pot of water to a boil and salt liberally. Add your pasta and cook about 8 - 12 minutes, until al dente, or, just before it is fully cooked.  Meanwhile, add half or so of the fresh basil, reserving a few torn leaves and a couple of whole leaves for garnish, if you like. 


Allow the sauce to simmer on low for about ten minutes, stirring occasionally to allow those wonderful flavors to marry well.  Your home will smell absolutely amazing.  If you live in an apartment, your neighbors will be jealous and give you a thumbs up as they walk by your place (as they did with me!). I had my windows open a little.  

When the pasta is done, save about a half cup of the pasta water and drain the pasta in a colander.  Turn the heat off. Add a small tab of butter to the large pasta pot, add the pasta with a few torn basil leaves (or fresh baby torn kale) back to the pot.  Grate a little parmigiano cheese over the pasta, then pour the sauce into the large pot over the pasta.  Grate a bit more cheese and using tongs, thoroughly mix the pasta with the sauce.  That little tab of butter will not only give the pasta mad flavor but it will give a gloss to your sauce and help it stick better to the pasta.  


About this time, I bet you wish you had smellaphone or smellaputer!

Plate, sprinkle with and garnish with fresh torn basil, and grate a bit more parmigiano atop the pasta.  That sharp taste will be throughout the pasta and sauce. Trust me, so good!  Now serve and enjoy!!!


 Enjoy this warm, spicy pasta made with all fresh vegetables and herbs.  Nothing better on a cool or cold autumn or winter's night.  Until next time, Thank You for viewing!


Sunday, November 17, 2013

Semi-Homemade Cheesy Kale Fried Ravioli with Roasted Red Pepper Sauce


Sometimes you get a craving for something warm, filling and beyond the norm of every day cooking.  After all, it is not every day that we spend a good hour or two carefully filling, folding and frying or boiling ravioli, as well as creating a flavorful meatless Monday sauce.  I was off last Monday, and upon the third day of my three day weekend, I had the time to devote to my own kitchen. I wanted to have a meatless Monday after a meaty dinner Sunday with my mom, and so, following my craving, I made semi-homemade ravioli which I stuffed with ricotta and parmesan cheeses and finely chopped fresh baby kale. I filled round potsticker sheets forming half circles and fried them in a mix of canola, grapeseed and extra virgin olive oil.  For my sauce, I used two large sweet roasted red peppers along with shallots, red onion, a Fresno chili and garlic which I'd roasted as well.  It made for a thick, flavorful sauce.  Let's get started with the recipe itself, alright?

Ingredients:
2 shallots, halved
1 quarter of a red onion
3 cloves garlic to roast, plus one to grate
1 Fresno chili
2 large sweet red peppers
1 package round potsticker (pasta) sheets
1 15 ounce container of ricotta cheese
2 tablespoons finely grated parmesan cheese
1/2 cup finely chopped baby kale
2 cups canola or vegetable oil (I used an oil that is comprised of canola, grapeseed and extra virgin olive oil).  
salt and pepper
1 small bowl water
*I added a teaspoon of dried oregano and a couple of fresh leaves of basil to my sacue

 
 Some of the fresh ingredients I used for my ravioli.


Preheat your oven to 400 degrees.  On a baking sheet or in an oven-safe skillet, add a little extra virgin olive oil to your roasting vegetables.  Season with a little salt and pepper and roast until the peppers' skins are blackened.  Remove the peppers and place them in a zip lock bag or a paper sack and allow them to steam.  This will allow the skins to separate from the flesh of the pepper.  It makes for easy skin removal.  Allow them to steam for at least fifteen minutes.  Remove the skins, seed and ribs. Cut the pepper flesh into thirds.  Add the peppers and the other vegetables to your food processor or blender.  Either will be fine.  Just make sure that the ingredients are not hot.  If they are hot, you will have a veggie-explosive (and pretty messily funny) situation. Process or blend the veggies until the mixture is smooth.  Puree is the setting you want.  At that point, add the mixture to a skillet over low heat and allow the mixture to reheat and for the flavors to marry. I also add a quarter cup of heavy cream and a teaspoon of dried oregano crushed between my palms.  For even more Italian flavor, tear up a couple of fresh basil leaves. The aroma will be fantastic!

While I am talking about the sauce, I made ravioli with a few different sauces, red pepper sauce among them.  For those sauces and a slightly different version of this one, please see my ravioli post from February 2013.  Thank you!

 Now that the sauce is slowly warming and those amazing flavors marrying, time to start on those ravioli!  You will need a flat surface and a non-skid chopping block or something stable like that.  You will need to dedicate a set period of uninterrupted time for this, as the sheets of pasta can dry out quickly and that can cause problems when you go to fry or boil.  I fried mine, in keeping with the wonton/potsticker wrappers, which can be used either way.

In a medium or large bowl, add the ricotta and parmesan cheeses, and mix together.  Add one clove of garlic, finely grated, and the half cup of kale, finely chopped. Season with salt and pepper.  Mix together thoroughly.  Now, position your bowl of water near your filling and folding station.  You may want to use a brush for this, but I used my fingers.  Fingers are my best kitchen utensils. And, as always, make sure they are always clean!!!  Add a little bit more than a teaspoon of the filling to the center of the wrapper round. Using your fingers, moisten the lip of the round liberally.  Fold the lip either toward you or away from you, whichever method is easier for you.  I began folding it away from me, but found that folding it toward me was much easier.  But, whatever is more comfortable for you.  


 You should be able to make 30 (thirty) ravioli.  Be sure to cover them with a moist paper towel or moist cotton towel.  When you lay the ravioli out on a plate or a pan, do not allow them to touch.  This is Very Important.  If they touch you may not be able to separate them, even by moistening further.  I was not careful, some of them touched, and I could not use them.  I lost five that way.  I learned my lesson: do not allow them to touch. Enough said.  

Meanwhile, have your oil heating over medium-high heat.  If you want to flavor the oil with garlic, smush a garlic clove and toss it in, skin and all, and then turn on the heat.  When it begins to sizzle, remove the garlic.  Your nose will tell you how wonderfully flavored the oil is!  The oil should be about 350 degrees. 

Add three ravioli and keep them separated. They will sizzle and may do pop and splatter due to the water we used or if some of the filling oozes out.  You may well want to wear a heavy apron during the frying time.  The ravioli will brown quite quickly, in less than two minutes.  Allow them turn golden brown and then turn them.  They will brown even further on the opposite side.  Total cook time should be no more than four minutes.  Nothing in the filling needs to cook, so you are essentially frying the outside and nicely warming up the interior ingredients.  Place them on a plate lined with parchment paper or, on a baking sheet with a rack over it.  You may want to place them in the oven at 200 degrees to keep them warm and crispy.  Frying upwards of thirty ravioli is a busy job, and can be take a bit of time.  

Tip:  If you are not going to fry up or boil all of your ravioli, they can easily be frozen.  Line the bottom of a container with parchment or waxed paper, place a layer of the ravioli atop the paper, carefully placing them so they do not touch, place another layer of parchment atop that, and create another layer.  You can remove them, partially thaw if you are going to fry them, or just place them in to boiling salted water to boil them. 

When you are ready to serve, add a dollop of the aromatic sauce to a plate, arrange the ravioli - whether you fried them, like I did, or boil them, as I did in my previous post - and add a little more sauce, if you like.  Top with a fresh basil garnish and enjoy.  I had fun scooping up the sauce with my ravioli.  You can always toss the ravioli in the sauce and add more parmesan or pecorino romano cheese. Whatever you are feeling!


I hope you enjoy this dish, as it was one of my favorites this autumn, thus far! 


Wednesday, November 13, 2013


Italian Grilled Cheese Sammy


One of The Most Go-To college student foods is grilled cheese sandwiches.  All you really need is to slices of bread, butter or margarine and cheese.  But what about kicking it up a notch?  Or 47?   How about adding a roasted red pepper, provolone cheese, smoked Gouda cheese, sopressata salami and Italian dry salami?  How about making a ricotta cheese and basil pesto spread?  How about crusting the bread with finely grated parmesan cheese?  Any college student or "townie" can make this very filling "sammy" and fully enjoy amazing textures and flavors reminiscent of Italy. 


Here is my starting line-up:
      For the spread
1 cup ricotta cheese
2 -3 tablespoons basil pesto 
1 tablespoon grated parmesan cheese
1 garlic clove, finely chopped or grated                                             

     Meat and Cheeses
Sliced Provolone 
Sliced Smoked Gouda
Sopressata Salami
Italian Dry Salami

     For the Sammy
Large slices of your favorite bread  (I use Sourdough)
1 large sweet red pepper, roasted, steamed, peeled, ribbed and seeded and sliced into strips
1 cup finely grated Parmesan cheese
1/2 - 1 stick of butter or margarine


Spread the ricotta-pesto-cheese mixture to the slices of bread, add some slices of the roasted red pepper to one side, the provolone to the other.  Arrange the cheeses as needed to cover the entire surface area of the bread.  I my case, breaking them into half moon shapes worked great.  Arrange the meats atop the cheeses to your liking.  Place one slice atop the other and thoroughly butter one side.   Add two or three tablespoons of parmesan cheese to the buttered side and press it down.  Place a skillet or grill pan or grill plate over medium-high heat.  When quite hot, place the sammy buttered-side down.  Reduce the heat to medium.  Butter the top side now, adding another couple of tablespoons of pressed in parmesan. Check after about four minutes to make sure the bread is golden brown.  The aroma of the parm, butter and bread and the melting cheese ought to be incredible about now.  When the bread is crispy and golden, carefully flip over the sammy.  Follow the above directions.  Remove the sammy when done, allow it to rest for a few scant minutes, IF you can!  Cut at an angle, arrange nicely, add some rich fruit or a green salad to your plate, and fully enjoy a savory, sweet, rich and aromatic experience!  


Tip:  If you cannot use butter or margarine, or if you do not have enough of one of those, add some mayonnaise to the butter/margarine. 


A Couple of Things I Have Been Up To....

Welcome, gentle readers, to another chapter of "What I Have Been Up To".  I reinvented my "Growed Up Mac and Cheese" which was great fun and very tasty!  Not only did I boil my farfalle pasta in chicken stock and Tecate beer, but I added Tecate to my roux.  Delicious!  In addition, I used both andouille sausage (one of my all-time favorites) and also Chipotle Chicken Sausage.  The combination of Cajun and Chipotle spice was quite complimentary.  Loved it.  I also added roasted Anaheim green chiles. My son devoured it, which was a great sign of success.  Here is a wedge of it:  


On a more comical note, I made Chocolate Decadent Cupcakes. That in itself, while messy, was not the comical part.  I decorated my cupcakes - with absolutely  no confidence - using one of those frosting bags (the technical term escapes me) and my frosting, which I wanted to look like a rose, turned out more like worm poop.  Yes, I am deeply shamed, but it is too funny to not share it with you.  Here, have a laugh.  It is ok.  I laughed, too.  Yes, indeed, this is the reason why I am not writing a baking blog.  Clearly. 

 
The best part was being able to use my last year's Christmas present, my KitchenAid hand mixer.  Made life a lot easier.  The last batch of cupcakes that I'd made (at a friend's house) I mixed by hand with a whisk, which took forever.  This time, it was quite fun. 

Thank you for enjoying this episode! Stay tuned for two more posts!  I have been quite busy in the kitchen!

Udon with Tamarind~Teriyaki Chicken

  Udon with Tamarind~Teriyaki Chicken and scallions and eggs These days families are super busy, especially if you have school age children ...