Sunday, July 9, 2017

My Great Virginia Beach Trip: Beach Fun, Climate Change and Food!


My Great Virginia Beach Trip:
Beach Fun, Climate Change and Food!

Early in June, I took a six hour flight to Virginia Beach to visit my dear friend, Morgan. When I stepped off the plane into the portal, I was shocked by the warmth (at 12:45am) and at the humidity. The day after, we had lunch at one of Guy Fieri's restaurants, which was excellent, by-the-way, and then toured the USS Wisconsin, a battleship, and oh my lord, I was soaking with sweat!  Mind you, I am used to California's relative "dry heat", just like they say in Arizona.  92 degrees f with 88% humidity was quite a climate change for me!  Later in the week, however, a series of thunderstorms made their way through, as they are today, and the lightning and thunder and downpours reminded me of Arizona's monsoons.  Very warm, very humid but great fun to watch and listen! 


While I was there, Morgan took me to a couple of different beaches.  One was a very popular beach and I enjoyed taking my photo with the iconic bronze statue of Poseidon.  


In addition, Morgan took me to another beach where I swam in Chesapeake Bay and Atlantic all at once.  I think, anyway.  The water was like bath water and we witnessed a small, beautiful wedding on the beach.  I swam and played in the water like a little kid.  


Those who know me well, know that I love the beach, which is my happy place. And now you know, too!

Now, as a daily Thank You to my hosts, I made dinner for my hosts each night.  I seared steaks and oven roasted potatoes the first night. Delightful, filling and we had leftovers for another night.  Simply seasoned with salt, pepper, garlic powder, dried rosemary and thyme and tossed in extra virgin olive oil, I oven roasted the potatoes (baby new potatoes cut in wedges) for 25 minutes at 400 degrees until crisp and golden.   


Isn't this the cleanest oven you have Ever seen?


I simply seasoned the ribeye steaks with salt and pepper and let them come to room temperature. I seared them and plated them with the potatoes after they had rested a few minutes and served. 

But first, I seasoned the oil in the skillet over low heat with crushed garlic cloves. 

The seared steaks resting.
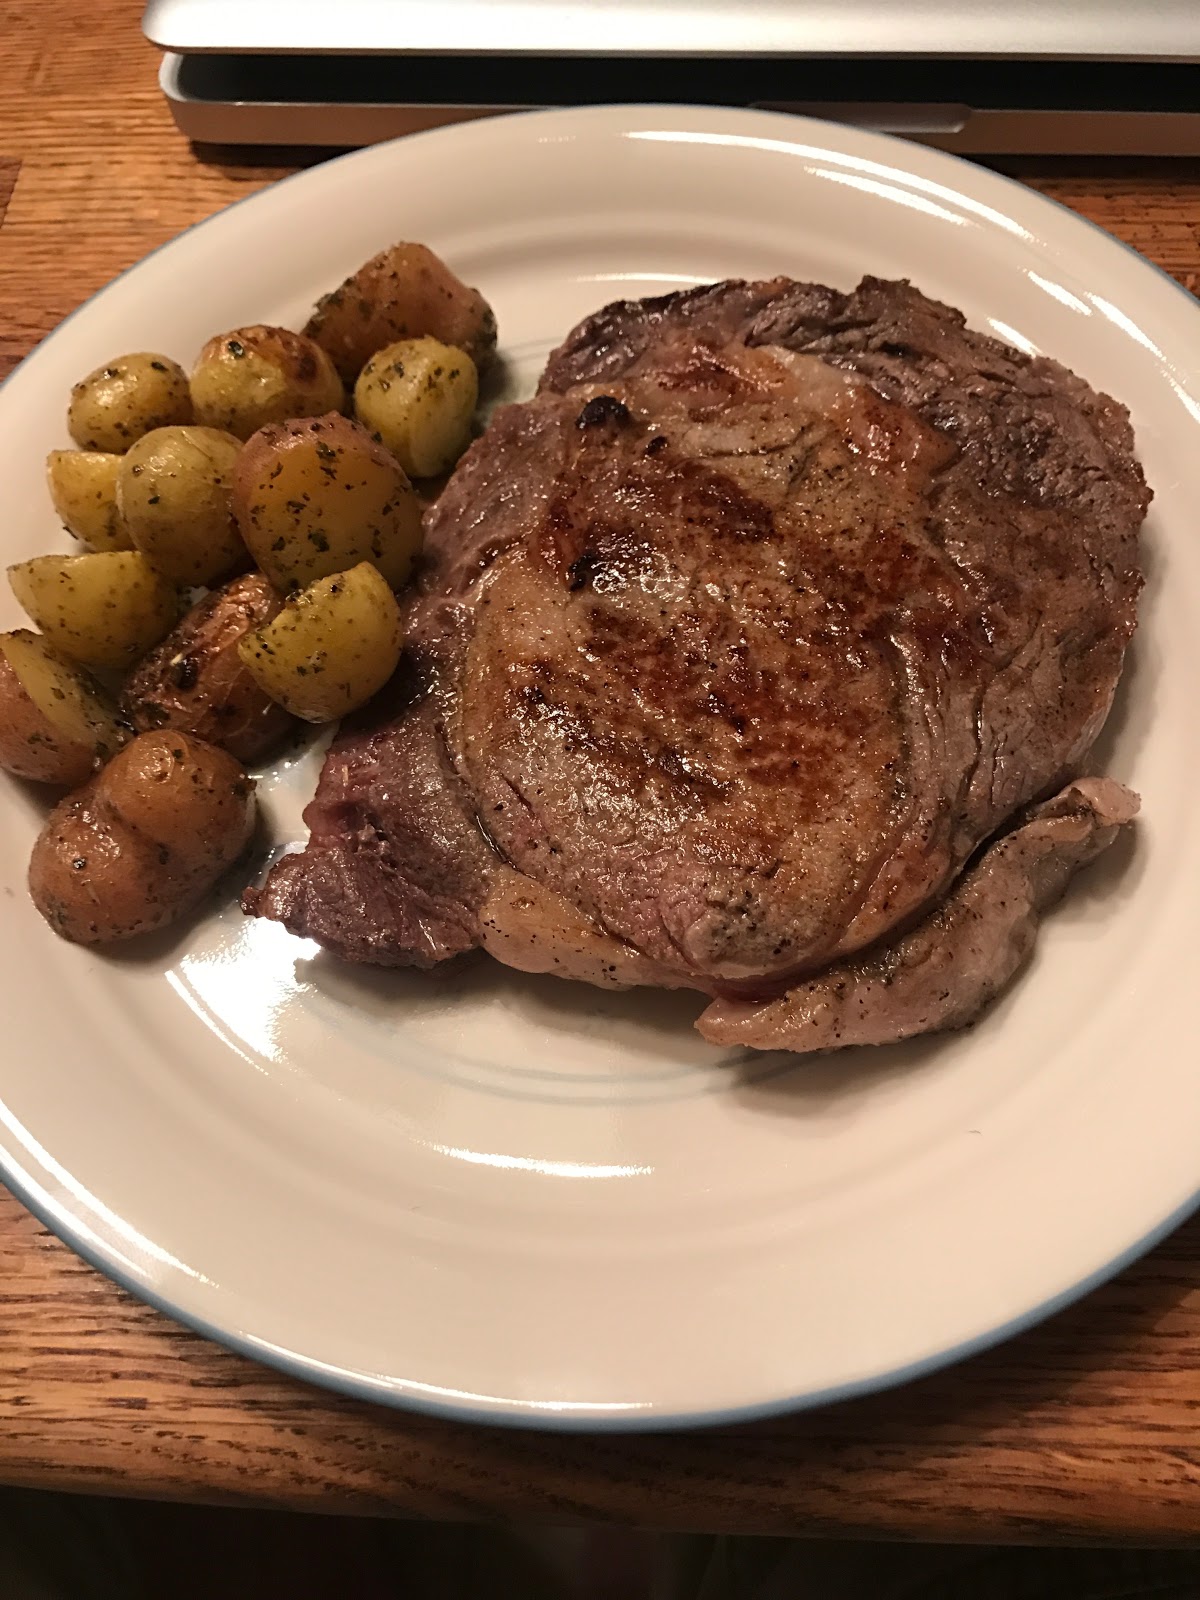

And Served!  

Next, Seasoned, Seared and Oven Finished Chicken Breasts with Mrs. M's rice pilaf and southern green beans. 


I only have two photos of this dish. I lost the photo of the plated dish.  So sorry!  I halved and quartered chicken breasts and seasoned them with evoo (extra virgin olive oil), salt, pepper, Italian dried seasonings and a little extra dried rosemary. I seasoned the evoo in the skillet with crushed garlic cloves over low heat, removed the garlic and raised the heat to medium-high.   I gave each piece of chicken a good sear until golden brown on both sides, then oven finished.  Tender and juicy interior and flavorful exterior crust is the delicious result. 


This was a tag team meal.  Mrs. M made rice pilaf (above, which smelled insanely delicious and tasted just as awesome!) along with green beans sauteed in butter and garlic. The aroma was just like My Grandma P made.  Simply amazing. 

I wish I had a plated photo for you.  I took one but seem to have lost that.  My apologies.  I am sure you can imagine how beautiful the plating was, chicken resting atop the pilaf and the beans cascading down the other side of the pilaf.  

Finally, my crowning dish!  

Steak Fajitas!


This dish, too, was a bit of a team effort.  Morgan and I purchased an onion, guacamole and salsa.  We already had the steak, leftovers from Wednesday night and, Mrs. M had halved red and green bell peppers left over from a recent meal.  Incredible pantry and team meal!

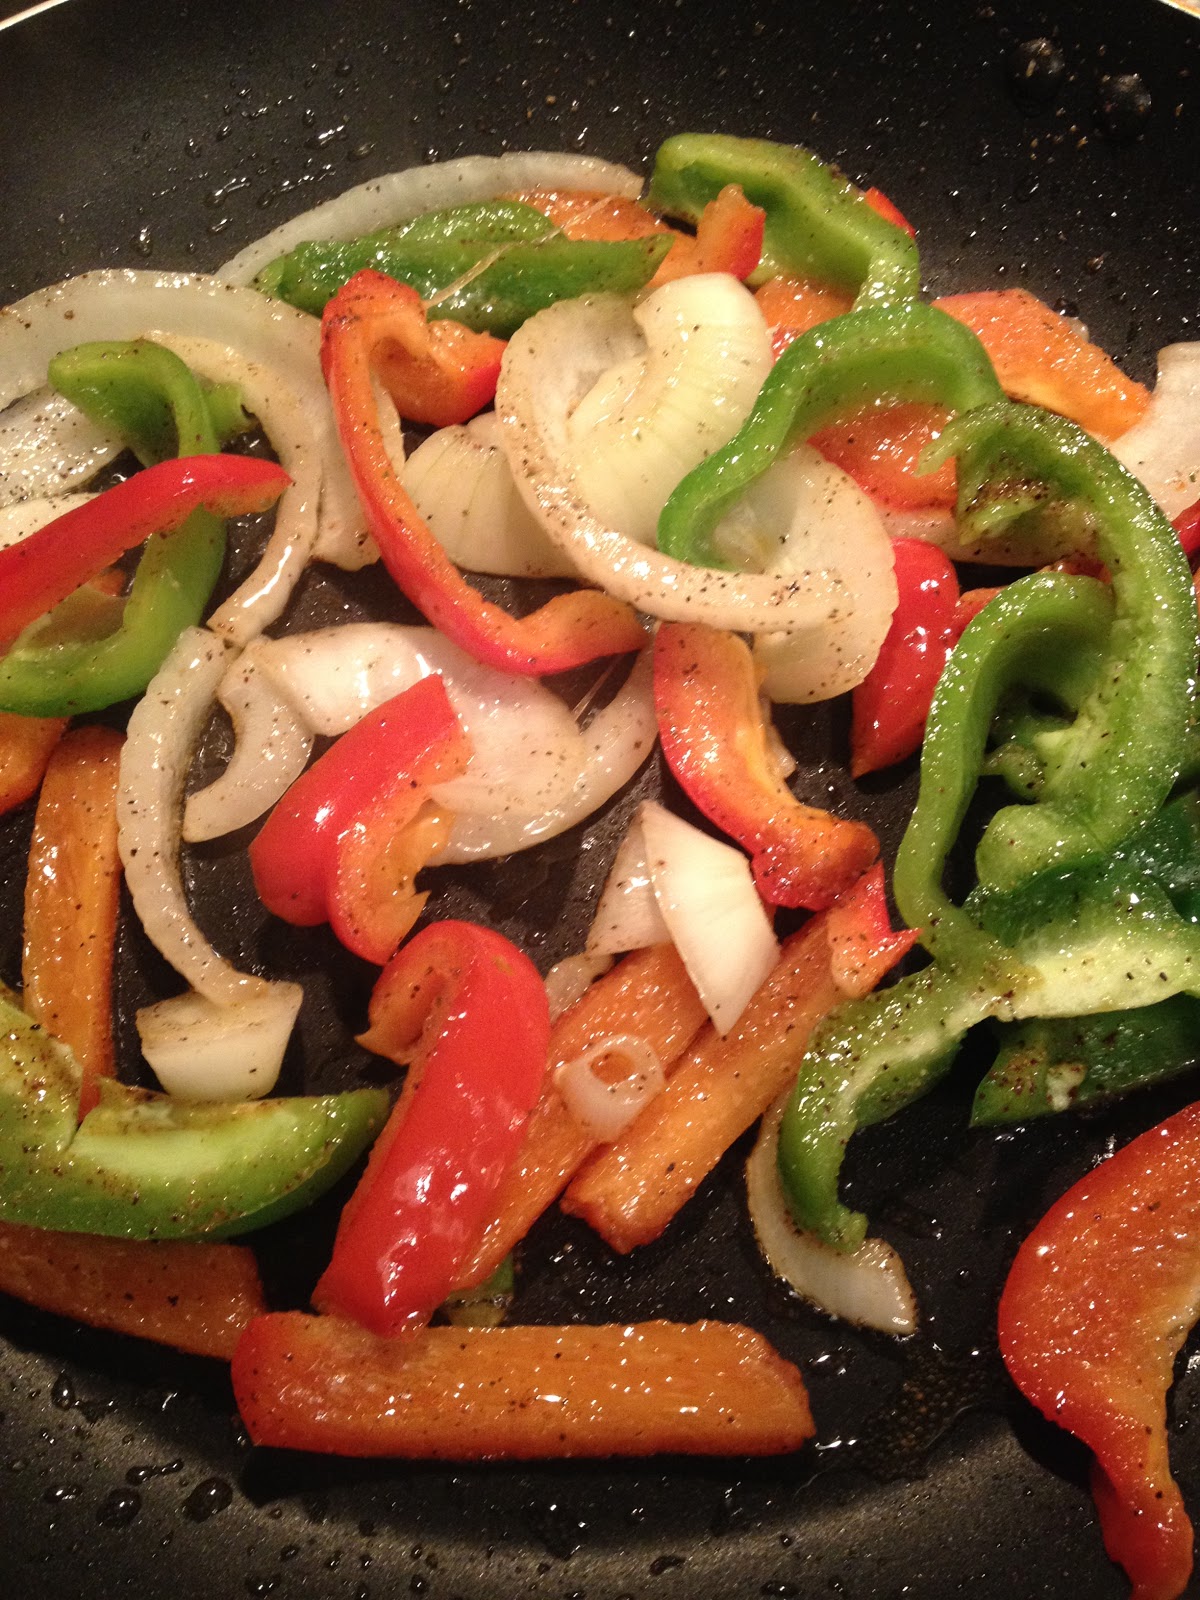
While I sliced the onion and steaks, Morgan sliced the peppers expertly. I added some evoo to mister skillet, the same skillet I'd been using all week, Thanks, Mrs. M, over medium-high heat and added the onions and peppers seasoned simply with salt and pepper. I sauteed those for three minutes to allow the onions to sweat their sweet juices and then I added the thinly slivered steaks. I added dried oregano, thyme, paprika and cayenne powder, just a half teaspoon of each.  We were going for mild that night, not on fire.  


I'd added the onions and slivered peppers first with salt and pepper.  Sauteed for three minutes over medium-high heat. 


Next, I'd added the slivered steaks and sauteed the mix until the onions were getting translucent, the peppers starting to soften and the steaks just a little pink.  


We'd added some of the fajita mixture to a flour tortilla (that was my choice, btw) with a dollop of guacamole and a couple of drops of salsa. All of this was put together in 30 minutes.  A true thirty minute meal!  

I hope you enjoyed my trip down memory lane.  I had a great time and loved cooking for my hosts. Y'all know me, I cannot go Anywhere without cooking!


As always, Thank You for your time, viewer/readership and consideration.  

Now! Go cook for someone you love!  


*Note: Coca Cola Company is not a sponsor of my humble blog.  This big chair was on the beach sidewalk.  


Wednesday, June 28, 2017

Beef Short Rib Tacos


Braised Beef Short Rib Tacos

One of my favorite cuts of beef is short ribs.  I mean, I love ALL ribs, but beef short ribs ranks right up there with ribeye steaks and porterhouse steaks with me. If you go through my five years worth of recipes, you will notice that I have used beef short ribs several times in several different dishes. And lo and behold, I found a way to incorporate beef short ribs in a taco recipe!!!  You are totally and completely surprised, I know.  😉

This recipe, however, is one of my masterpieces, and I'd be honored to share it with you all.  Thanks for reading!


Spice Rub Ingredients:
2-3 chile ancho pods, seeded and stemmed, coarsely chopped
2 tablespoons smoked paprika
1 teaspoon coriander seeds
1 teaspoon cumin seeds
1 rounded teaspoon garlic powder
1 rounded teaspoon onion powder
1 teaspoon thyme
1 tablespoon oregano 
1 teaspoon pasilla powder
1 teaspoon salt
1 teaspoon ground black pepper

Add all of the spices and herbs to a spice grinder or mortar and pestle, and grind the spices finely. Rub all sides of each of the beef ribs with the spices, reserving two tablespoons of it. 

Braising Ingredients:
1 14.5-ounce can beef stock, light sodium
1 large bottle of Mexican beer 
3 tablespoons pickled jalapeno juice
2 tablespoons pickled jalapenos, diced
2 cups water
2 14.5-ounce cans fire roasted tomatoes
2 tablespoons reserved spice rub
3 Mexican green onions, the whites sliced into discs and the greens sliced at a bias, reserve 1/4 cup of the greens
1 yellow onion, chopped
4 cloves garlic, smashed
4 tablespoons extra virgin olive oil

On to the fun part!

Bring the ribs to room temperature for about thirty minutes if you have had them in the refrigerator with the spice rub on them. 

In a Dutch Oven over medium-high heat, wait for the oil to ripple before adding the ribs, bone side down. Sear three minutes per side to get a good caramelization, or, crust, on the ribs.  Remove the ribs to a plate and set aside for now, and add the chopped yellow onion and crushed garlic to the pot; no need to add salt, as there is salt in the burnt on bits in the pot. Add some of the beer and, using a wooden spoon, scrape up the burnt bits as you stir the onions and garlic. Once the onions begin to soften, add the can of tomatoes, the beef broth, the water, stir well, and bring it to a boil. 


Sear the ribs on all sides. 


Add some of the beer to the pot and, using a wooden spoon, scrape up the burnt on bits of rubs.  This is flavor!


Add the Mexican green onions, less 1/4 cup of the greens, and the two tablespoons of reserved spice rub. Bring to a boil and stir.  Snuggle the ribs into the mixture as it comes to a boil. Add the remaining beer to the pot, again bring it to a boil. Reduce the heat and simmer 2.5 to 4 hours over low heat. It can be on the stove top or in the oven. I put the pot in to the oven for four hours. 


After the time you have allotted, remove the ribs, but be aware, they will be very soft and bones may have fallen to the bottom of the pot. The meat will fall apart and the aroma will be tantalizingly stunning. Remove the bones and discard and remove the rib meat from the membrane that keeps the meat attached to the rib. Discard the membranes. Remove as much extra unrendered fat as you can. 

Meanwhile, over medium heat, reduce the braising liquid by 2/3. This will intensify the flavors. This may take a good twenty-to-thirty minutes. 

Using two forks, shred the meat as you like it, chunky or finely shredded. I am a middle of the ground guy, a little chunky and a little finely shredded. Once the braising liquid has finished reducing, skim the fat off the top (this will be time consuming, sorry!) and from the bottom, scoop up some of the condensed, reduced liquid and add it to the shredded meat; about 4 tablespoons. This will add even more flavor to the meat!  Toss the beef in the liquid. 


Now, add meat and shredded cheese and your favorite garnishes (mine is fresh cilantro) to your tacos. Add your favorite sauce, if you wish to, and enjoy!


I hope you have enjoyed this recipe. I know it has a lot going into it, but it is not nearly as complicated as it looks or sounds. The flavors will be gratifying and intensely satisfying. Enjoy!  Eat up!

As always, my awesome readers, Thank You for your time and consideration! 

Now, go cook something for someone you love!

Martin
In-House Cook


Tuesday, June 20, 2017

Italiano Burger


Italiano Burgers

I had not planned to blog this burger, particularly because I had not taken many pictures, particularly of the process, but it turned out so well, I decided to write a mini-blog.  Enjoy!  This burger is pretty simple and full of delightful flavor. 

Ingredients:
1 pound ground sirloin
1 pound ground Italian sausage
1 package your favorite buns (I used onion buns)
1 teaspoon fresh or dried thyme leaves
1 teaspoon fresh or dried oregano
1 teaspoon dried basil or, 10 leaves fresh basil, six kept for the burgers as greens, the other four finally chopped, halved

Two tablespoons of dried Italian Seasoning.  🌿🌿🌿

2 tablespoons of Worcestershire Sauce 
2 tablespoons Apple Cider Vinegar  
2 cloves garlic, separated
1 teaspoon salt and pepper
1/2 teaspoon red pepper flakes
1 tablespoon tomato paste
1/4 cup extra virgin olive oil +3 tablespoons

 🌿 Add the dried or fresh herbs to the meats, along with the salt and pepper, pepper flakes, tomato paste, half of the chopped garlic, the dried Italian seasoning and half of the finely chopped basil. Mix thoroughly. 

To a bowl, add the 1/4 cup extra virgin olive oil, Worcestershire sauce, apple cider vinegar, half of the finely chopped garlic, the other half of the finely chopped basil, and the teaspoons of dried or fresh herbs.  Whisk well and set aside to allow the flavors to marry. 

Add the remaining three tablespoon of evoo to a large skillet over medium-high heat. Form the patties.  I have the meat in a bowl and I score it to the number of burgers (like a pie graph) I am making.  I made four large burgers.  

While waiting for the oil to ripple, making sure it is hot enough to fry in, I toasted the buns under the broiler. 

Add the burgers to the large skillet when the oil begins to ripple.  Leave the burgers alone for at least four minutes and enjoy the fragrance of the herbs as the burgers fry. Turn the burgers after four solid minutes and fry four more minutes. If you like your burgers well done, fry for six minutes per side over medium-high heat. Add mozzarella cheese to the burger tops once cooked on the second side and cover with a foil tent to melt the cheese. 

Remove the burgers and set aside. Open the toasted buns and put whatever condiments you wish. Add a drizzle of the herb sauce to the top and bottom of the burger and top with fresh basil leaves. 

Note the tangy herb sauce dripping off the burger. So flavorful!


The back side of the burger. OH look!  You can see me taking the picture below!  How embarrassing.  😊

I hope you enjoyed this recipe.  Sorry for the lack of procedural photos. I must get back into the practice of that, but as I had said, I had not planned to blog this.  It just turned out too nice not to.

Thank You for your time and consideration, as always.  Now, go cook for someone you love!

~Martin
In-House Cook

Friday, June 9, 2017

Cheese and Herbs Stuffed Chicken Breasts with Brown Rice and Veggie Cold Pasta Salad


Cheese and Herbs Stuffed Chicken Breasts with Brown Rice Pasta Salad and Veggies

Ladies and Gentlemen, chicken dinners do NOT have to be boring, but they also do not need to be complicated!  Most of you know that I prefer to work with chicken thighs, but for this dish, chicken breasts are essential.  This two part dish is perfect for summer dinners, for serving guests indoors or outdoors, for parties and reunions, which most often are planned for summers. It is also perfect because it incorporates fresh herbs and vegetables in both the chicken and the pasta salad, and, using brown rice rotini pasta, this is a perfectly healthy dish!

Prep time is about 20 - 30 minutes (if you are distracted by snacks and a cocktail) and cook time is 45 minutes.  

Chicken Breast Ingredients:
3+ nice sized chicken breasts
1+ cups mixed cheeses
     *I used mozzarella, sharp white cheddar and 
       parmesan
3 rounded tablespoons fresh flat leaf Italian parsley, sage, basil, oregano, rosemary and thyme (altogether)
1/4 teaspoon salt and pepper
3 tablespoons ricotta cheese or mayo
2-3 tablespoons extra virgin olive oil
non-stick spray

I used my favorite herbs and my favorite cheeses (although Fontina or Oaxaca would be perfect all by itself), and I encourage you to experiment and use herbs and cheeses you would love. 

Before I go on to the pasta salad recipe, I want to finish the recipe for the chicken.  

First, take a paring knife and, carefully, starting at the thick end of the chicken breast, cut a slit in the center of the meat.  Expand the hole a little right and left, interchanging the blade from side-to-side to expand the cavity all the way to the end. Continue with the rest of the breasts, simply salt and pepper both sides, and move on to the stuffing mixture.  

Once mixed, use your fingers or a tea spoon to generously stuff the chicken breasts.  Do not be stingy!  Some of the cheese is going to melt out so be sure to stuff the chicken generously. 


Cheese and herbs mixture

Once the chicken breasts have been prepped and stuffed, wrap with plastic wrap and place in the refrigerator for thirty minutes so the cheese can set; in that way, less cheese will melt out.  You could close the opening with a toothpick, if you wish. I chose not to.  

Next, Brown Rice Rotini Pasta Salad


I love cold pasta and potato salads. I do love a couple of warm salads, but I am very partial to substantial cold salads in summer that do not rely on wilting greens in summer heat.  I have become obsessed with brown rice pasta, which holds its shape in a vinaigrette, holds up longer than semolina pasta and it is healthy. Do not worry, I am still a semolina pasta hound, too!  I love it all! 💓

Now, let's get to this very easy recipe. As I said before, unless you are distracted by a cocktail, this will take very little time and the end result is a happy flavor explosion! 

Pasta Vinaigrette Ingredients
1/4 cup extra virgin olive oil 
2 rounded tablespoons fresh thyme, flat leaf Italian  parsley, oregano, basil and garlic, finely chopped
1/4 teaspoon salt and pepper, each
2 tablespoons Mirin
3 tablespoons Pomegranate Vinegar (or red wine vinegar)
2 tablespoons Worcestershire Sauce

Note, if you do not have fresh herbs, dried herbs for the vinaigrette as well as the cheese stuffing for the chicken works just as well. I love to use fresh, in-season herbs as much as possible. 

Combine all of the ingredients in a bowl and whisk together and chill in the frig until you combine the pasta and veggies. 

Meanwhile.......

Bring about four quarts of generously salted water to a roiling boil. 

On a clean cutting board, sliver a red onion or two shallots, finely chop a large or two small cloves garlic, finely chop flat leaf Italian parsley, sage and basil, and halve two pints of baby heirloom or baby tomato medley.  Finely chop scallion greens. Toss all into a large bowl. 

*Note: I also added a package of shredded broccoli and red cabbage to the salad to give it crunch and more healthy substantial greens. 

Add one pound, or, one package of brown rice pasta (your favorite; I used rotini) to the boiling salted water and stir to prevent the pasta from sticking to the bottom of the pot. Boil the pasta about ten to twelve minutes, a bit more than al dente. You will want the cooking process to stop abruptly, which is why I cook it a little more than al dente.  (Al dente is just about done). 

At this time, remove the chicken from the refrigerator. 

Drain the pasta and - although I have been taught never to do this, I want the cooking process to abruptly stop, as I mentioned a moment ago - rinse with cool water.  If you are worried about your tap water, pour chilled bottled water to rinse the pasta. The thing is, if you are on a timeline, you do not have all afternoon to chill the pasta tossed with the veg and vinaigrette; cool the pasta with water, despite it being a gastronomical no-no, and toss the pasta with the vegetables and vinaigrette, then chill as long as possible in the refrigerator. 

Preheat the oven to 375-degrees.

Now, add two or three tablespoons of extra virgin olive oil to a large skillet over medium-high heat. When the oil begins to ripple, add the chicken, stuffing end toward the edge of the skillet. Saute or sear for about three minutes per side or until it begins to form a golden crust. This will help keep the juices in while oven finishing. Repeat on the other side.  


Place foil into a baking pan, spray the lining with non-stick spray and oven roast for 40-minutes. Check the internal temperature; should be about 170-degrees or so.  And do not worry, as I said earlier, some of the cheese will melt out, but if you generously stuffed it, as I stated, there will be plenty of flavorful stuffing remaining. 

I safely plated the chicken over a healthy helping of the pasta salad, whole.  But in hindsight, I should have sliced it and served it atop the salad.  


I hope that you will try this delicious dish, either one or both!  It is far less complicated than it sounds.  It is perfect for dinner for a couple or for a family. It can be grilled (hot side then cooler side) or fully oven roasted.  

As always, I appreciate your time and readership!  

Now, go cook for someone you love!  

Martin
In-House Cook


Sunday, May 7, 2017

It's All About the Sides...About the Sides.....About the sides...Three Delicious Side Dishes!!!


Cuz It's All About the Sides, About the Sides.....

All of my posts since May 31, 2012, when I posted my very first recipe on this site, have been either a main protein or pasta of a meal, but I have never focused on sides much.  Today, this post is all about the sides.  Three of them, to be exact. First, pasta nests, next, new potato bacon-wrapped roses and finally, a fresh, zingy herb and tomato rotelle pasta salad. Let's just get to it, shall we? 

I first made pasta nests as a main dish, but I realized that this is quite a practical side dish and should be served with a protein, such as lamb, chicken or pork or a main vegetable.  I purchased linguine pasta nests at my local grocer.  I made a simple mix of onion, garlic and tomato medley (different small tomatoes I halved) and herbs. Now, when I first made this I tossed the aromatics and tomatoes with Italian sausage, garnished with crisped pancetta, shaved parmesan and herbs, but I realized then that this should be a delectable side dish without the sausage. It was great with it, but as a side dish, perfect as a sauceless pasta side. 


One pint fresh halved tomato medley, two cloves finely chopped garlic and half yellow onion, finely chopped; 4 rolled, chiffonade basil leaves, three fresh thyme sprigs and 3 fresh oregano sprigs, leaves stripped.


Bring a pot with about for quarts of water to a boil and liberally salt the water and stir.  Use tongs or a spider (kitchen tool) to gently add the nests to the water.  Let them be and do not tough them.  They should remain intact.  Let them boil untouched about eight minutes or however long your package says to cook them to al dente. Remove the nests when done and place the nests on a wire rack covered by a paper towel until to allow the extra water to drain. If you are not going to use them immediately, cover them with foil to keep the nests moist.  Try to use them immediately after they drain. 

Meanwhile, in a skillet with three tablespoons of extra virgin olive oil, saute the onion, garlic, flat leaf Italian parsley, salt and pepper until the onions are just translucent.  Add the tomatoes and a tab of butter. This will help add a sheen to the aromatics and tomatoes. Add the thyme leaves and half of the basil and stir.  This process should take no more than ten minutes, tops.  Next, plate the nest with the main protein and add a ladle of the saute over the top of the nest and garnish with some of the remaining basil and fresh shaved parmesan cheese. 


This is a photo of a nest with the saute including Italian sausage, crisped pancetta, aged balsamic drizzle, fresh shaved parmesan and chiffonade basil. Delicious as a main dish, fantastic and elegant as a side dish!

Now, on to the Rose Garden.....

While I certainly wish I could claim this as my own brilliant idea, I cannot.  I saw it on Facebook and decided to make it, myself.  Easy, flavorful and beautiful. Now, I did not follow the exact directions. I was under a time crunch and had to improvise a bit. This is what I did....

I took six round red new potatoes and washed them well.  I used a mandolin to slice the potatoes into thin discs.  My mistake was to shave them too thick. I had in my pantry a bottle of chimichurri sauce and poured a good cup of it into a bowl and retrieved a brush.  The original video recipe called for a fresh herb chimichurri with melted butter.  

On a cutting board used just for the rose process, I laid out six strips of hickory smoked bacon. I brushed each slice with the chimichurri and layered the potato discs like scales from one end of the bacon to the other and brushed them with the chimichurri and sprinkled with finely grated Fontina and parmesan cheeses. Before rolling, I preheated the oven to 350-degrees and sprayed a regular-sized muffin pan with non-stick extra virgin olive oil spray. 


I folded over the bacon and potato closest to me and tightly rolled it until the opposite end was met. Next, I took the rolled rose and placed it carefully into a sprayed muffin tin.  I repeated the process five more times until I had six roses.  Being my first time, they did not all turn out beautiful, but I was able to get a great photo or two. I had served these with my favorite ribeye steak. 

This one turned out beautifully. 

I baked the roses for twenty minutes until golden brown, but I have learned that thirty minutes is even better for crisping the bacon wrapper, depending on the calibration of your oven. Thirty for mine, for sure. 

In any event, allow the roses to rest a few minutes before removing from the muffin tin. Be careful when removing; use a narrow spatula to encircle the muffin tin and gently scoop out the rose and plate it. 


As I mentioned above, I served the roses with a seasoned and seared ribeye steak, my favorite steak. 


I love adding butter and fresh herbs to the skillet or cast iron skillet to baste and flavor the steak. 


***And Now, My Tangy Cool Pasta Salad***


I have had the pleasure - well, mostly - of tasting as well as making dozens of pasta salad recipes since the 1980's when I was a darn good griller.  I am, still, a good griller, but I had more time to grill back then.  I also had much more hair, an actual neck and a waistline, but it is all good and relative. 😏  This pasta salad took several years of trial and error, different ingredients, different pastas, different dressings.  My homemade vinaigrette dressing and fresh herbs and rotelle pasta have become my utter favorite. Let's get to it, shall we?

Ingredients
1 cucumber, partly peeled and sliced into small cubes
3 scallions w/greens, sliced at an angle
2 shallots, finely sliced into crescents
3-4 Roma tomatoes, seeded and diced
1/4 cup chopped flat leaf Italian parsley 
1/4 cup chopped cilantro
2 cloves garlic, grated
3 tablespoons parmesan cheese
1 pound rotelle or rotini pasta


Vinaigrette:
1/2 cup extra virgin olive oil or grape seed oil
3 tablespoons mirin
1 tablespoon Worcestershire sauce
1/4 cup red wine vinegar
1 garlic clove, grated
1 shallot, finely chopped
1 teaspoon salt and pepper
1 rounded teaspoon fresh thyme
1 tablespoon dried Italian seasoning
3 fresh basil leaves, rolled, finely chopped
1 tablespoon fresh grated parmigiano-reggiano
zest of one lemon and juice of half a lemon

The prep-work is the hard part and takes about twenty minutes. The rest is a breeze and when chilled and the vinaigrette allowed to marry with the pasta and the veg and herbs, the result is deliciousness on a grand scale. 


Once you have made the vinaigrette to your liking, reserve 1/4 cup of it.  Set aside in the frig. 

Bring four quarts of water to a roiling boil and liberally salt it.  Yes, you know......it is your only chance to season the pasta.  Add one pound of the rotelle or your favorite pasta salad pasta and cook just beyond al dente by a minute or two.  Strain and set aside to begin cooling.  

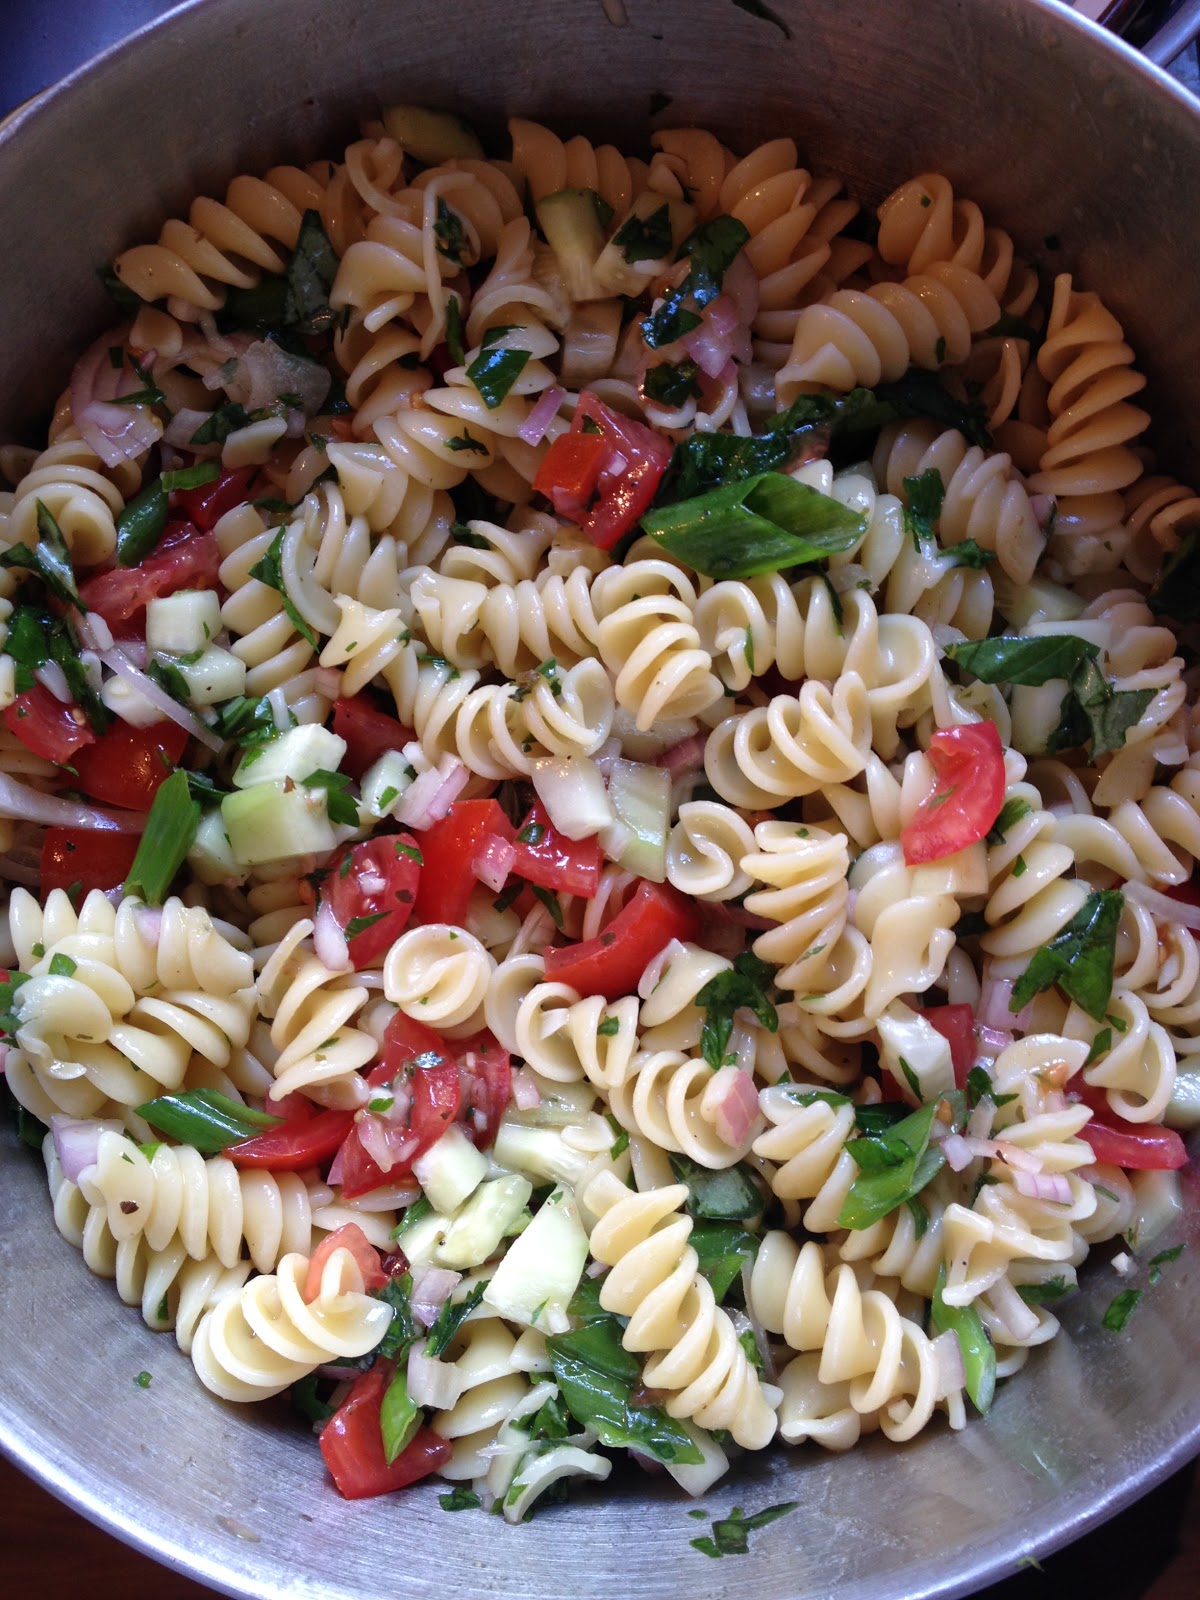
After about four minutes, use a spoon to toss the pasta to keep it from sticking.  I chose rotelle (though any tightly spiral pasta, such as rotini, works great) because its spiral collects the sauce and herbs very well.  Add the fresh herbs and veggies to the vinaigrette and stir.  Little-by-little, add a cup of pasta to the vinaigrette and veg and toss to allow the vinaigrette to coat all the pasta evenly. 


The longer you can allow the pasta to marry with the vinaigrette, the better.  The salad should cool in the frig for at least two hours prior to serving, but chilling for several hours would be best.  Even overnight.  That is why I reserved some of the vinaigrette. I add it to the salad shortly prior to serving and toss it again to freshen it up a bit. Adding a drizzle of evoo is a delicious way to brighten up the salad, too!


I served this salad with a delectable, savory, cheesy burger. 


  I hope you enjoyed this rather rambling blog post, for which I am grateful for your attention and time!!! I hope you have formulated some ideas for sides and have been inspired by one or all of these recipes.  Make them your own and enjoy!  

Now, go cook something for someone you love!❤ 


Udon with Tamarind~Teriyaki Chicken

  Udon with Tamarind~Teriyaki Chicken and scallions and eggs These days families are super busy, especially if you have school age children ...