Monday, August 27, 2018

Rustic Homemade Rice Pilaf with Chicken Thighs A One Pot Wonder


Rustic Homemade Rice Pilaf with Chicken Thighs
A One Pot Wonder

It has been a real long day, you are exhausted, but your food and every other budget has been met or exhausted, so there is no going nor ordering out.  Your pantry is nearly bare but you do have a couple of different types of rice, some fresh cilantro greens, fresh onion and garlic still. The sink has dishes in it already, and you are not in the mood to add several more to it. So how about a one pot wonder?  I've got just the dish for you!

I was pretty much explaining my own situation the other day and I refused to use more than one pot or skillet. I actually used a high-sided skillet (my favorite) and it turned out fantastically. While I considered it an experiment, it really was one of those important pantry meals. Teachers, at least in California, are paid once per month. The last week of the month - particularly for single teachers - can be intensely financially lean. This was one of those miracle experimental pantry meals. 

Let me stop storytelling and get to it.  The great thing about this dish, other than the aroma and flavors, is the minimal ingredients list and it can be prepped and cooked in just under an hour.  Let's get to it, shall we?

Ingredients:
2 cups rice (remnants, or your favorite)
1 onion, chopped
4 cloves garlic, finely chopped
1 box or 14.8-ounce can chicken stock
1 - 1/2 cup water
salt and pepper
1 tablespoon oregano
fresh cilantro leaves, one bunch, torn
1 tablespoon smoked paprika
(I also used a tablespoon Tikka powder)
4 - 6 chicken thighs
Feta or parmesan cheese
4 tablespoons extra virgin olive oil

Preheat the oven to 300-degrees.

Add the evoo to a high-sided skillet or oven-safe pot over high heat.  When the oil ripples, add the chicken thighs, seasoned simply with salt and pepper, skin side down.  Turn after four minutes; if the thigh does not pull away immediately, allow it sear a little longer, then turn.  Reduce the heat to medium. Remove the chicken after three or four minutes.  Bring the skillet with the chicken renderings up to high heat and again, when the oil ripples, add the onion and garlic.  Saute for three minutes and add rice and cilantro and stir continuously for several minutes to toast the rice. Add the onion and garlic and continue to stir vigorously, about four more minutes. 


Add the chicken stock and water and stir until the mixture begins to boil.  


Snuggle the chicken thighs, skin side down, to the liquid in the skillet. Add the seasonings and gently stir or fold in.  


Place the skillet into the oven, uncovered, and set the timer for forty-five minutes.  Remove the skillet after the timer goes off and check to see if the rice is finished.  Tip:  White rice finishes during that time frame easily, but, with the extra water, wild brown rice will finish nicely, too.  If need be, turn the heat to medium-low and allow the moisture to evaporate further. What an amazing aroma you will have in your kitchen!

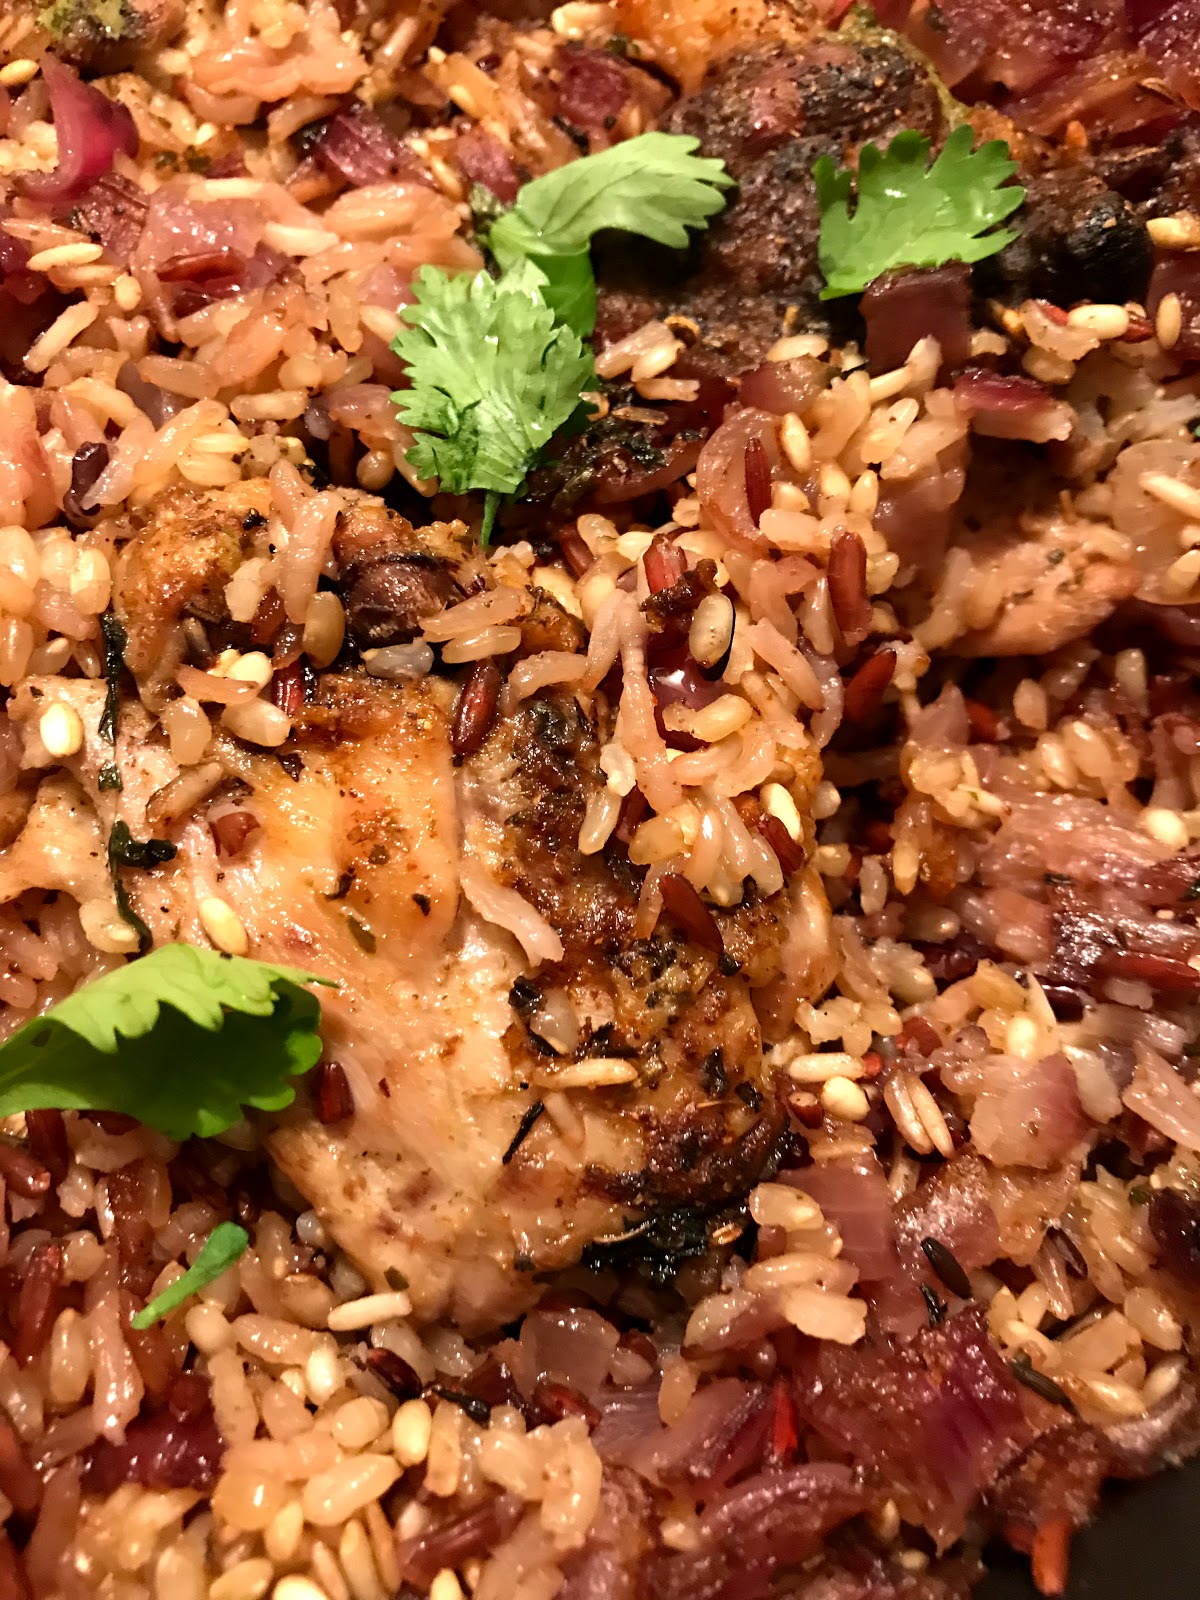

Remove the chicken and plate however you wish.  I used a bowl.  The chicken thighs I'd used were very small; tiny, in fact!  Any chicken will work very well with this dish.  The flavors are incredible!  I also added Feta to the bowl and some fresh cilantro leaves for garnish and flavor.  I also realized, while eating, that I could easily turn this into a fantastic fried rice with egg! I could also stuff bell peppers and bake, and more!  Make any leftovers your own!


I added Feta cheese to the skillet just prior to serving, as well as in the bowl.


Chicken and the Pilaf in a bowl with Feta and Cilantro leaves as flavorful garnish.  

Delish Dish!

As always, Friends, Thank You for your visit to my humble page and for your time and consideration!  

Now, Go Cook For Someone You Love! They will thank you and love you for it.  Now, Go!  Shoo!  Get your cook on!

~Martin
In-House Cook


Saturday, August 25, 2018

Bistro Burger with Seared Short Rib and Oven Roasted Bacon-Wrapped Baby Potatoes


Bistro Burger with Seared Short Rib and Oven Roasted Bacon-Wrapped Baby Potatoes


Last weekend you seared and braised beef short ribs in your slow-cooker for pasta and tacos.  You had a tiny bit left over and froze it. You have a ton of ground beef to use and some Baby New potatoes and leftover bacon from breakfasts.  Here's what you do....Burger Mania!

Please note, if you do not have any leftover short rib meat, no need for this extreme***.  Of course this burger can be made with no short rib meat or, you can add something else, such as caramelized soppressata or bacon.  I was going for an Italian theme with this dish, and had I had prosciutto on hand, I would have wrapped the baby potatoes in that.  

Now, let's get to the recipes. You can serve the burger with any side, and the side featured in this recipe is perfect for chops, steaks, poultry.  It is a bit elegant and insanely flavorful. 

Burger Ingredients:
2 pounds of ground beef (I use 93% lean)#
1 small can fire roasted ground green chiles, diced
***Any leftover beef or salamis you may have
1/4 grated red onion
1 clove garlic, grated
2 tablespoons dry Italian seasoning, 1 teaspoon separated
salt and pepper, 1/4 teaspoon each
Sliced Fontina cheese, two per burger
buns, your favorites
eggs# this recipe serves 4-6 people
sprinkles of smoked paprika for the eggs


Bacon-Wrapped Rosemary Baby Potatoes:
2 pounds baby potato medley (or baby New potatoes) #serves 4-6
1 pound bacon, each slice halved
fresh rosemary sprigs or leaves for rolling potatoes
3 tablespoons vegetable oil
1 tablespoon smoked paprika
1 rounded tablespoon garlic powder, or ground
1 teaspoon dry Italian seasoning (see burger ingredients)
fresh rosemary for oven flavor garnish and serving garnish


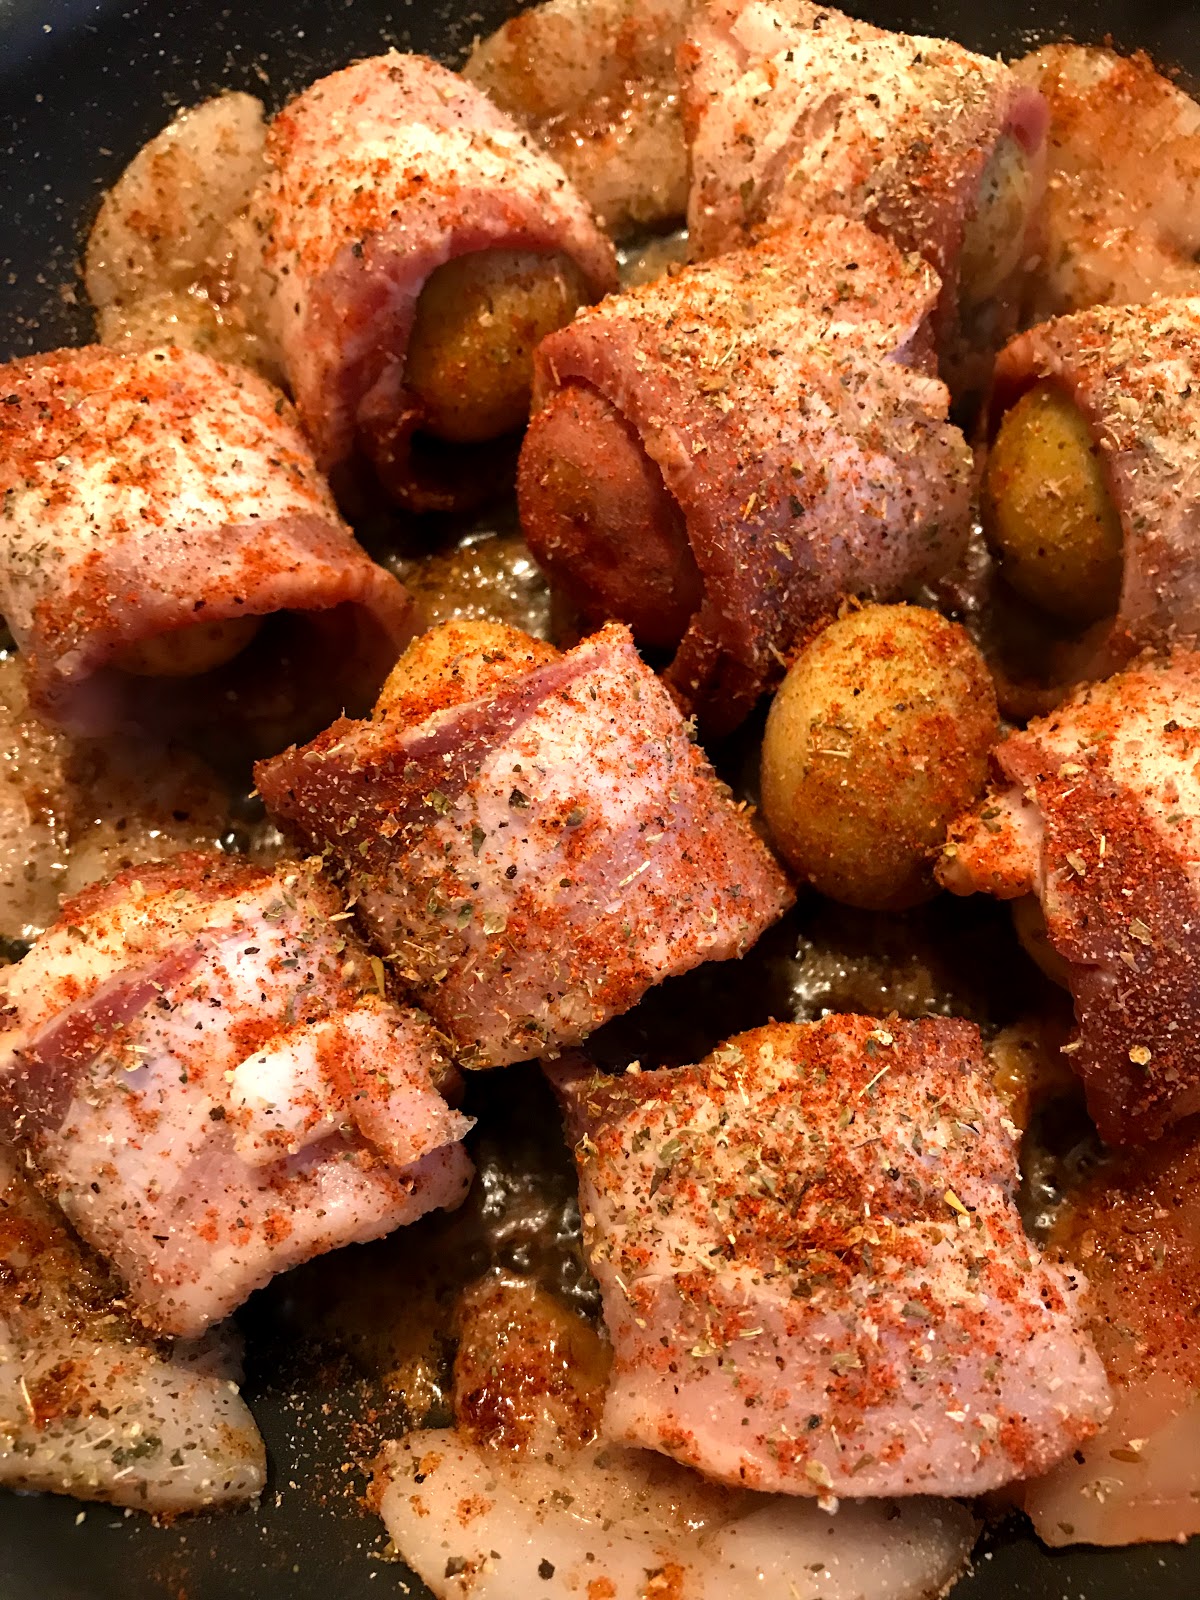
Bacon-wrapped baby potatoes wrapped in halved bacon slices and seasoned, oven ready! See directions below!

Bacon Wrapped Baby Potatoes

Preset the oven to 400-degrees

Wash and rinse the baby potatoes in a colander and let them dry. Meanwhile, slice a pound of sliced bacon into halves.  Set aside.  Add three tablespoons of vegetable or grape seed oil to an oven safe high-sided skillet.  

On a cutting board, lay out a half slice of bacon. Add some fresh rosemary leaves to the bacon. Roll a baby potato into a round and place it bacon end down in the high-sided skillet. Once all of the potatoes are wrapped, sprinkle them in the skillet with the spices as noted above. Add larger fresh sprigs of rosemary to flavor the bacon and potatoes and provide an incredible aroma. Oven roast for 25 minutes.  


They come out of the oven crispy and flavorful. 


The Burger

Add the ground beef to a large bowl.  Add the onion, garlic, Italian seasoning, salt and pepper. Using your best kitchen tools, your hands, mix everything together thoroughly. You do not want the fat to stick much to your hands; if it does, you are overworking the meat.  Be gentle. 😉

Score the meat to separate equal sections for the patties.  Form each patty and set aside. 

Add 3 tablespoons vegetable oil to a large skillet over medium-high heat. When the oil ripples, add a batch of burgers to the skillet. Flip in about four minutes and caramelize the other side.  Reduce the heat to medium. Add two slices of Fontina cheese per burger.  Create a foil tent and place it over the skillet. This helps the cheese melt uniformly. 

The Eggs

I have a little single egg fryer and love to use the silly looking thing.  It makes for perfect eggs every time!  My Aunt Mona gave it to me and I truly love the thing! It is non-stick coated already but I add a tiny drizzle of evoo over medium heat.  For this burger, I used two or three eggs per burger because the eggs I had purchased were real small.  I almost thought they were quail eggs, they were brown and tiny.  I sprinkled a little smoked paprika atop the eggs.  Delish, provides a little smokey heat. 


In a small skillet, I crisped up my leftover short rib shredded meat.  I had used it for sandwiches and tacos and froze the little bit I had left; it topped four burgers. 

I put the burgers together with Chipotle mayo, mustard whisked with a little Italian dressing (also leftover), added green chiles to the top bun, topped the burger first with short rib meat, then an egg, then the bun.  Bottom bun had the chipotle mayo condiment.  I served with a few bacon wrapped potatoes and garnished with fresh thyme and rosemary. 


I love how the Fontina oozed all around the burger, like a snug blanket. The gentle tang of the Fontina was a subtle delight amongst the Italian flavors, the smokey flavor and crispy of the egg and the Latin, heated flavors and aromas of the short rib meat. The potatoes had a savory, salty crispy bite, and the potato itself was almost creamy and took on the rosemary, garlic flavors.  I sure struck gold with this dish!

As I said, the potatoes could be served with any dish, any potato. 


As always, Thank You for your visit, your time and consideration. I appreciate your visit to my humble site. 

Now, please, Go Cook For Someone You Love!

~Martin
In-House Cook


Giant Rib Steak with Garlic Cheesy Smashed Potatoes and The Case of the Writer's Block


Giant Rib Steak with Garlic Cheesy Smashed Potatoes and The Case of the Writer's Block

I had started this blog post after a truly delicious meal of steak and mashed potatoes, and, not featured, store-bought fruit cup.  But no sooner had I simply posted the photo, above, and the title, I lost all ability to think this deliciously simply recipe through. Some three weeks later, here I am, trying again.  Writer's block is a strange brain-fello.  You can find motivation to go to work, to love it, to love your pets and devote loving time to them, to your garden, but after writing eight simple words, boom!  The thoughts and motivation disappear.  Boggles my mind. 

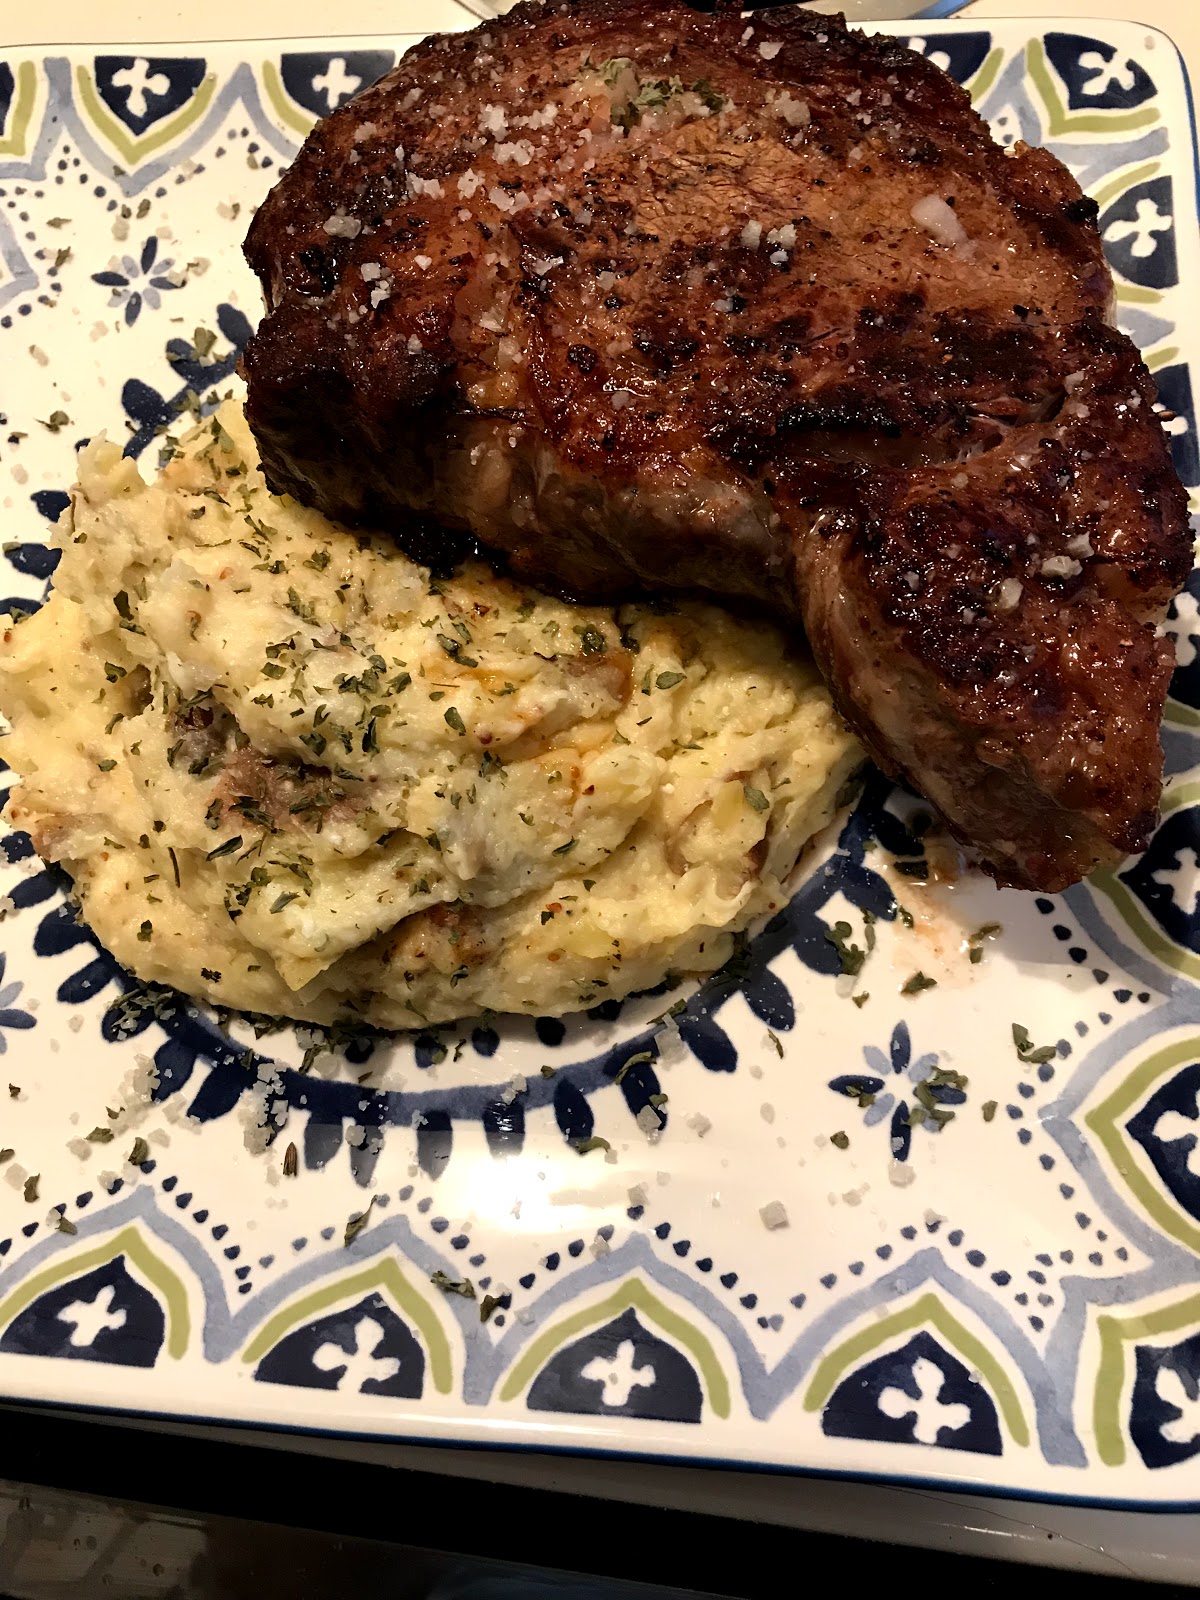
I am back, however, fully ready to share my garlic, cheesy smashed baby potatoes. Oh yeah, and a huge, thick, amazingly tender and juicy rib steak, seasoned, seared and oven finished low and slow. 

I'd simply seasoned the steak on both sides with salt and pepper and let it come to room temperature. 

Meanwhile, I washed and chopped 1.5 pounds baby Yukon gold and New potatoes into fourths; most of them, as some were small enough to halve.  I covered the potatoes with water and brought the water to a boil.  I then seasoned the boiling potatoes with sea salt and two smashed cloves of garlic.  

I added three tablespoons of vegetable oil to an oven-safe skillet over high heat.  I also set the oven to 250-degrees bake.  When the oil began to ripple, I added the steak and began the searing process.  After four minutes, I turned the steak and reduced the heat to medium. After four minutes I'd placed the skillet into the oven for eighteen minutes. 

The potatoes will have been boiling for about twenty minutes and should be ready by now.  Use a spoon or a fork to check for softness of the wedges. 

Next, I had drained the baby potatoes in a colander, added four tabs of butter to the pot over low heat along with two cloves garlic, grated. I added the potatoes to the pot and used a wooden spoon to stir.  I added 3/4 cup of buttermilk, a hefty tablespoon of dried oregano and level tablespoon of dried parsley flakes and another two tabs of butter, salt and pepper. I used a potato masher to smash the potatoes.  After a good arm workout, I added a cup of Italian cheeses (provolone, mozzarella and gouda, all grated) to the smashed mix and folded in the cheeses. 

I rustically placed a mound of smashed potatoes onto the serving plate and, after having removed the steak skillet and allowed the steak to rest on a cutting board, placed the steak partly over the potatoes.  


It was not until after I'd given up on trying to write this that I realized some things that I Should have done to make the dish vastly better.  One, I should have sliced the steak and should have made either a buttery sauce with fresh parsley or an herb chimichurri. I realized just what a romantic dish this could be for two!  Next time, I will do this and I will write an addendum to this post. Two, I should have roasted carrots with bacon and garlic to serve with this dish, as the colors would have been truly complimentary and would have brought beauty to the plate.  


Regardless of the lessons I have learned, this was a lovely dish.  I finished the steak with Celtic Sea Salt and the potatoes with a sprinkle of dried parsley flakes. All-in-All, it was a fantastically delicious dish and, best of all, maybe, depending on who you are, I got my writing mojo back!!!

As always, Thank You for your visit and support!  I am sincerely grateful for your visit!

Now, Go Cook For Someone You Love!

~Martin
In-House Cook


Sunday, August 12, 2018

Stuffed Bacon Wrapped Chicken Thighs with Cherry Prosecco Compote


Stuffed Chicken with Cherry Prosecco Compote

There are a million stuffed chicken thigh or breast recipes out there, and while I have written several, myself, I think I have outdone myself this time!  I have taken a basic recipe - stuffing chicken thighs and wrapping it with a strip of bacon - but it is the sauce, or compote, which is a closer definition for it, takes center stage here.  There is a delicate and wonderful balance of sweet, tangy, savory and salty.  

This is an elegant dish, served with mashed potatoes or/and  roasted broccoli.  Rice or couscous, Caprese salad could easily fit with this dish. This simple and sensationally flavorful meal is perfect for date night!  Anyone can, really, regardless of their experience in the kitchen, make this dish.  Come on, let  me show you how!

Ingredients

6 boneless, skinless chicken thighs
6 slices of bacon
2 ounces goat cheese
6 sprigs fresh or dried rosemary
1 tablespoon Herbs de Provence
1/2 teaspoon salt and pepper, each
3 tablespoons vegetable oil

Cherry Compote Ingredients

1/4  grated red onion, the rest sliced into crescents
2 cups pitted cherries
1 12-ounce bottle Prosecco
2 full tablespoons honey
1/4 cup balsamic vinegar
1 lemon, zest and juice
1/4 cup water
1/4 teaspoon pasilla chile powder
1 tablespoon extra virgin olive oil with pinch of lemon zest


In a sauce pan, add one tablespoon of evoo with a pinch of lemon zest over low heat. Add the water and 1 tablespoon honey and bring to a boil.  Stir to incorporate. Add the cherries, the entire bottle of Prosecco, the remaining honey, the grated onion, the balsamic vinegar, lemon juice and remaining zest and the chile powder.  Stir vigorously until the mixture boils.  Reduce the heat to low and simmer, uncovered, for one hour.  The sauce should reduce by half.  The aroma will be insanely fantastic. 

Now, while I enjoyed the compote, or sauce, as I called it, the lesson I learned would be to reduce it further and then, when cooled, process it smooth.  That would have a beautiful sheen to it, a velvety texture, but I wanted it to be chunky; I wanted the cherries to take on the Prosecco flavor.  

Cherries simmering in the compote mixture. 


While the cherry compote is simmering away, use a separate cutting board and paring knife for the chicken. Lay out each chicken thigh and each bacon slice.  Use the paring knife to gently slice open the thicker part of the thighs.  I use chicken thighs for this, pretty strictly, because it maintains its flavor and moisture better than chicken breasts in a similar dish. I used a tea spoon to scoop the goat cheese (I used a Davenport, Calif. goat cheese rolled in chives), place it on the thicker side of the thigh, open side up, then I added a fresh-cut/home dried rosemary sprig to each complete thigh.  I rolled the thighs up, starting at the larger end of the bacon.  


Prior to rolling in the bacon, I'd added the red onion crescents to a high sided oven safe skillet with the vegetable oil.  I had also sprinkled the Herbs de Provence and salt and pepper over both sides of the chicken thighs before stuffing and wrapping. 

I set the oven to 400-degrees.  

Once all of the thighs had been stuffed and bacon-wrapped, I placed them onto the onion crescents in the skillet.  I placed the skillet into the oven, then immediately reduced the heat to 350-degrees.  I set it so hot first, so the bacon would begin to render its fat and quickly tighten around the thighs and keep the cheese inside. 


Set the timer for 45-minutes for small thighs, one hour for large thighs.  Mine were very small.  I added the rest of the dried rosemary sprigs atop the bacon-wrapped thighs for additional flavor.  It sure did provide an amazing aroma in my little kitchen while roasting. 

Once done, I allowed the thighs to rest a few minutes.  I plated a thigh and spooned on some of the Cherry and Prosecco Compote.  That aroma, too, was fantastic!  The combination of the tangy goat cheese, the salty bacon, the sweet and tang of the Cherry Compote was a party in my mouth.  One of those "Get in Mah Belly!" moments!

I garnished with tiny basil leaves which I thought added beauty and a little flavor hint. 


Lesson I learned:  I should have reduced the Cherry Compote another fifteen or so minutes so as not to be so loose. I mentioned above, too, that I also could have processed this smooth.  Had I served with it mashed potatoes, I definitely would have done so, to add elegance to the dish.  And, Be sure to remove the rosemary sprig so as not to chew on it.  


As always, I am Thankful for your visit.  I hope your try this dish and make it for someone you love.  Food is love, like music, which can give you much happiness and push away negative feelings from a bad day.  

Thank You!  

~Martin
In-House Cook


Sunday, July 22, 2018

Beef Short Ribs for Multiple Meals


Beef Short Ribs for Multiple Meals

Beef short ribs are among my favorite cuts of meat to sear and braise. Baked, braised or grilled, beef short rib meat is marbled with fat and so is delicious, soft and quite moist. It also takes on incredible flavors, whether braised in stock, wine or beer, or something else, and they go exceptionally well with myriad vegetables.  That is why I began thinking about it as a "Multiple Meal" meat, so this post is about how I make beef short ribs, Mexican style, that can be made into various dishes.  IF you scroll through my recipes on this site, you can find a recipe where I braised beef short ribs with wine, also an amazing recipe, my birthday dinner, served with vegetables and garlic mashed potatoes with a red wine reduction sauce! Delish!!!

Now, let's get to this recipe. 

Ingredients
6 beef short ribs
2 bottles Mexican beer 
1 large red or yellow onion
six cloves garlic/ 3 whole, the rest grated
2 tablespoons tomato paste
2 14.5 ounce cans fire roasted tomatoes
2 fire roasted Anaheim green chiles, diced
4 tablespoons vegetable oil

Spice Mix
3 tablespoons smoked paprika
1 tablespoon cumin seed
1 tablespoon granulated garlic
1 tablespoon granulated onion
1 tablespoon coriander seed
i tablespoon dried thyme
salt and pepper, teaspoon each
4 chile ancho pods, stemmed and seeded


Toast the spices and pods in a skillet over Medium-low heat for several minutes. Turn the chile ancho pods after five minutes. The aroma is the spices' flavors waking up. That is when they are ready to be processed in a spice grinder or molcajete, or mortar and pestle. 


The aroma of this spice blend is indescribably gooooood!!!

Preheat the oven to 259-degrees. 

Take out and open the package of short rib meat. While it is coming to room temperature, bring a cup of water to a boil in a small sauce pan and add the stemmed and seeded chile ancho pods to it and cover. After fifteen minutes, when the pods are reconstituted, remove and add to a small processor along with three tablespoons of the water in the sauce pan. Add three cloves garlic and a teaspoon of the spice blend. Process until pasty. Set aside. 


Now, over medium-high heat, add four tablespoons of vegetable oil to a Dutch oven or high-sided oven-safe pot.  Add the spice rub on all sides of each beef short rib and, when the oil begins to ripple, add the ribs, bone side down and sear on all sides until a good caramelized crust forms on all sides. This will take about or less than ten minutes.  You just want a good crust on the rib meat, but not cook them all the way through. 


When done, remove the ribs to a plate. 

Next, add a couple of ounces of the Mexican beer, and, with a wooden spoon, scrape up the browned bits off the bottom of the pot.  Add the onion and garlic and saute three minutes. Add the canned tomato products, the roasted green chiles and the chile Ancho paste.  Saute to combine and add the remaining beer.  Bring to a boil and snuggle in each short rib, bone side down again.  


Add two tablespoons of the spice blend and season the braising liquid.  Bring it back up to a boil and then reduce the heat to low.  Place the pot in the preheated oven for 2.5 to 3 full hours.  

When you remove the pot, be very careful, as the pot is very hot!  Remove the lid, use tongs to remove the meat, which, beware, may fall apart.  You may need a slotted spoon to help with that!  Some of the bones will probably have fallen out, too.  Remove the bones, too.  The marrow has already flavored the braising liquid.  Bring the remaining liquid to a boil and then set the heat to medium.  Stir vigorously to scrape any burnt bits from the bottom of the pot, and scrape the sides, as well, as condensed flavors are part of that ring around the pot. Let reduce for at least thirty minutes until the braising liquid becomes a thick sauce; more like a thick onion jelly. Remove from the heat and let it cool. 


Meanwhile, shred the rib meat.  

Believe it or not, we are near the end of this post!  I used the meat for sandwiches, tacos and pasta.  I forgot to take photos of the pasta and tacos, but I did the sandwich.  That rib-onion-chile jam is insanely flavorful.  


I'd added cheese and chipotle mayo spread on sliced focaccia bread.  What a delectable sammy!

I am going to recreate a dish - hopefully with my friend, Anne - using short rib meat in a large pasta pizzaola meal.  Stay tuned for that post in early August!  Another meal i had forgotten to make to show you was short rib meat tostada and mixed with Spanish rice with lime and radish and shredded fresh cabbage.  

Think about dishes You would like with short ribs!  Drop me a line and let me know! Thanks!

As always, I am truly grateful for your viewership and consideration.  Let me know what you think when you or If you make it!  Thank you!

Now, go cook for someone you love!  Cooking for your loved ones, friends, family or otherwise, is the Best and Greatest way to show them how much you love them.  Now....Go!  Cook!  

~Martin
In-House Cook


Friday, July 20, 2018

Fettuccine with Linguica Family Dinner


Fettuccini with Linguica 

I was raised on spaghetti with hamburger meat and tomato sauce, which I very much liked, but as an adult, my palette has expanded and sometimes, less is more to me. I have found that to be true with pizza, too; the fewer the items the more the flavors delight the taste buds. Again, that is just my opinion. With that in mind, I made a pantry pasta with a few key ingredients to enable pasta pandemonium! Let's get to it, shall we?

Ingredients:
1/2 pound fettuccine pasta
1 pound Linguica sausage, sliced
4 leaves basil, chiffonade + garnish
1 shallot sliced into slivers
3 cloves garlic, finely chopped or grated
2 tablespoons Parmesan, shaved or grated
2 tablespoons tomato paste
1 tablespoon dry Italian seasoning
salt for the pasta water
2 tabs of butter
2 tablespoons extra virgin olive oil


Prep the shallot, garlic and basil and slice the linguica on a separate cutting board. In addition, add about four quarts of water to a pot and bring it to a roiling boil.  When the water boils, liberally salt the water.  It's the only chance you really get to season the pasta. 


Liberally salt the water when it boils and add the fettuccine. Cook about twelve minutes. 

Meanwhile, saute the sliced linguica in a small saute pan with the olive oil and the dry Italian seasoning. Allow the rounded edges to caramelize, which will add tremendous flavor. 


When the pasta is done, reserve a 1/4 cup of pasta water and strain the pasta. Add the butter, shallot, garlic, tomato paste and half of the basil to the pot over medium-high heat.  Saute three minutes and add the pasta, and a good splash of the pasta water.  Toss thoroughly and add some of the shaved Parmesan. 

Serve family style or individually plated.  Garnish with the remaining basil and shaved or grated Parmesan. 


This meal is flavorful, easy, includes only a few ingredients and is a great time-saver!  If you do not have fresh basil, dried basil is fine!  

With that, Thank You for your time and consideration! I am always appreciative of your visits!

~Martin
In-House Cook

Thursday, July 19, 2018

BBQ Chicken in my Dad's Secret Marinade


BBQ Chicken Dinner with Spinner and Fam

Last Tuesday I had a great day driving up into the alpine Sierra Nevada Mountains on the way up to Lake Tahoe to visit my friend, Spinner, and her family who had rented a cabin in the piney woods.  Beautiful place! One of the family made incredibly tasty deviled eggs, which went like candy. I marinated chicken in my dad's secret marinade and grilled them on the bbq.  Here's the recipe. 

Ingredients:
1/2 cup vegetable oil
4 tablespoons Worcestershire Sauce
3 tablespoons Chile Soy Sauce (Ponzu) 
* That is my addition
1 teaspoon grated or finely chopped or dried garlic
1 teaspoon ground cumin
1/2 salt and 1 teaspoon pepper

Combine all of the ingredients into a bowl or large baking dish and whisk thoroughly. Using tongs, place the chicken skin side down for one hour, at least, and then meat side down another hour, *assuming you are using skin and bone-in chicken thighs or breasts. If you can marinate them for at least two hours, that is good, but several hours or overnight is ideal.  


 Start the charcoal about 25 - 30 minutes prior to cooking. Spread the coals once ready to have a hot side and a cool side, if possible. Spray the grill away from the fire with vegetable oil or rub it onto the grill  itself with a towel. Place the chicken skin side down. 

Allow the chicken to begin rendering its fat, about seven minutes before turning.  IF the chicken does not immediately release from the grill, do not force it!  The skin will tear and unevenly cook. Do not turn it until it does not stick to the grill at all. 

If the fire is too hot, it may burn the chicken. Reduce the heat if gas or smother the flame if charcoal until it is manageable.  You can always stack the burned piece atop another on the cool side or low flame. 

*Note, for some reason, I did not put them all skin down, which is a rookie mistake, and it shows, above.  Live and learn!


Now, after fourteen to twenty minutes, you might want to use a thermometer to see if the chicken is done, about 165-170-degrees.  Or, if touched and the juices run clear, you can be assured it is done or just about done. Plate family style and serve with whatever sides you wish to have!  As I mentioned, one of our sides was deviled eggs and a green been casserole Spinner (below, with lovely little Lily) made. Such good food, friends and fun!


Now, go cook for someone you love!  It is prime bbq season.  Get out there and show your peeps how much you love them!!!  

Thank You for your time and consideration!  I am always eternally grateful!

~Martin
In-House Cook


Udon with Tamarind~Teriyaki Chicken

  Udon with Tamarind~Teriyaki Chicken and scallions and eggs These days families are super busy, especially if you have school age children ...