Thursday, March 26, 2020

In-House Cook's Lasagna Rolls, Lasagna, and In-House Cook's Bacon Bacon Cheeseburgers!!!


Two QuaranDinners

Terrible play on words, but I wanted to share with you all a couple of simple dinners to bust your taste buds.  First is an experiment with traditional lasagna and the other is a slammin' burger.  Nothing here is difficult.  As a teacher, I am working remotely from home, and as a parent, you can bring the kids in on this and other dishes, particularly baking, talking about measurements.  Great math lessons abound in your kitchen!

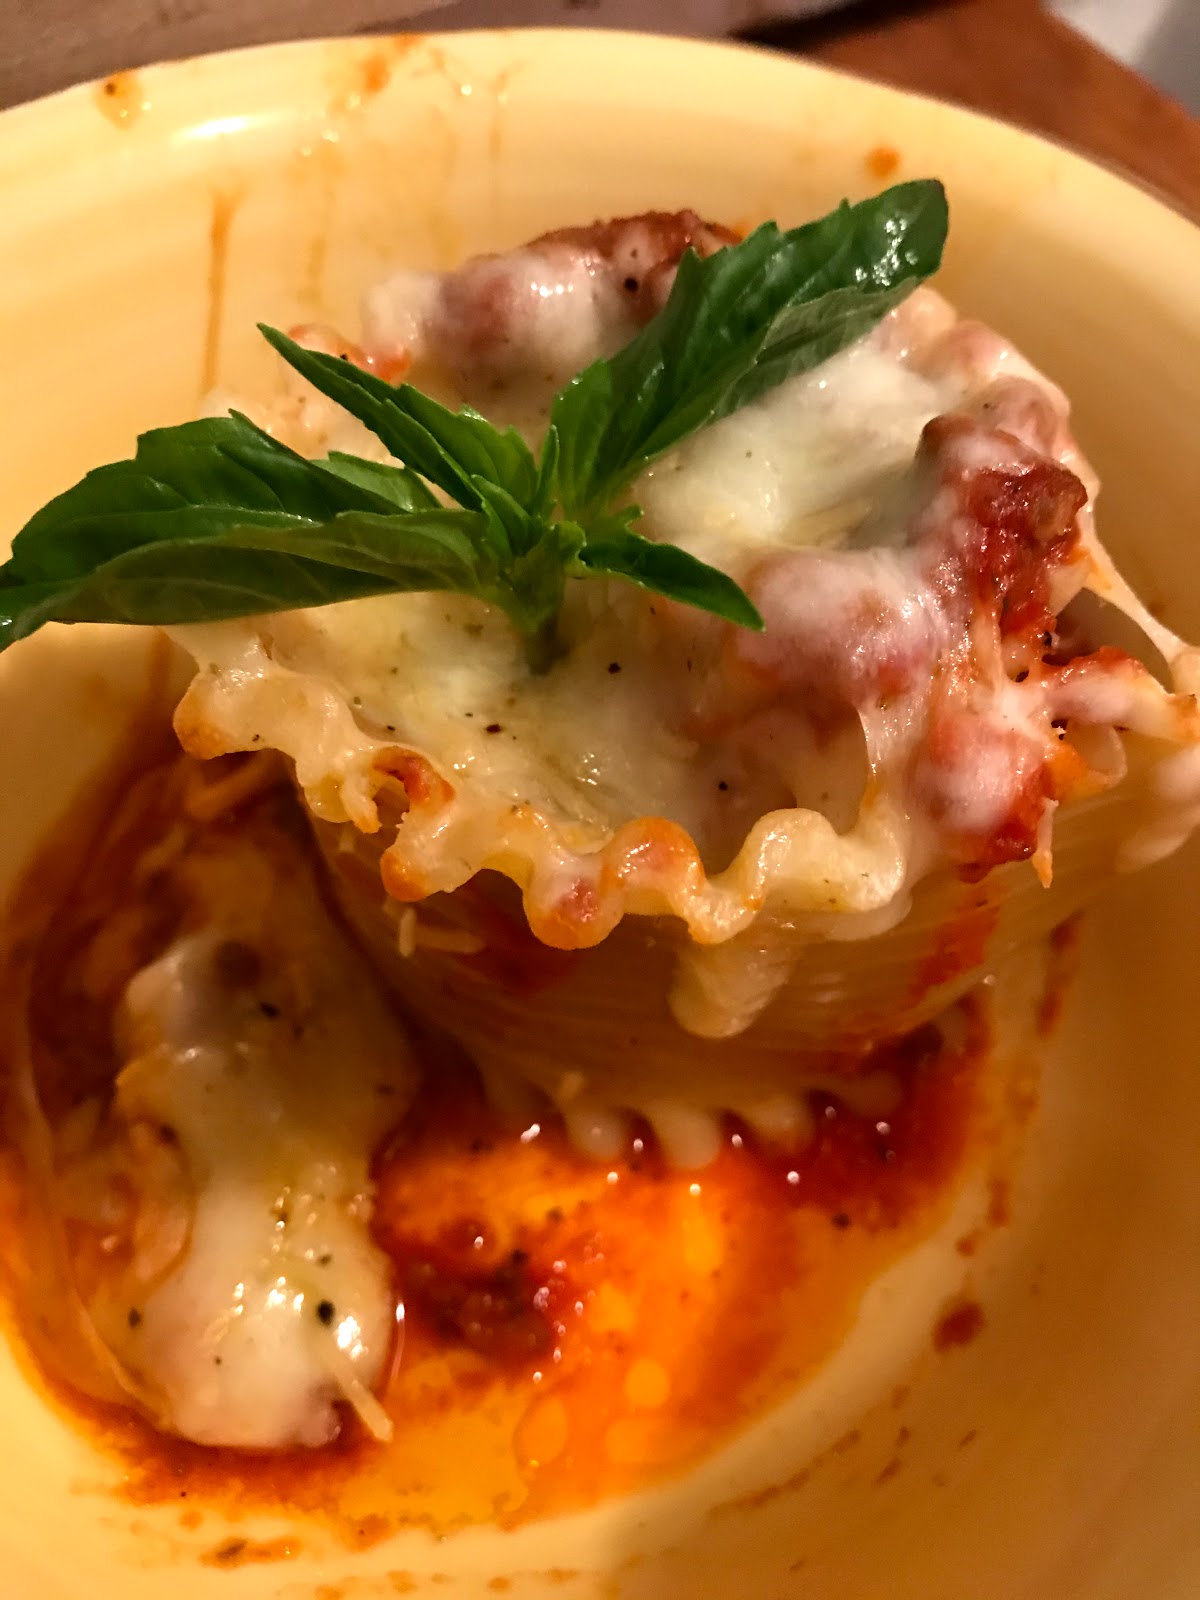
My first dish was a two-parter.  I made my garlic lasagna sauce, ingredients are below, but decided to create a lasagna stuffed noodle wrap in a parmesan bowl (See the photo above). Did not turn out pretty, but it tasted just like lasagna should! 

Let's get to my lasagna sauce, which is pretty much my regular tomato-based sauce with a little extra. 😉


In-House Cook's Lasagna Sauce 

1 yellow onion, finely chopped
6 cloves garlic, finely chopped or grated
2 tablespoons evoo
1 pound lean ground beef (93%)
1 28-ounce can San Marzano tomatoes, hand burst*
1 16-ounce can fire roasted tomatoes in oregano, basil and garlic
1 8-ounce can tomato sauce
2 tablespoons tomato paste
6 fresh basil leaves, rolled, chiffonade cut
2 rounded tablespoons dried Italian Seasoning
Several sprigs fresh thyme
Salt and Pepper to layer flavor
1 cup Cabernet Sauvingon 

1 box lasagna noodles.* 
1 container grated parmesan*
Ball of mozzarella cheese, sliced into discs or grated mozzarella*

Preheat the oven to 400-degrees. 

Use non-stick evoo spray and spray three bottoms of a muffin tin (underneath, to make a cup). To a baking sheet, spray evoo-non-stick spray.  Add half a cup of parmesan in mounds onto the baking sheet. Add to the oven and melt into discs. When melted, remove the baking sheet to cool for about five minutes.  Use a spatula to carefully pick up the discs and place them onto the sprayed reverse cups of the muffin pan. Allow the cheese discs to droop into a cup.

Now.....

In a medium pot, drizzle two tablespoons of extra virgin olive oil (evoo) over medium-high heat. Add the lean ground beef and crumble, add pinch of salt and pepper and continue to crumble finely, about four or five minutes.  Add the onion and garlic and toss for three minutes to bring out the aromatics. Add a pinch of salt as you combine. 

*In a bowl, add the hand burst San Marzano tomatoes and juice.  Use a large fork to continue to smash the tomato chunks. Add a pinch of salt and pepper and some of the fresh thyme (and oregano leaves, if you have some). 

Add the wine to the pot and deglaze the pot with a wooden spoon, picking up those burnt on beef flavors. 

Now, back to the tomatoes. When the mixture is fine as possible, add it to the pot.  Add the other wet ingredients to the pot and incorporate thoroughly.  The aroma should have you floating in the kitchen by now. Add the dry Italian seasoning and stir thoroughly. Bring to a boil, cover, and reduce the heat to low.  Let simmer one hour, if you can, otherwise, thirty minutes. 

In a high-sided skillet, add three cups of water and bring to a boil.  Add a hefty pinch of salt and stir.  When the water begins to boil, add three lasagna noodles.*  Leave them in the water until they are pliable and not dried in the corners. They do not need to be fully cooked. After four or so minutes, use tongs to remove the three lasagna noodles.  You can use ready use or need-to-boil lasagna noodles to do this. 

Now, remove the parmesan cups from the bottom of the  muffin pan and set aside nearby. Three muffin cups should be sprayed with non-stick spray already. Add the three parmesan cups to the sprayed muffin cups.  Take a lasagna noodle and curl it up and let it expand loosely in the cup. Using a tablespoon, fill the cup with the beefy pasta sauce. Top with a mozzarella disc or fresh grated mozzarella. Set the oven heat to 375-degrees and bake for 15 minutes. Remove and serve in a bowl, garnished with fresh basil leaves. 


Three Lasagna Rolls in Parmesan Cups oven ready. Add a little evoo and splash of water (3 tablespoons water) to the small skillet or pan to bake. 


 Not pretty plating, but delicious and aromatic!

Next, with the leftovers, I made traditional lasagna.  I hope my videos come out!!!


I sprayed the baking pan with evoo spray, placed a layer of pasta sauce, then a layer of ready use lasagna noodles, a layer of pasta sauce, a layer of grated mozzarella, more noodles, repeated until I had nothing left.  I topped with fresh mozzarella discs and baked for thirty minutes at 375-degrees.  Easy and sooo delicioso!!!

Ready for the next dish?  I promise, many more photos this time. 

***************

In-House Cook's Bacon Bacon Cheeseburgers


A true diner classic burger full of bacon and dripping with mozzarella cheese and my special sauce.  Easy to put together, to fry or grill, this burger is a true winner. Let's get to it!

Ingredients
1-pound 85% lean ground beef
1/2 red or yellow onion, finely chopped
2 cloves garlic, grated
2 tablespoons Worcestershire Sauce
1 level tablespoon Chinese Garlic Chili Sauce
1 teaspoon ground or whole seed Cumin
salt and pepper
1 tablespoon smoked Paprika
1 package thin thin sliced bacon

Cheese for topper melting.

Special Sauce Ingredients

Shhhhh.....!!!!!
Not going to tell you!  Make your own!  Get creative!  Use yogurt and spice it up!

In the meantime, combine all of the above ingredients in a bowl, less the cheese and bacon. Make burgers, put a thumb hole in the center on top and place in the frig. 


The buns. Not very big, I know. 

In a large skillet, fry up the bacon.  IF you get that super thin kind I mentioned above, it curls up somewhat or a lot, and that is good.  Season it with pepper or oregano or your favorite bbq spice! Or not. ✌ Set the bacon aside once done. 


Make your special sauce and set it aside.  

Keep the bacon renderings in the large skillet, may need to add a little vegetable oil to it because that super thin bacon does not release a lot.  Over medium-high heat, or, on your grill, cook the burgers.  I like mine with a little little bit of pink in the middle, but you do you, boo.  ✌


Put your big ole burger together with your special sauce and enjoy! 

Thank You, Friends, for your time and patience!  I did a lot of writing today!  More recipes are on the way! 
Now, go cook something for someone you love!


Friday, November 29, 2019


Venezuelan Panqueque Extreme Pantry Meal

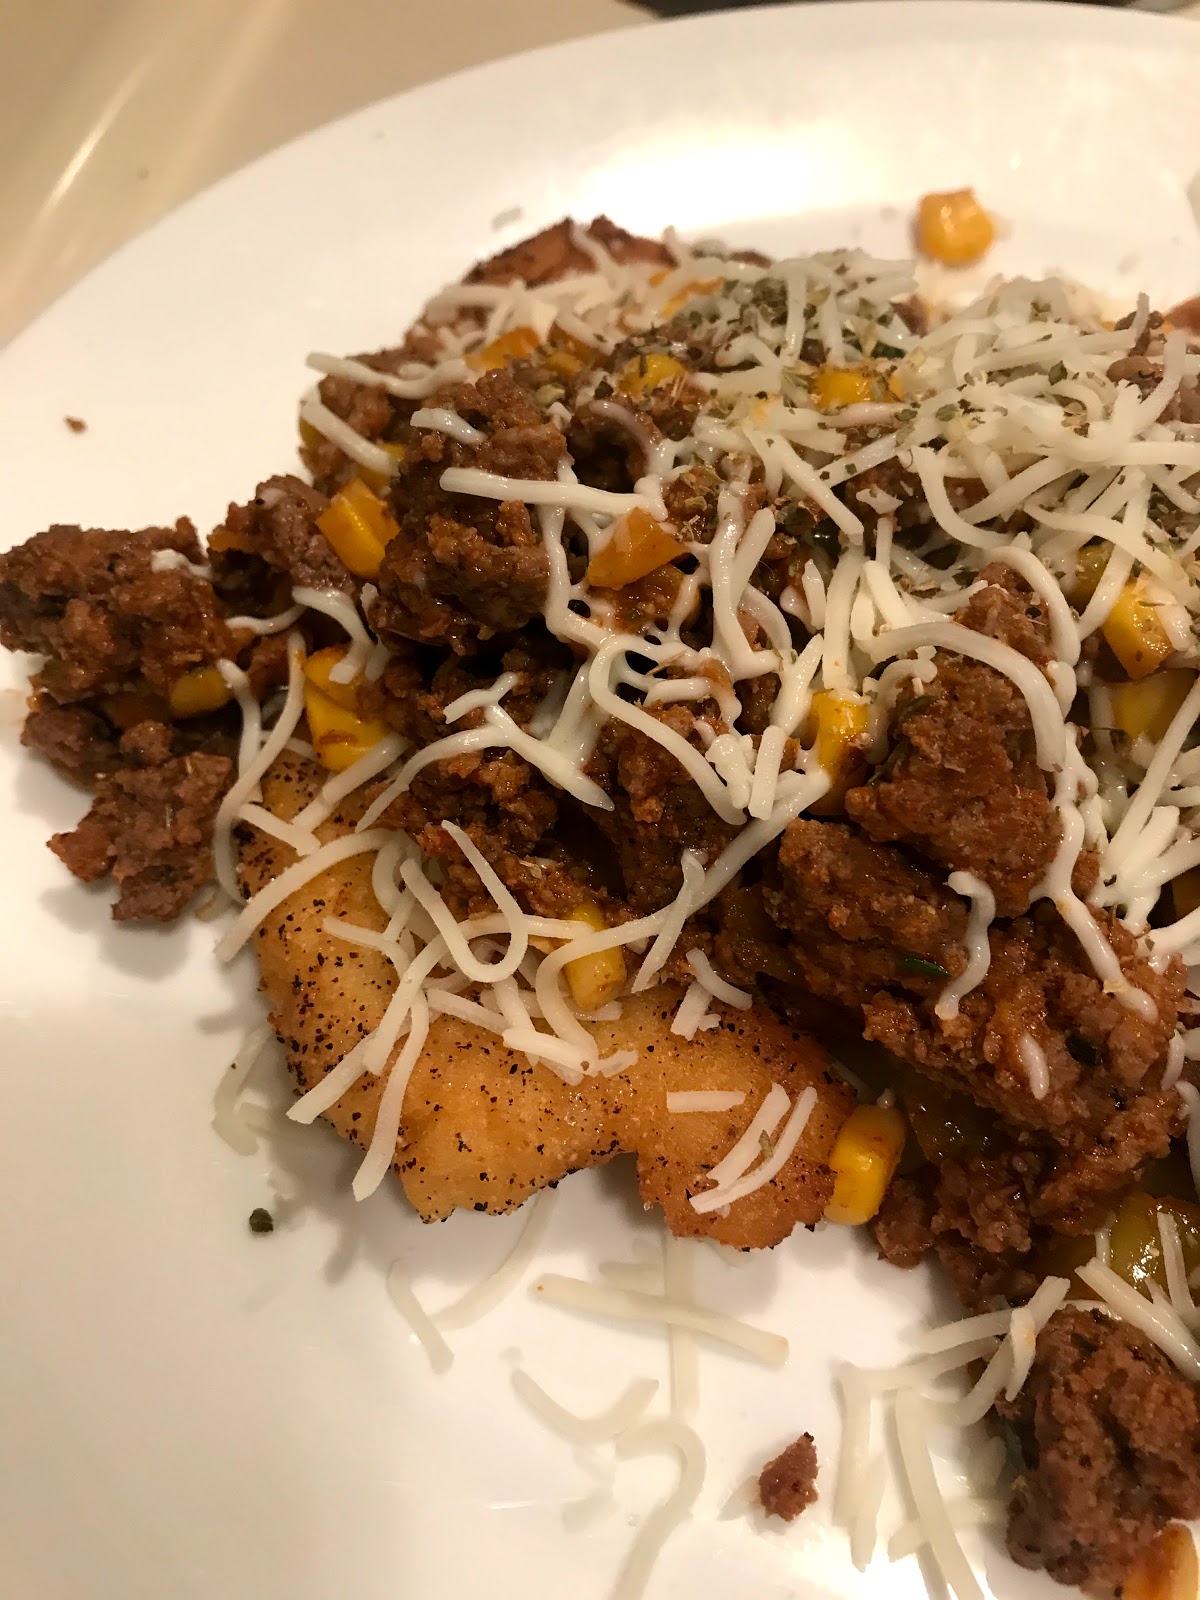
The last week of this month found me making some pretty wild extreme pantry meals. This one, however, was the most successful and real keeper for the books.  I had two eggs, Pan (a corn based meal flour used to make Venezuelan Arepas) a package of ground beef, corn and a little bit of cheese remaining.  My freezer and frig, after this meal, was empty!!!  Lesson learned:  keep your pantry stocked for emergencies. 😆 

I decided to make pancakes, panqueque in Spanish, rather than arepas. I added 2.5 cups Pan flour to a large bowl, followed by a teaspoon of salt and two tablespoons of my Mexican spice blend and two eggs.  I combined all the ingredients (it needed some water, as well) to make a thick batter.  I heated a skillet over medium-high heat with vegetable oil.  When the oil began to ripple, I added some of the batter, about the size of a pancake. I let it sit for four minutes before turning over for four more minutes.  It becomes golden with a bit of burned spots and it is aromatic.  


Afterward, I browned the ground beef in a skillet, added a tablespoon of tomato paste, three tablespoons water, a can of drained corn kernels, and two tablespoons of my Mexican spice blend.  This became the topping for the panqueques. I topped with the last little bit of quesadilla cheese I had left.  


I added some cilantro left from my garden and some chile strips.  


I am totally surprised about how well this turned out.  The crunchy, hot, flavorful texture of the panqueque, the crunch of the corn and the Mexican flavors were quite delicious.  This was just what I needed on that last week.  I hope you will make this and add your favorite toppings and love it!

As always, Thank You for your visit, your time and consideration!  

Now, go Cook something for someone you Love!

~Martin
In-House Cook

Sauceless Pasta with Linguicia


Sauceless Pasta with Linguicia

A friend of mine in England asked me to make a vegan version of this dish.  This dish, a favorite of mine, can be made into a vegan version at any time. Simply leave out meat.  Add cannelloni beans (white beans) for protein, if desired. I love pasta and I love sausage, and Linquicia was calling out to me.  I am so mad though, because I do not know what button on my computer to push so I can make the special c, like one does for acai.  Urg.  Anyone?  Help?

Despite my obvious trouble with technology, this is a winner date night meal, a wedding rehearsal dinner or for the picky eaters. It is simple and delightful, with amazing textures, colors and flavors in every bite. Let's get to it, shall we? 

Ingredients
one box thin spaghetti
one pint mixed baby tomato medly, halved
6-10 fresh basil leaves, chiffonade
6 thin scallions with brilliant greens, sliced
2 links Portuguese Linguicia, sliced into discs
1 rounded tablespoon dried Italian seasoning
1/2 stick butter
3 tablespoons Extra Virgin Olive Oil (evoo)
10 sprigs fresh lemony thyme
6 cloves garlic diced


Slice the linguicia into discs and saute in one tablespoon evoo over medium-high heat in high-sided sauce pan. Save the renderings. 


Bring four quarts of water to a boil in a large pot.  Place a colander in the sink.  Have a mug or measuring cup to save about a cup of the pasta water for the final stage. At this point, have all of the ingredients ready to go.  The rest goes very quickly!


Liberally salt the pasta water once it boils.  It is the only time you have to season the pasta. 

Pour the fresh ingredients and the linguicia into the pot with the butter and evoo. 


Save one cup of salty starchy pasta water and set aside a moment.  Add the tomatoes and all of the other ingredients to the pot along with the three tablespoons evoo and the butter over medium high heat.  When the butter melts and begins to foam, pour the hot pasta in. Using tongs, quickly and thoroughly toss the pasta with the rest of the fresh ingredients.  Make sure the pasta is coated with the herb infused butter and evoo.  Very important!  


Plate as you wish.  I plated family style. 


I forgot to take photos after I'd shaved parmigiano-reggiano over it.  The cheese added a delicious bite to it. 

 Happy Thanksgiving to you All, should you celebrate. If not, that is perfectly acceptable.  What a great alternative meal to turkey, right?  I want to Thank You for your time and consideration, and stick with me for an extreme pantry meal next! 

Now, go hug your loved ones and Cook something for someone you love, like this pasta dish!

~Martin
In-House Cook


Sunday, September 15, 2019

Hearty Potato, Sausage, Eggs and Cheese Breakfast Casserole


Who doesn't love breakfast for dinner?


Hearty Potato, Sausage, Eggs and Cheese Skillet Casserole

I have never met a person who does not like breakfast for dinner.  I made this dish for dinner, but you can make it any time.  It is an "any time" dish.  Great for pot-lucks! My recipe feeds four good eaters or six average eaters.  Let's get to it, shall we?

This is a very straight-forward recipe.  Not really any anecdotal story to go with this one.  My grandma P would make casseroles like this made of "scraps" of meat, potatoes and vegetables, and used block cheddar so she'd cut that into cubes and place it on her creation in her cast iron skillet. 

Ingredients
one bag of cubed potatoes, Potatoes O'Brien or hash browns
1/4 onion, coarsely chopped
fresh thyme and oregano sprigs
one large link smoked sausage, sliced
two links andouille sausage, sliced
8 eggs
2 cups cheese, your favorite
3 tablespoons evoo + 4 tablespoons vegetable oil

Preheat the oven to 375-degrees.


Simply slice the sausage, saute in a high-sided skillet with the evoo over medium-high heat.  Get some color on the slices and remove after eight minutes. 

Strain the renderings of the sausages and add the four tablespoons to a large cast iron or oven-safe skillet. Stir with a spatula or wooden spoon to mix the two fats.  Crank the heat up to high and add the potatoes.  Allow the potatoes to just sit there for three or so minutes before turning them or stirring. You want a nice caramel color on the potatoes.  Follow the directions on the package of of potatoes you use. 

When half way done, add the sausages to the large skillet. Stir to incorporate.  Smooth out the potatoes and sausages.  Crack the eggs and add one egg (whites and yolks) to several places on top of the mix.  If you have small eggs, you may want to use ten eggs. 


Add the skillet to the oven.  Remember, if you are using a skillet, use either cast iron or an oven safe skillet.  

Bake for twenty minutes.  Add the two cups of cheese after twenty minutes and bake twenty more, covered or not.  Remove and allow to rest so that the cheese oozes into those empty flavor pockets.  Afterward, add the fresh thyme and oregano for color and flavor.  


This dish does not plate well.  It is not a pretty plated casserole.  Sorry.  


I like to add hot sauce to my bowl, the best way to plate this monster.  What's your favorite hot sauce?  I love both Tapatio and Cholula (not and advertisement).  

Well, that's that.  Told ya it was not a brain killer. 

I love that you have taken the time to visit my humble little site, and I am totally grateful.  

Now, Go Cook For Someone You Love!

~Martin
In-House Cook


1.  GusGus and me!
2. ChuChi and her momma Butter.


Monday, September 2, 2019

Steak on a Cloud


Steak on a Cloud

This post is a last minute decision.  My product is not the prettiest, but it sprouted from a breakfast idea and I went through with it with dinner in mind and prepared a delicious, albeit, rustic looking finger food meal.  More like hand food because they turned out larger than I'd realized they would.  I am throwing this one out to you because you all can make it better and please, please, drop me a line here, or on my blog's facebook page (In-House Cook) to let me know how you made it your own and better. 

This is all I did.....

Ingredients
carne asada steaks
1/4 cup red wine vinegar
1/2 cup vegetable oil
2 tablespoons Worcestershire Sauce
1 teaspoon of garlic powder, onion powder, thyme, oregano, cumin, salt, pepper
2 tablespoons smoked paprika
whole seed mustard 
aged balsamic vinegar

Separately.....
aluminum foil or parchment paper
non-stick cooking spray
flour to dust pastry marble
two crescent dough sheet rolls
salt


I placed a gallon sized zip lock bag in a large bowl.  In a smaller bowl, I combined and whisked all of the ingredients together.  I poured half of it into the bag and then placed the thing carne asada steaks in the bag.  I poured the remaining marinade over the meat, sealed the bag and smushed it several times (yes, I said smushed) to coat all of the steaks. I placed the bag in the refrigerator as I was not going to start dinner for another hour or more. 

When I got back to it, I removed the zip lock bag and allowed it to come to room temperature. 

I set the oven to 350-degrees.

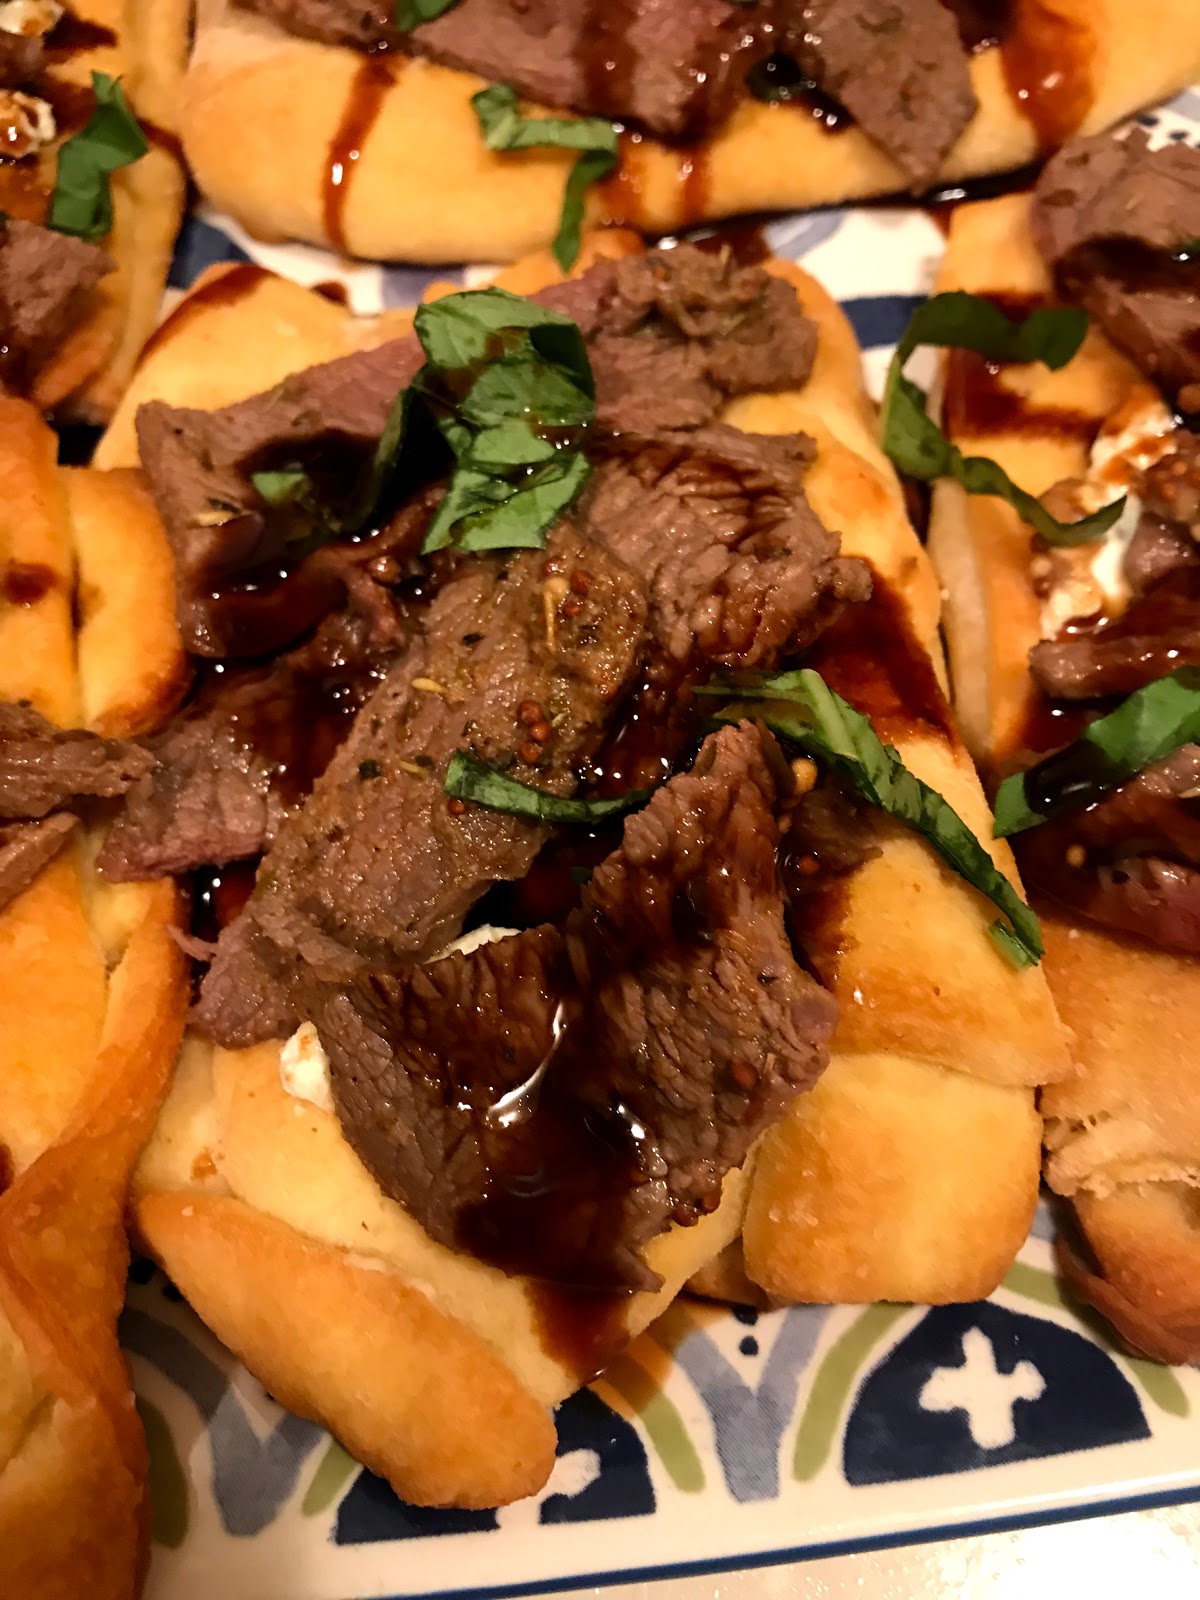
I rolled out two crescent roll dough sheets after using flour to dust my pastry marble. I used a knife to cut them into squares and place one layer onto another.  I wanted the "clouds" to look fluffy. I placed them on non-stick sprayed foil.  I baked the "clouds" 13 minutes at 350-degrees. 
Afterward, I spread a little goat cheese onto the cloud.

Meanwhile, as the clouds were baking, I had removed the thin carne steaks and had gently seared them, two minutes per side, over medium-high heat. That is more than enough to finish them.  I sliced the steaks into thin strips and placed them atop the "clouds" and the almost melting cream cheese. I chiffonade sliced six fresh basil leaves and sprinkled them atop each "Steak on a Cloud".  

Now, please enjoy the photo essay from different angles. 


I'd added a dollop of grain mustard in white wine and aged balsamic drizzle. 

Thanks, as always, for your visit!  I appreciate your support tremendously!

Now, Go Cook Something For Someone You Love!!!

~Martin
In-House Cook 

Sunday, September 1, 2019

Hearty Folded Coppa on French Bread Bruchetta


Hearty Folded Coppa on French Bread Bruschetta

I felt the need for a snack, a hearty snack, but one not too overly bad for my son and I yesterday afternoon.  I had just purchased sourdough and french bread, both large baguette-type loaves and decided to use the french bread. The one thing that does not really make this a true bruschetta is the I did not bake or broil the bread.  I wanted it to be soft, so I guess it is more of an hors d'oeuvre than a bruschetta. Who cares though, it's good and so simple you'll be done before you know it. 

Here's what you need:
baguette or loaf
fresh basil leaves
your favorite sliced deli salami
herb spreadable goat cheese
salt for finish
aged balsamic to drizzle
lemon olive oil or zest


Slice the bread of your choice, toast it or not. I did not.  Place a good rounded teaspoon dollop of the goat cheese on the bread and slightly spread it. Fold and add the thinly sliced deli salami to the bread over the cheese.  I make a big deal of saying "folded" because the meat I bought from the deli was twice the size of the bread.  I did not want it to hang over so I folded it, and it looked pretty elegant. Next, add the fresh washed basil leaf to each piece of bread, and drizzle with aged balsamic, which is much thicker than the usual balsamic vinegar. I sprinkled very lightly with finishing salt and dry Italian seasoning. 

You could add small thinly sliced tomatoes and shaved parmigiano, if you wish.  The possibilities are endless! 


Now for the fun part!  The Eating!  

This would be great for a small friendly get-together, at holidays, birthdays, and to take to a pot-luck.  

As always, Thank You for your visit!  

Now, Go Make Something For Someone You Love!!!


~Martin
In-House Cook


Baked Chicken Tacos


Baked Chicken Tacos

Ever have one of those nights where you want to eat something super delicious but do not want to put on a network tv show production to achieve it? Me neither, not last night, anyway.  I think I have solved the problem.  Want to learn about it?  Well, here we go.....

Ingredients
10 - 12 boneless skinless chicken thighs *
two packets Taco Seasoning*
1/2 12-ounce jar of Chipotle Salsa
non-stick cooking spray
grated cheese
fresh cilantro
street taco tortillas 

First off, let me address the two marked ingredients.  I was cooking for my son and myself, both big eaters, as well as to have leftovers for another day. Six thighs will feed two to four easily.  Next, I used my own Mexican Spice Blend which I have posted in many blogs, but using spice packets is super easy, too, and, they are not expensive.  I will make it a separate, single post some time. 

Back to business......

Preheat the oven to 350-degrees.

Line a large baking or roasting pan with foil. Spray the foil with the non-stick cooking spray.  Place the chicken, outer thigh meat down first, and generously sprinkle the meat with Taco Seasoning or your own Mexican Spice Blend (or mine! 😀).  Turn the thighs over and repeat.  Be generous!  Use it all up!  Next, drizzle the chipotle salsa over the thighs. Don't be stingy!  Give them a good coating!


This is the chicken finished in the pan, but I wanted to show you what I mean about being generous with the spices and salsa.  You want this crust to form, which is pure, insane, aromatic deliciousness. 

Bakem, uncovered, for one hour fifteen minutes.  Low and slow is best for chicken thighs and it frees you up to relax or get in more chores on a busy weekend.  Very little fuss for you. 

Finally.....

When the chicken is done, let it rest about five minutes. Remove a few thighs and coarsely chop or slice them up.  Serve with your favorite street taco tortillas (my faves are flour, but I do like the corn, as well, so don't @ me! 😂).  


Delicioso!

Now for the hard part.  Simply assemble the tacos the way you want to!  I like to add white cheese to the tortilla, top it with chicken, add fresh cilantro and hot sauce.  BaBayuuum!  Done!  Time to eat!


Simple, time-negotiable (meaing you could crank up the heat and finish the chicken earlier, but why mess with perfection?), and wickedly delicious. Add whatever condiments you like! Fresh cabbage, radishes, lime juice....make it your own! 

As always, Muchas Gracias, Thank You your visit!

Now, Go Cook Something For Someone You Love!


~Martin
In-House Cook


Asian Inspired Hoisin Pork Belly Sandwich

  Asian Inspired Hoisin Pork Belly Sandwich I like to get take out for either breakfast or lunch. That has not been good for me, so I decide...