Sunday, July 22, 2018

Beef Short Ribs for Multiple Meals


Beef Short Ribs for Multiple Meals

Beef short ribs are among my favorite cuts of meat to sear and braise. Baked, braised or grilled, beef short rib meat is marbled with fat and so is delicious, soft and quite moist. It also takes on incredible flavors, whether braised in stock, wine or beer, or something else, and they go exceptionally well with myriad vegetables.  That is why I began thinking about it as a "Multiple Meal" meat, so this post is about how I make beef short ribs, Mexican style, that can be made into various dishes.  IF you scroll through my recipes on this site, you can find a recipe where I braised beef short ribs with wine, also an amazing recipe, my birthday dinner, served with vegetables and garlic mashed potatoes with a red wine reduction sauce! Delish!!!

Now, let's get to this recipe. 

Ingredients
6 beef short ribs
2 bottles Mexican beer 
1 large red or yellow onion
six cloves garlic/ 3 whole, the rest grated
2 tablespoons tomato paste
2 14.5 ounce cans fire roasted tomatoes
2 fire roasted Anaheim green chiles, diced
4 tablespoons vegetable oil

Spice Mix
3 tablespoons smoked paprika
1 tablespoon cumin seed
1 tablespoon granulated garlic
1 tablespoon granulated onion
1 tablespoon coriander seed
i tablespoon dried thyme
salt and pepper, teaspoon each
4 chile ancho pods, stemmed and seeded


Toast the spices and pods in a skillet over Medium-low heat for several minutes. Turn the chile ancho pods after five minutes. The aroma is the spices' flavors waking up. That is when they are ready to be processed in a spice grinder or molcajete, or mortar and pestle. 


The aroma of this spice blend is indescribably gooooood!!!

Preheat the oven to 259-degrees. 

Take out and open the package of short rib meat. While it is coming to room temperature, bring a cup of water to a boil in a small sauce pan and add the stemmed and seeded chile ancho pods to it and cover. After fifteen minutes, when the pods are reconstituted, remove and add to a small processor along with three tablespoons of the water in the sauce pan. Add three cloves garlic and a teaspoon of the spice blend. Process until pasty. Set aside. 


Now, over medium-high heat, add four tablespoons of vegetable oil to a Dutch oven or high-sided oven-safe pot.  Add the spice rub on all sides of each beef short rib and, when the oil begins to ripple, add the ribs, bone side down and sear on all sides until a good caramelized crust forms on all sides. This will take about or less than ten minutes.  You just want a good crust on the rib meat, but not cook them all the way through. 


When done, remove the ribs to a plate. 

Next, add a couple of ounces of the Mexican beer, and, with a wooden spoon, scrape up the browned bits off the bottom of the pot.  Add the onion and garlic and saute three minutes. Add the canned tomato products, the roasted green chiles and the chile Ancho paste.  Saute to combine and add the remaining beer.  Bring to a boil and snuggle in each short rib, bone side down again.  


Add two tablespoons of the spice blend and season the braising liquid.  Bring it back up to a boil and then reduce the heat to low.  Place the pot in the preheated oven for 2.5 to 3 full hours.  

When you remove the pot, be very careful, as the pot is very hot!  Remove the lid, use tongs to remove the meat, which, beware, may fall apart.  You may need a slotted spoon to help with that!  Some of the bones will probably have fallen out, too.  Remove the bones, too.  The marrow has already flavored the braising liquid.  Bring the remaining liquid to a boil and then set the heat to medium.  Stir vigorously to scrape any burnt bits from the bottom of the pot, and scrape the sides, as well, as condensed flavors are part of that ring around the pot. Let reduce for at least thirty minutes until the braising liquid becomes a thick sauce; more like a thick onion jelly. Remove from the heat and let it cool. 


Meanwhile, shred the rib meat.  

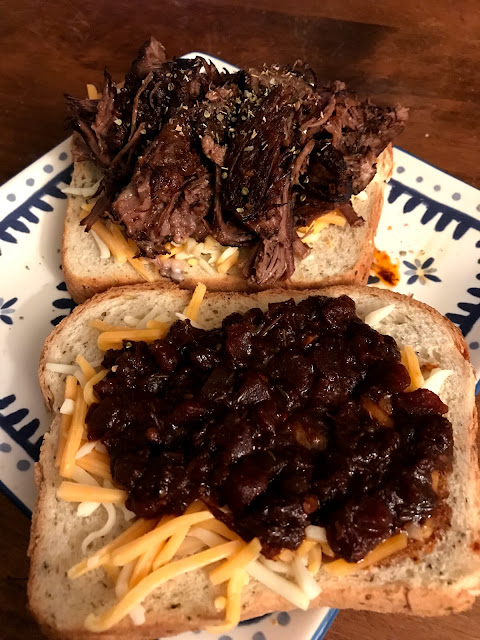
Believe it or not, we are near the end of this post!  I used the meat for sandwiches, tacos and pasta.  I forgot to take photos of the pasta and tacos, but I did the sandwich.  That rib-onion-chile jam is insanely flavorful.  


I'd added cheese and chipotle mayo spread on sliced focaccia bread.  What a delectable sammy!

I am going to recreate a dish - hopefully with my friend, Anne - using short rib meat in a large pasta pizzaola meal.  Stay tuned for that post in early August!  Another meal i had forgotten to make to show you was short rib meat tostada and mixed with Spanish rice with lime and radish and shredded fresh cabbage.  

Think about dishes You would like with short ribs!  Drop me a line and let me know! Thanks!

As always, I am truly grateful for your viewership and consideration.  Let me know what you think when you or If you make it!  Thank you!

Now, go cook for someone you love!  Cooking for your loved ones, friends, family or otherwise, is the Best and Greatest way to show them how much you love them.  Now....Go!  Cook!  

~Martin
In-House Cook


Friday, July 20, 2018

Fettuccine with Linguica Family Dinner


Fettuccini with Linguica 

I was raised on spaghetti with hamburger meat and tomato sauce, which I very much liked, but as an adult, my palette has expanded and sometimes, less is more to me. I have found that to be true with pizza, too; the fewer the items the more the flavors delight the taste buds. Again, that is just my opinion. With that in mind, I made a pantry pasta with a few key ingredients to enable pasta pandemonium! Let's get to it, shall we?

Ingredients:
1/2 pound fettuccine pasta
1 pound Linguica sausage, sliced
4 leaves basil, chiffonade + garnish
1 shallot sliced into slivers
3 cloves garlic, finely chopped or grated
2 tablespoons Parmesan, shaved or grated
2 tablespoons tomato paste
1 tablespoon dry Italian seasoning
salt for the pasta water
2 tabs of butter
2 tablespoons extra virgin olive oil


Prep the shallot, garlic and basil and slice the linguica on a separate cutting board. In addition, add about four quarts of water to a pot and bring it to a roiling boil.  When the water boils, liberally salt the water.  It's the only chance you really get to season the pasta. 


Liberally salt the water when it boils and add the fettuccine. Cook about twelve minutes. 

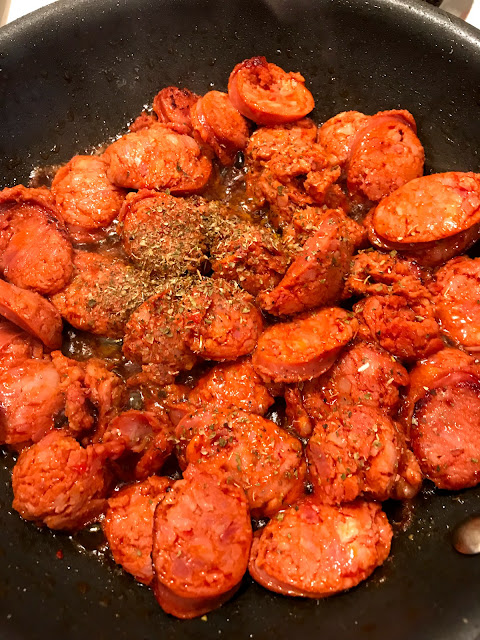
Meanwhile, saute the sliced linguica in a small saute pan with the olive oil and the dry Italian seasoning. Allow the rounded edges to caramelize, which will add tremendous flavor. 


When the pasta is done, reserve a 1/4 cup of pasta water and strain the pasta. Add the butter, shallot, garlic, tomato paste and half of the basil to the pot over medium-high heat.  Saute three minutes and add the pasta, and a good splash of the pasta water.  Toss thoroughly and add some of the shaved Parmesan. 

Serve family style or individually plated.  Garnish with the remaining basil and shaved or grated Parmesan. 


This meal is flavorful, easy, includes only a few ingredients and is a great time-saver!  If you do not have fresh basil, dried basil is fine!  

With that, Thank You for your time and consideration! I am always appreciative of your visits!

~Martin
In-House Cook

Thursday, July 19, 2018

BBQ Chicken in my Dad's Secret Marinade


BBQ Chicken Dinner with Spinner and Fam

Last Tuesday I had a great day driving up into the alpine Sierra Nevada Mountains on the way up to Lake Tahoe to visit my friend, Spinner, and her family who had rented a cabin in the piney woods.  Beautiful place! One of the family made incredibly tasty deviled eggs, which went like candy. I marinated chicken in my dad's secret marinade and grilled them on the bbq.  Here's the recipe. 

Ingredients:
1/2 cup vegetable oil
4 tablespoons Worcestershire Sauce
3 tablespoons Chile Soy Sauce (Ponzu) 
* That is my addition
1 teaspoon grated or finely chopped or dried garlic
1 teaspoon ground cumin
1/2 salt and 1 teaspoon pepper

Combine all of the ingredients into a bowl or large baking dish and whisk thoroughly. Using tongs, place the chicken skin side down for one hour, at least, and then meat side down another hour, *assuming you are using skin and bone-in chicken thighs or breasts. If you can marinate them for at least two hours, that is good, but several hours or overnight is ideal.  


 Start the charcoal about 25 - 30 minutes prior to cooking. Spread the coals once ready to have a hot side and a cool side, if possible. Spray the grill away from the fire with vegetable oil or rub it onto the grill  itself with a towel. Place the chicken skin side down. 

Allow the chicken to begin rendering its fat, about seven minutes before turning.  IF the chicken does not immediately release from the grill, do not force it!  The skin will tear and unevenly cook. Do not turn it until it does not stick to the grill at all. 

If the fire is too hot, it may burn the chicken. Reduce the heat if gas or smother the flame if charcoal until it is manageable.  You can always stack the burned piece atop another on the cool side or low flame. 

*Note, for some reason, I did not put them all skin down, which is a rookie mistake, and it shows, above.  Live and learn!


Now, after fourteen to twenty minutes, you might want to use a thermometer to see if the chicken is done, about 165-170-degrees.  Or, if touched and the juices run clear, you can be assured it is done or just about done. Plate family style and serve with whatever sides you wish to have!  As I mentioned, one of our sides was deviled eggs and a green been casserole Spinner (below, with lovely little Lily) made. Such good food, friends and fun!


Now, go cook for someone you love!  It is prime bbq season.  Get out there and show your peeps how much you love them!!!  

Thank You for your time and consideration!  I am always eternally grateful!

~Martin
In-House Cook


Tuesday, July 17, 2018

Two Steak Recipes! Steak and Potatoes and Steak and Pasta!


Bone-In Rib Steak with Oven Roasted Potatoes and Fresh Herbs

The Fourth of July causes people to gleefully break out and shine up their grills and cast iron skillets, prepping them to be clean and ready to be used on one of the busiest Q days of the year in the USA. Due to a ban on charcoal grills where I live (someone improperly disposed of hot coals which caused a dumpster fire on the property) I had to cook inside. 
I chose bone-in ribeye steaks with an ulterior motive, to give them to my little dog, Gus. 

I had my local butcher season the steaks, both sides, with their special seasoning and allowed them to come to room temperature.  I had tossed the potatoes in 3 tablespoons grape seed oil and seasoned them with salt, pepper, fresh thyme, rosemary, sage and oregano and garlic and about two rounded tablespoons of coarsely chopped onion.  


I began sauteing the potatoes on the stove top over high heat, then oven finished them at 400-degrees for twenty minutes. 


I went a little overboard with the fresh herbs for dramatic effect, but to be honest, the flavors, when basted with three tabs of butter and garlic were mouth-watering and it was almost more fun to just smell the plated steak than to eat it.  ALMOST!!!


Another view before infusing the butter with the fresh herb's flavors and basting the steaks. 

I ate one of the steaks on Independence Day and used the other steak for a simple and delicious recipe that follows this one!


I plated simply, steak and potatoes garnished with finishing salt and fresh herbs.  So delicious!!!

The next recipe involves steak and pasta, plated differently than above. Tons of flavor, a simple and easy dish from start to finish, and, only one pot!


Steak and Pesto Zucchette Pasta

This next dish is a basic thirty minute dish. In this case, the steak is already done from the previous night's dish. The ingredients for this dish is very small and delicious.


Ingredients:
1 medium red or red onion
3 large or 6 medium cloves garlic, grated
1 4-ounce jar pest or your own homemade pesto
1 tablespoon dried Italian seasoning
salt for the water
steak, sliced
3 tabs butter
Parmesan 

Bring four quarts of water to a roiling boil. Liberally salt the water and the appropriate amount of pasta of your choice; I used a round hollow pasta, Zucchette which would catch the pesto easily. 

Cook the pasta about twelve minutes. Strain the pasta and add the butter. Add the onion and stir with a pinch of salt when the butter foams. Saute about three minutes. Add the garlic, the dried Italian seasoning and half of the pesto and the pasta.  Stir to incorporate to coat the pasta with the butter and add the remaining pesto. Continue to stir.  


Plate the pasta evenly and garnish with fresh herbs and Parmesan. Top with Parmesan and fresh herbs and a drizzle of a blend of olive oil and balsamic.  


I served this family style but it could certainly be served per person. What a great way to show someone you love them!

With that, Thank You for your readership and viewership!  I am, as always, grateful for you all!

Now, Go Cook For Someone You Love!

~Martin
In-House Cook


Wednesday, July 4, 2018

Smoked Dakota Sandwich with Sauteed Onion on Sourdough Bun


Smoked Dakota Sausage with Sauteed Onion Sammies

HAPPY INDEPENDENCE DAY!!!

Just about in time for the Fourth of July holiday, two recipes for your bbq!  Please see my previous post for Ian Schwartz's Elote: Mexican Street Corn and here, for my Smoked Dakota Sausage Sandwich with Sauteed Onions. Smoked Dakota's are easily found at your local butcher shoppe. Let's get started, shall we?

Ingredients:
Smoked Dakota sausages, 1 per person
Sourdough or French bread buns
1 large yellow onion, coarsely chopped, for four
2 cloves garlic, finely chopped or grated
few sprigs fresh cilantro
1 rounded tablespoon white wine whole seed mustard
salt and pepper
your favorite condiments
*I used mustard, mayo, Chipotle Mayo and sriracha
2 cups your favorite grated cheese (I used mozzarella) 
4 tablespoons olive oil
2 tablespoons butter

To a medium skillet over medium-high heat, add three tablespoons extra virgin olive oil and two tablespoons butter.  As the butter melts and starts to foam, add the chopped onion.  Stir to coat the onion, add a good pinch of salt and pepper and stir well.  Allow to simmer three minutes, then add the garlic and stir.  Reduce the heat and simmer fifteen minutes, stirring occasionally. The onions should be just about translucent before serving. 


Meanwhile, in a larger skillet over high heat with a tablespoon of evoo, or, out on the grill, add the Dakota Sausages and cook until the skin is crispy. The aroma is going to be festive and bring back memories of bbq's past. 


Add your favorite condiments to the buns, toasted or not, and pile on the cheese and onions, add cilantro as garnish and and have at it! Let the festivities begin!


Now!  Go out there and cook for someone you love!  Your family, loved ones and You will love the smoky sausage, the mustard bite of the onions and the tang of the condiments!  Serve with Ian Schwartz's Elote: Mexican Street Corn, and the party is on!!!

As always, Thank You for your time and consideration!  

Again, Happy Independence Day!!!!

~Martin
In-House Cook


ELOTE: Grilled Mexican Street Corn By Special Guest Blogger: Ian Schwartz


Elote
Grilled Mexican Street Corn
By Special Guest Blogger:  Ian Schwartz

I first got to know meteorologist Mr. Ian Schwartz when I'd recruited him to come present to my class about severe weather. One of the things I learned about him is that he is an incredibly amazing cook and master of the grill.  Just in time for July 4th, please enjoy this delicioso recipe, courtesy of Ian! 


It's summer and the heat is here in many cities around the nation. 
I live in Phoenix and as crazy as it sounds, I grill outside even on a 110 degree day. 
The idea is to keep the home cool, and not use the oven! 
One of my easy favorites on the grill is Elote, also known as Mexican street corn. 
Usually this is sold off of carts in Mexico, on the cob. 
Mine version is a bit different, but delicious none the less! 
I prefer to take mine off the cob so you don't have to floss as much afterward. Ha! 
Ingredients 
8 ears of corn
Mayo
Tajin spice
Salt
Pepper
Crumbled Cojita cheese
Fresh lime juice
Finely chopped cilantro 
Directions
Grill the corn with some butter or oil you paint on. Cook it until the kernels have a light char to them. Next take a knife and cut the corn off the cob into a large bowl.
In the large bowl mix the corn with a few tablespoons of mayo. It's up to you how much or little to use, but at least two tablespoons for a large bowl. 
Squeeze a couple of limes into the mix and add a handful of finely chopped cilantro. Add some Tajin spice too, around 2 tablespoons. Add salt and pepper as desired. 
You can mix the cojita cheese into the whole thing or just put a layer of the crumbles on top. Up to you. I do both! 
Cut a thin slice of lime to put in the center of the bowl for garnish. 
Serve at room temperature.
Easy and delicious!  


My Waaayyy Overstuffed Baked Potatoes

  My Waaayyy Overstuffed Baked Potato Last Thursday my spouse and I went out to run errands and we ended up eating at a local eatery. As we ...