Wednesday, November 8, 2023

Homemade Pasta Sauce with Ravioli


Homemade Pasta Sauce with Ravioli


Hello Friends!  

This recipe is so simple and easy, it is a true 30-minute meal, maybe even less.  Flavorful, easy, and aromatic, and you can effortlessly adjust the recipe to serve two or more hungry eaters. Let's get to it, shall we?

Ingredients

2 pints cherry or medley tomatoes
1 head garlic, halved
3 - 6 leaves basil, chiffonade cut
4 tablespoons EVOO
salt and pepper

Preheat the oven to 400-degrees. 

In an oven safe skillet or cast iron skillet, add the evoo, the tomatoes and the two halves of the garlic. Place the cut side into the evoo, then turn them over and sprinkle the tomatoes and the garlic with a little salt and pepper. Add about a fourth of the sliced basil to the tomatoes. Place in the oven for twenty to thirty minutes.  When about all of the tomatoes have popped, releasing their sweetness, and the garlic begins to turn a little golden, remove the skillet carefully.  Add the next two fourths basil to the skillet and let the sauce ingredients cool for about fifteen minutes. Place the sauce ingredients into a food processor and blend till smooth.  Set aside. 

Bring four cups to four quarts of water to a boil (four cups for two, four quarts for 4 or more) and salt generously. When the water comes to a roiling boil, add the ravioli or whatever pasta you are wishing to use, and boil till the pasta rises (if it is ravioli or tortelloni).  Now, pour the sauce into the skillet along with a drizzle of evoo and bring to medium heat. Use a spider or  hand-held strainer and add the pasta to the sauce skillet.  Toss with a wooden spoon until the ravioli has been fully coated. 


 Grate some Parmigiano-Reggiano or Pecorino-Romano cheese to each dish and enjoy!

Thank you for your time and consideration!  I am so happy you have come to visit my humble little site.  I am working on becoming more consistent with my recipe writing and posting.  Thanks, Again!

~Martin
Your In-House Cook


Tuesday, October 31, 2023

Beef Stir Fry


Beef, Shallot and Peppers Stir Fry with Udon Noodles


Everyone who knows me Knows that I love Chinese take out at least once per month. Having lived here for only a few months, however, we have not established where our favorite eateries are, especially not Chinese and Japanese food places. So, I decided to make something Asian inspired that we'd both love.  It's simple, quick and tasty.  Let's get to it, shall we?

Ingredients

1 steak, sliced (I used flank steak)

3 eggs

1 bunch scallions with greens or 2 shallots, sliced at bias

Your favorite Sauce:  Hoisin or Korean BBQ

2 bundles Udon noodles

1 yellow, red, green, orange peppers, sliced

4 tablespoons of Sesame Oil, or, your favorite

1 tablespoon chile paste or pinch of red pepper flakes

Salt and pepper


I use a wok often for meals other than Asian, but it was perfect for this beef, shallot and pepper dish.  

Bring the oil in a high-sided skillet or wok to a ripple over high heat, then add the beef.  Toss it around with salt and pepper for about three minutes. Push the steak to the sides and add the shallot.  Repeat: stir vigorously so as not to burn the shallot or onion. After three minutes, add the sliced peppers. 

Bring four quarts water to a boil in a pot and add the two bundles udon noodles. 


Boil the udon for ten minutes.  Strain the udon in a colander and set aside, covered with a towel. By this time, the stir fry should be quite done. The shallots should be near transparent and the peppers should have just a tiny bit of crispness to them. Add the Hoisin sauce and stir vigorously, making sure the entire mixture is coated in this delicious tangy, soy-based, almost barbecue-like sauce (it is SO much more than that)!


Add the udon to the wok or high-sided skillet and toss carefully. 


Use hashi (chopsticks) or forks to enjoy this healthy, flavor-packed meal by yourself, or, with your family and friends!  This recipe feeds four hungry people easily!

I want to Thank You - any of you - who take a moment to visit this post.  It's been a year since I started this post and a year it took me to finish. So much has happened in our lives since June 3, 2022.  I am thrilled to be back to writing again.  I am grateful to you All. 

~Martin 
In-House Cook


Tuesday, November 15, 2022

Stuffed Chicken Breasts


Stuffed Chicken Breasts


There are times in all of our lives when we are having special people over for dinner.  You may have planned it, or, as in many cases this holiday time of year, the guests just show up with your husband, kids, or wife!  C'mon ladies, we know about y'all gettin' all rowdy out there!❤  Real talk...you are cooking to impress, as this dish can be for a date night for two, or the way described below, it can easily feed up to four hungry eaters.  Let's get this show on the road!


Ingredients

2, 4 or 6 large b/s chicken breasts

salt and pepper

Dried Italian Seasonings

Fresh thyme and oregano

Fresh garlic, finely diced or grated

Italian Cheeses Mixed bag:

*Parmigiana

*Romano

*Asiago

*Smoked mozzarella

Salami, Coppa and/or Prosciutto


Preheat the oven to 375-degrees.


Use a sharp chef's knife to slice open the chicken breast, sliced horizontally starting on the thin side and cut carefully to the thick side.  Be careful to not cut all the way through.  The idea here is to open the breast like a book.  It will be stuffed and then be folded closed and fastened with a toothpick, or two. Once you have all of the chicken breasts you are serving sliced and opened like a book, cover the breasts and pound them out little so the meat tenderizes.   


Now, season both sides of the open chicken breasts with salt, pepper and dried Italian seasoning.  Of course, add whatever spices you like and spice them up your way!  Next, add some of the finely diced garlic, halves of prosciutto or lunch meat ham, add the salamis, add a little bit of fresh thyme and oregano, and lastly, the cheese mixture.  Close the chicken breast like a book and secure with two toothpicks.  Some of the cheese is going to ooze out while roasting, so put some more on top!  Whoa, this is going to smell and taste fantastic!


My neighbor, Bonnie, and her husband (who is a master gardener) gave me several types of chiles and peppers, and I used the little red jalapenos as garnish to roast. Place the stuffed chicken breasts onto a foil lined baking sheet that's been sprayed with non-stick evoo cooking spray.  Again, top with cheese and whatever garnish you'd like to roast onto the chicken (adds flavor!) and place the baking sheet into the preheated oven. Roast for 45 minutes. Use a thermometer to check for proper heat.  When done, garnish with whatever you wish.  I added fresh thyme, oregano and cinnamon basil.  Really, the cheese stole the show and the garnishes were perfect.  If you have big eaters, serve two to each guest.  If you have pickety bits eaters, serve them one breast along with rice.  Deliciousness!


What a simple, fantastically flavored meal for date night or holiday guests.  Enjoy!


As always, Thank You for your visit and for your time and consideration.  I am happy to have you here!


Now, Go Cook For Someone You Love!  


~ Martin

In-House Cook


Monday, November 14, 2022

Martin's French Toast Casserole


Martin's French Toast Casserole

I love French Toast and pancakes.  A few years ago, Morgan and I went to a restaurant on one of the piers in San Francisco and I'd had the Best French Toast ever.  It was layered, cut into a wedge, with fresh fruit and powdered sugar.  I have been thinking about that and craving it.  So, I decided to go big.  Here's my recipe.  


Ingredients

1 1/2 loaves Brioche

1/4 cup cinnamon 

1 cup sugar

10 eggs

2 - 3 cups milk

pinch of salt

1/3 stick butter + four tabs

fresh fruit:  strawberries, raspberries, blackberries


Preheat the oven to 400-degrees. 


In a smallish bowl, add the sugar and cinnamon and use a fork to mix thoroughly.  Next, in a large bowl, crack the eggs, add 2 cups milk and the sugar cinnamon.  Use a whisk to break the yolks and combine completely.  Remove the bread from its packaging, one whole loaf and one half loaf.  Cut a few stacks of bread (about 3 or 4 slices per stack) in half.  


Melt 1/3 stick of butter.  In a baking pan, use a brush to spread as much butter as needed to cover the bottom and sides of the pan.  


Add a layer of sliced brioche bread.  Pour some of the egg/milk mixture atop the layer of bread.  Repeat until you have three or four layers, pouring the egg/milk mixture between each layer and atop the final layer. 


If you wish, add some more cinnamon sugar atop the layers.  All up to you.  😆


Bake for 45 minutes.  Remove and let rest for about five to ten minutes. Plate however you wish;  I cut squares instead of wedges. Finally, add fresh fruit, cinnamon sugar or powdered sugar, and serve with pancake syrup, or honey.  I love Karo syrup and I used that while Morgan used maple syrup.  


With that, please enjoy your version of my French Toast Casserole!  Make it your own and serve your loved ones with this and warm their hearts and bellies!😃  


Thank You for your time and consideration.  I always appreciate your visits!


~ Martin

In-House Cook


Morgan and I.  i'm in the blue sweatshirt.


Tuesday, November 1, 2022

Seasoned, Seared and Gently Braised Brisket over Rice with Onion and Garlic


Seasoned, Seared and Gently Braised Brisket
Over Rice with Onion and Garlic

I had not had the best of luck making brisket that turned out more steak-like rather than shredded.  I do not have a smoker nor a grill (yet) but this recipe turned out really well, to everyone who is me.  The aroma was fantastic and the ingredients list, Spartan.  Minimalist. I served it over rice that I had mixed with the braised onion and garlic that had served as a braising bed for the brisket. I made sandwiches with the remaining slices as well as the flavor blasting protein in a bowl of udon noodles with scallions and egg.  Let's get to it, shall we?

Ingredients

1 smaller brisket (about 2.5 pounds), scored

2 large or 4 medium onions, coarsely chopped

6 cloves garlic, smashed or chopped into discs

1 box or can chicken broth 

Brisket Spice Mix 

1 rounded tablespoon salt
1 tablespoon black pepper
2 tablespoons smoked paprika
2 tablespoons granulated garlic
1 rounded tablespoon granulated onion

Jerk seasoned paste
White wine vinegar
Shoyu (soy sauce)

Add the spices to a bowl and combine it all with a fork or small whisk.  Add whatever binding ingredient you'd like to the spices bowl, sprinkle in white wine vinegar and vigorously stir or whisk into a paste.  I used Jerk seasoned paste (jarred) and shoyu and white wine vinegar. 

Believe it or not, This here, above, was the hard part!

****

Use a chef's knife or what ever sharp culinary knife you have, and score both sides of the brisket. Slice at one angle from one end to the other, turn the brisket and slice from the other angle so you have what looks like cubes on that side.  Repeat on the other side of the meat.  Next, use a spoon or spatula (or, your hands) and rub in the spice paste onto and into the scores.  Repeat on the opposite side.  Set the meat aside.  

Meantime, chop the onion and slice the garlic and set  them aside. Add three generous rounds of your favorite cooking oil to the pot you will use for braising over high heat. When the oil ripples, add the brisket.  Sear both sides, about eight minutes per side.  


Remove the brisket for a moment and add the onions and garlic to the pot. Sautee the mixture about six minutes, scraping the bottom of the pot with a wooden spoon.  The burnt on bits in the pot from searing the brisket is pure flavor! Add the brisket back to the pot.  Add two cups of chicken broth/stock or, two cups of hot water if you do not have any stock.  Beef broth is perfectly fine, instead of chicken broth. Bullion of either beef or chicken is fine, along with water. Add anotehr cup of stock or water if two cups is not enough. Add a splash of white wine vinegar to the liquid in the pot.  Bring it all to a boil.  Reduce the heat to simmer, cover, and let braise low and slow for three to four hours. 

As you can see, above, the brisket is only gently submerged in the liquid.  That is perfectly fine.  It will steam and gradually cook and the connective tissues will keep together, rather than fall apart. It will be juicy, soft but intact, like a steak. Not having a smoker or grill at this time, this was my next alternative. 

I digress.  Once the brisket is done, upwards of three to four hours, turn off the heat.  Remove the brisket to a plate to rest.  Use a spider or strainer to collect the onion and garlic from the pot and set on the plate with the brisket. Cut the brisket into slices and set aside. 


Plate with rice and the onion garlic mixture.  When I served myself, I used a spoon to mix the rice with the onions and garlic.  Such a wonderful aroma and flavor!  The brisket slices are the star of the show, and garnished with a little fresh rosemary, the dish is complete. Whether you serve it on a plate or, like me, in a bowl, it is a meal you're sure to fall in love with.  I did!


This dish takes a bit of time, but if you have the time, and things to do while the brisket is braising, this is a great dish to help you catch up either on your rest or allow you to catch up on household tasks.  In any event, I hope you make this dish and make it your own, whatever that entails.  That's the joy of cooking at home, you can make any recipe your own.  ❤

With that, Thank You so much for your time and readership.  You all mean so much to me, tremendously!

Now, Go Cook For Someone You Love!

~ Martin
In-House Cook


Saturday, October 29, 2022

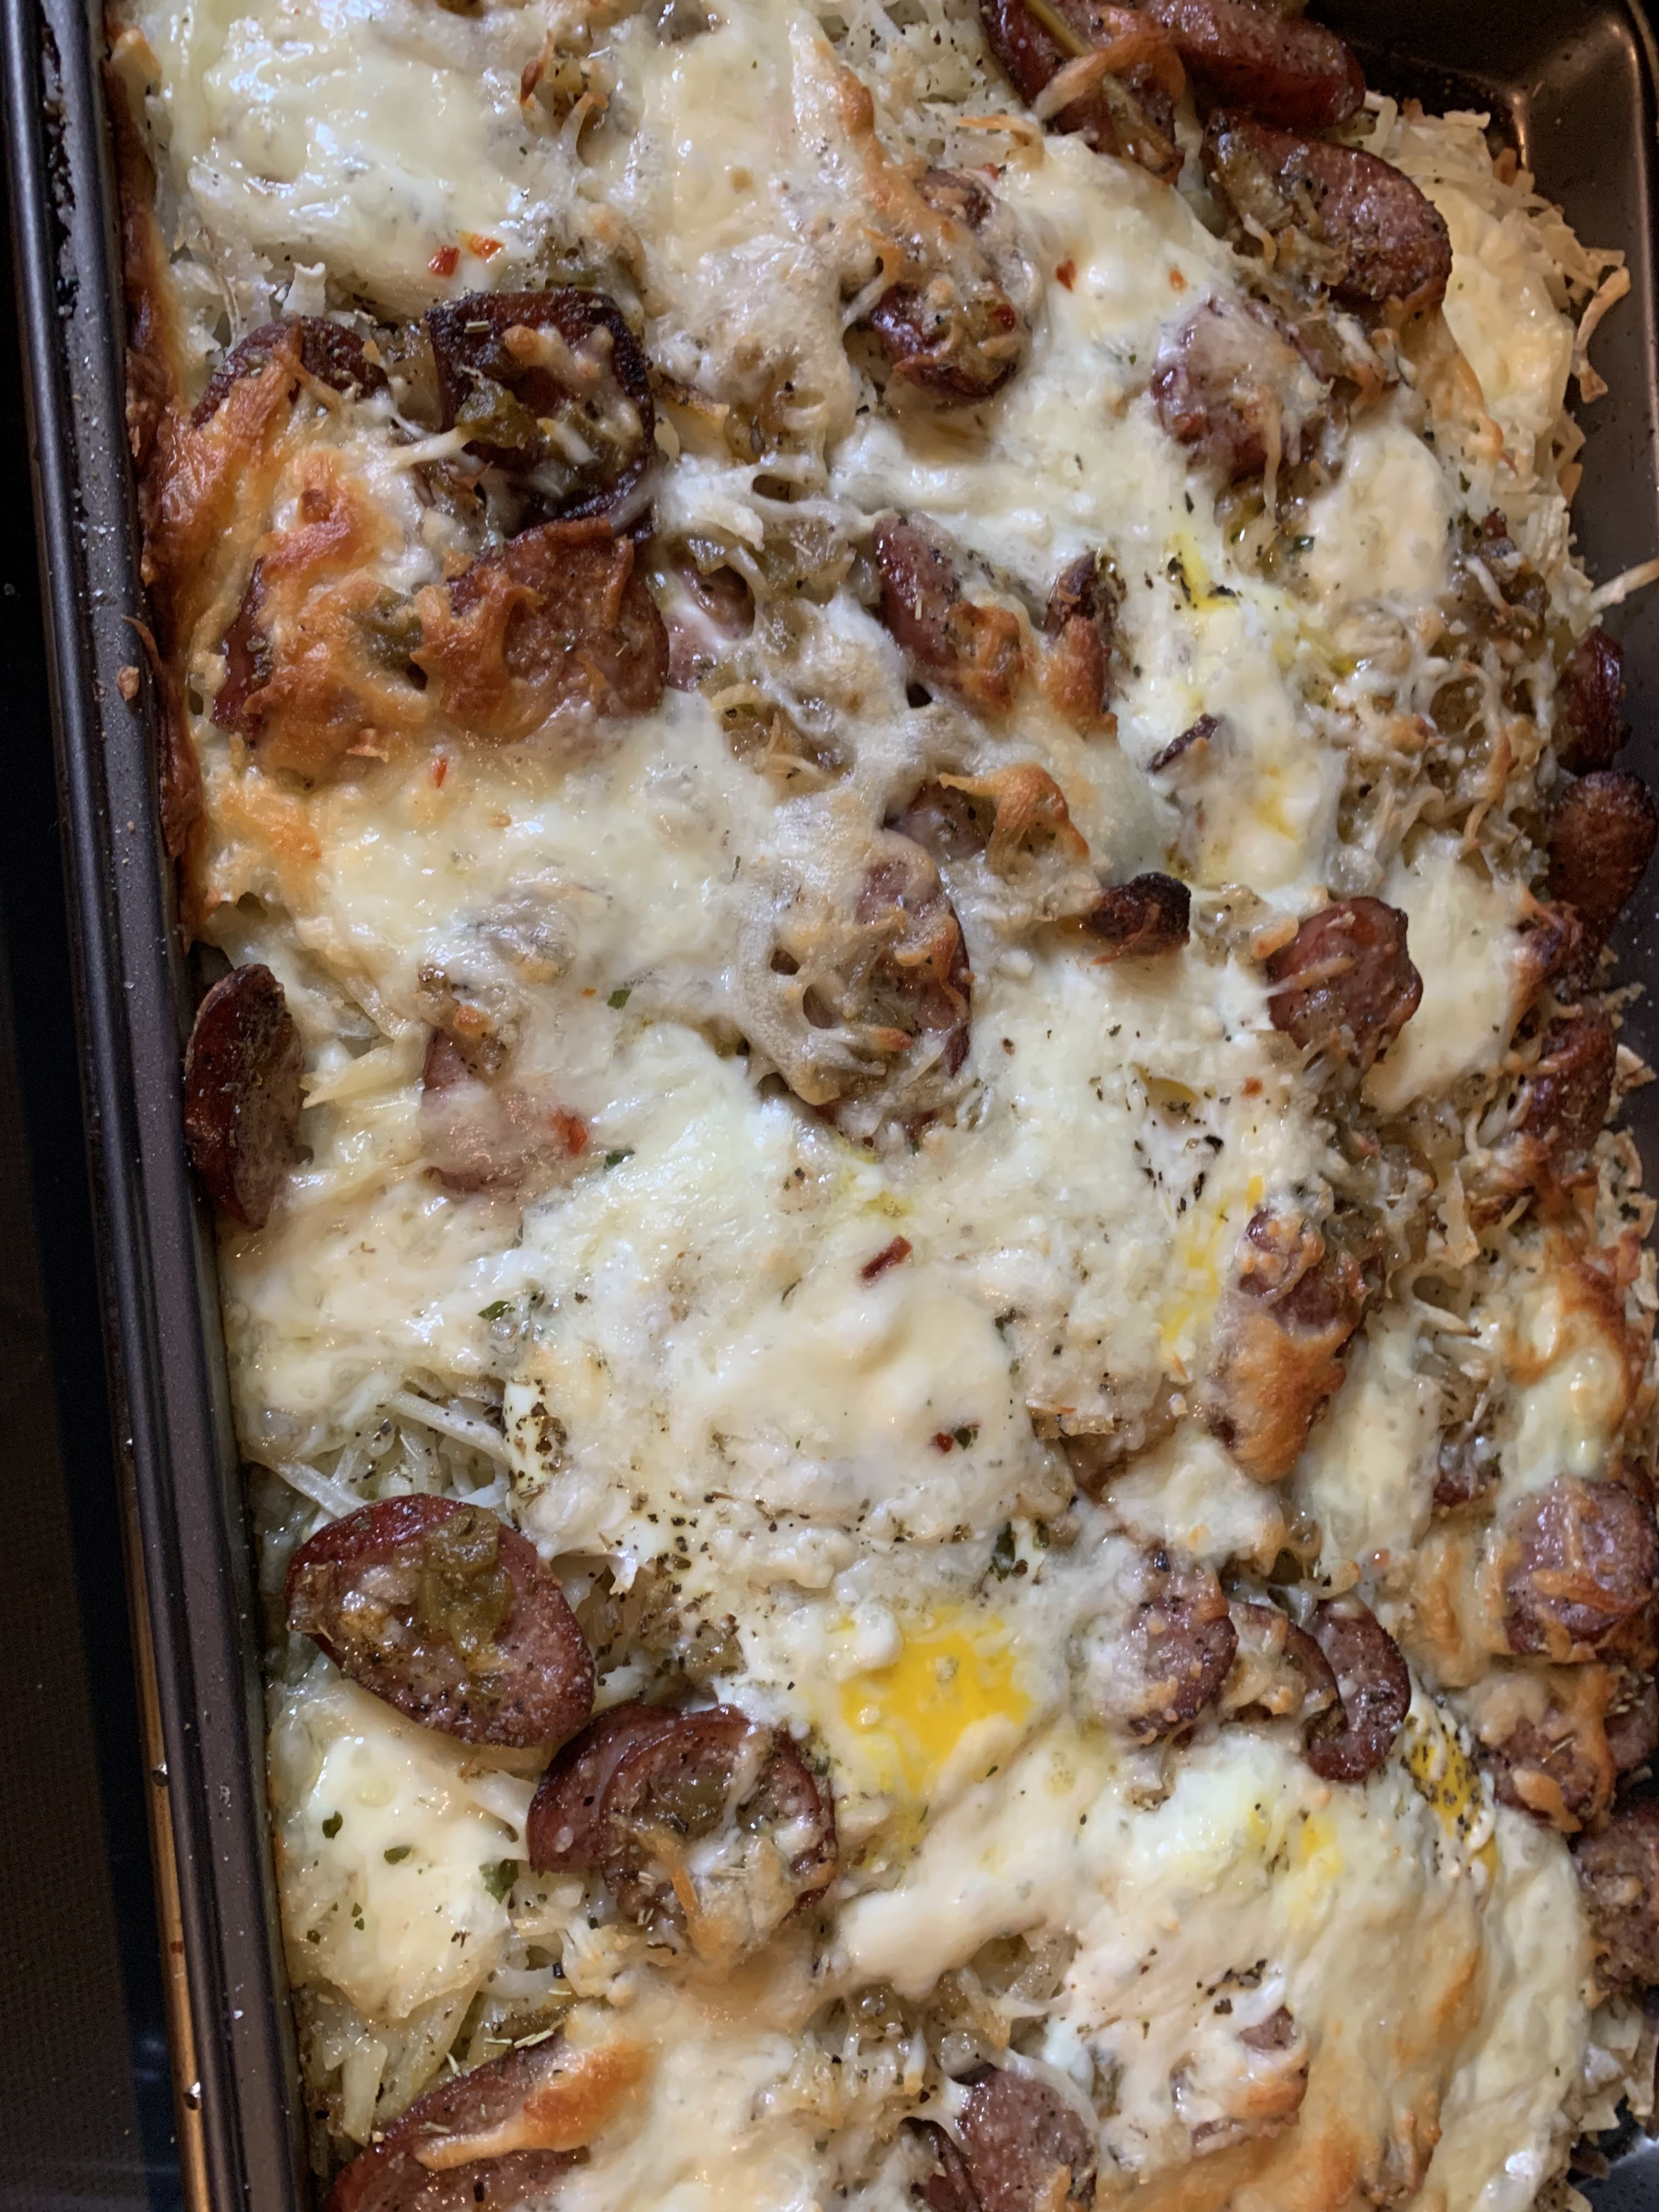
#Name this breakfast bake challenge!


Name this Breakfast Challenge


Breakfast. Wrote a blog about it. Want to read it?  Here it goes.......

My favorite meal of the day is breakfast; morning, noon or night.  My mother, rest her soul, made amazing breakfasts for dinner. I carry on that tradition. While caring for her, I would make her fruit pancakes every Sunday night for dinner. She particularly loved banana pancakes, but I threw in raspberries, blackberries or strawberries, or some combination. Those memories help me keep the tradition strong. 

Whereas my mother loved sweet breakfasts, I prefer savory breakfasts. This is one of those. To give me a bit of fun, I have challenged all of you good folks to read the blog (sorry, required) and come up with a sensible but fantastic name for this breakfast bake.  Sorry, "Breakfast Bake" is not going to cut it.  Here we go!

Ingredients

1 large bag frozen hash browns*
1 pound coarsely sliced bacon or smoked sausage
1 large onion, diced 
4 - 10 eggs
1 container small marinated mozzarella balls
Fresh grated mozzarella cheese, 1.5 - 2 cups*
spices and herbs*
salt and pepper
5-oz can of fire roasted green chiles*

THIS is how we do it

Spray a rimmed baking sheet with non-stick cooking spray (not baking spray).  Preheat the oven to 425-degrees  Pour out the entire bag of hash browns onto the baking sheet.  Sprinkle with salt and pepper.  Spray the top of the hash browns and bake for 12 minutes. Meanwhile, in a skillet with a light drizzle of your favorite oil, add bacon cuts or thinly sliced smoked sausage or both! When the bacon or sausage begin to caramelize, taking on color and crispiness, add the onions and chiles. Use a wooden spoon or spatula and stir thoroughly.  When the onions JUST begin to soften, set the skillet aside. By now, the twelve minute pre-bake of the hash browns must be done. 

While the sausage, onion and chiles are cooling and resting, crack the eggs over the hash browns.  I was awfully short on eggs, with only four to add to the hash browns.  Eight eggs or ten would be perfect, especially for feeding up to six people. Add the marinated small mozzarella balls. These are sooo good and add so much soft texture and delicious flavor!


Add the sausage and onion mixture and sprinkle a good amount of shredded mozzarella cheese atop the entire baking sheet pan. I saved some of the marinate and drizzled that atop the mixture, as well.  

Shake it to left...Spice up your life!*

Here are the spices I added atop it all other than salt and pepper.  It's your choice, of course. 

Crushed red pepper flakes
Smoked Paprika
Dried oregano
Dried Thyme
Black pepper

****

You could always make your own hash browns. You can use a processor or grater, placing the grated potatoes in a large bowl lined with cheesecloth or a clean thin dish towel.  Squeeze out the extra moisture and freeze for a few minutes to prevent spoilage. 

****

In addition, you could use whatever cheese or cheeses you like.  As I said above, it's your choice!😁

Also....

You could roast your own chiles, Anaheim or Pasilla (Poblano) chiles, place in a plastic or paper bag to steam and cool off. Then rub off the burnt skin. Dice and they're ready to use.

***


Finally, add another generous sprinkling of mozzarella, place the baking sheet in the oven and bake for thirty minutes. 


The above two photos are from my pulling the baking sheet from out of the oven.  If you need to cook the eggs more, put it back in for fifteen minutes, especially if you are using up to ten or twelve eggs!


Use fresh herbs for garnishes - or even in the dish itself!  I love using fresh herbs. You could create a special hollandaise for this dish, or use whatever you like, if anything!  I would add a gentle sprinkle of sea salt before serving.  This dish can serve from four really hungry folks or up to six pickity bits eaters. 

In any event, THANK YOU for reading! I am excited to hear the dish titles you send me and I will contact you personally should I select your title.  Good luck!

Now, Go Cook For Someone You Love! ❤

~ Martin
In-House Cook


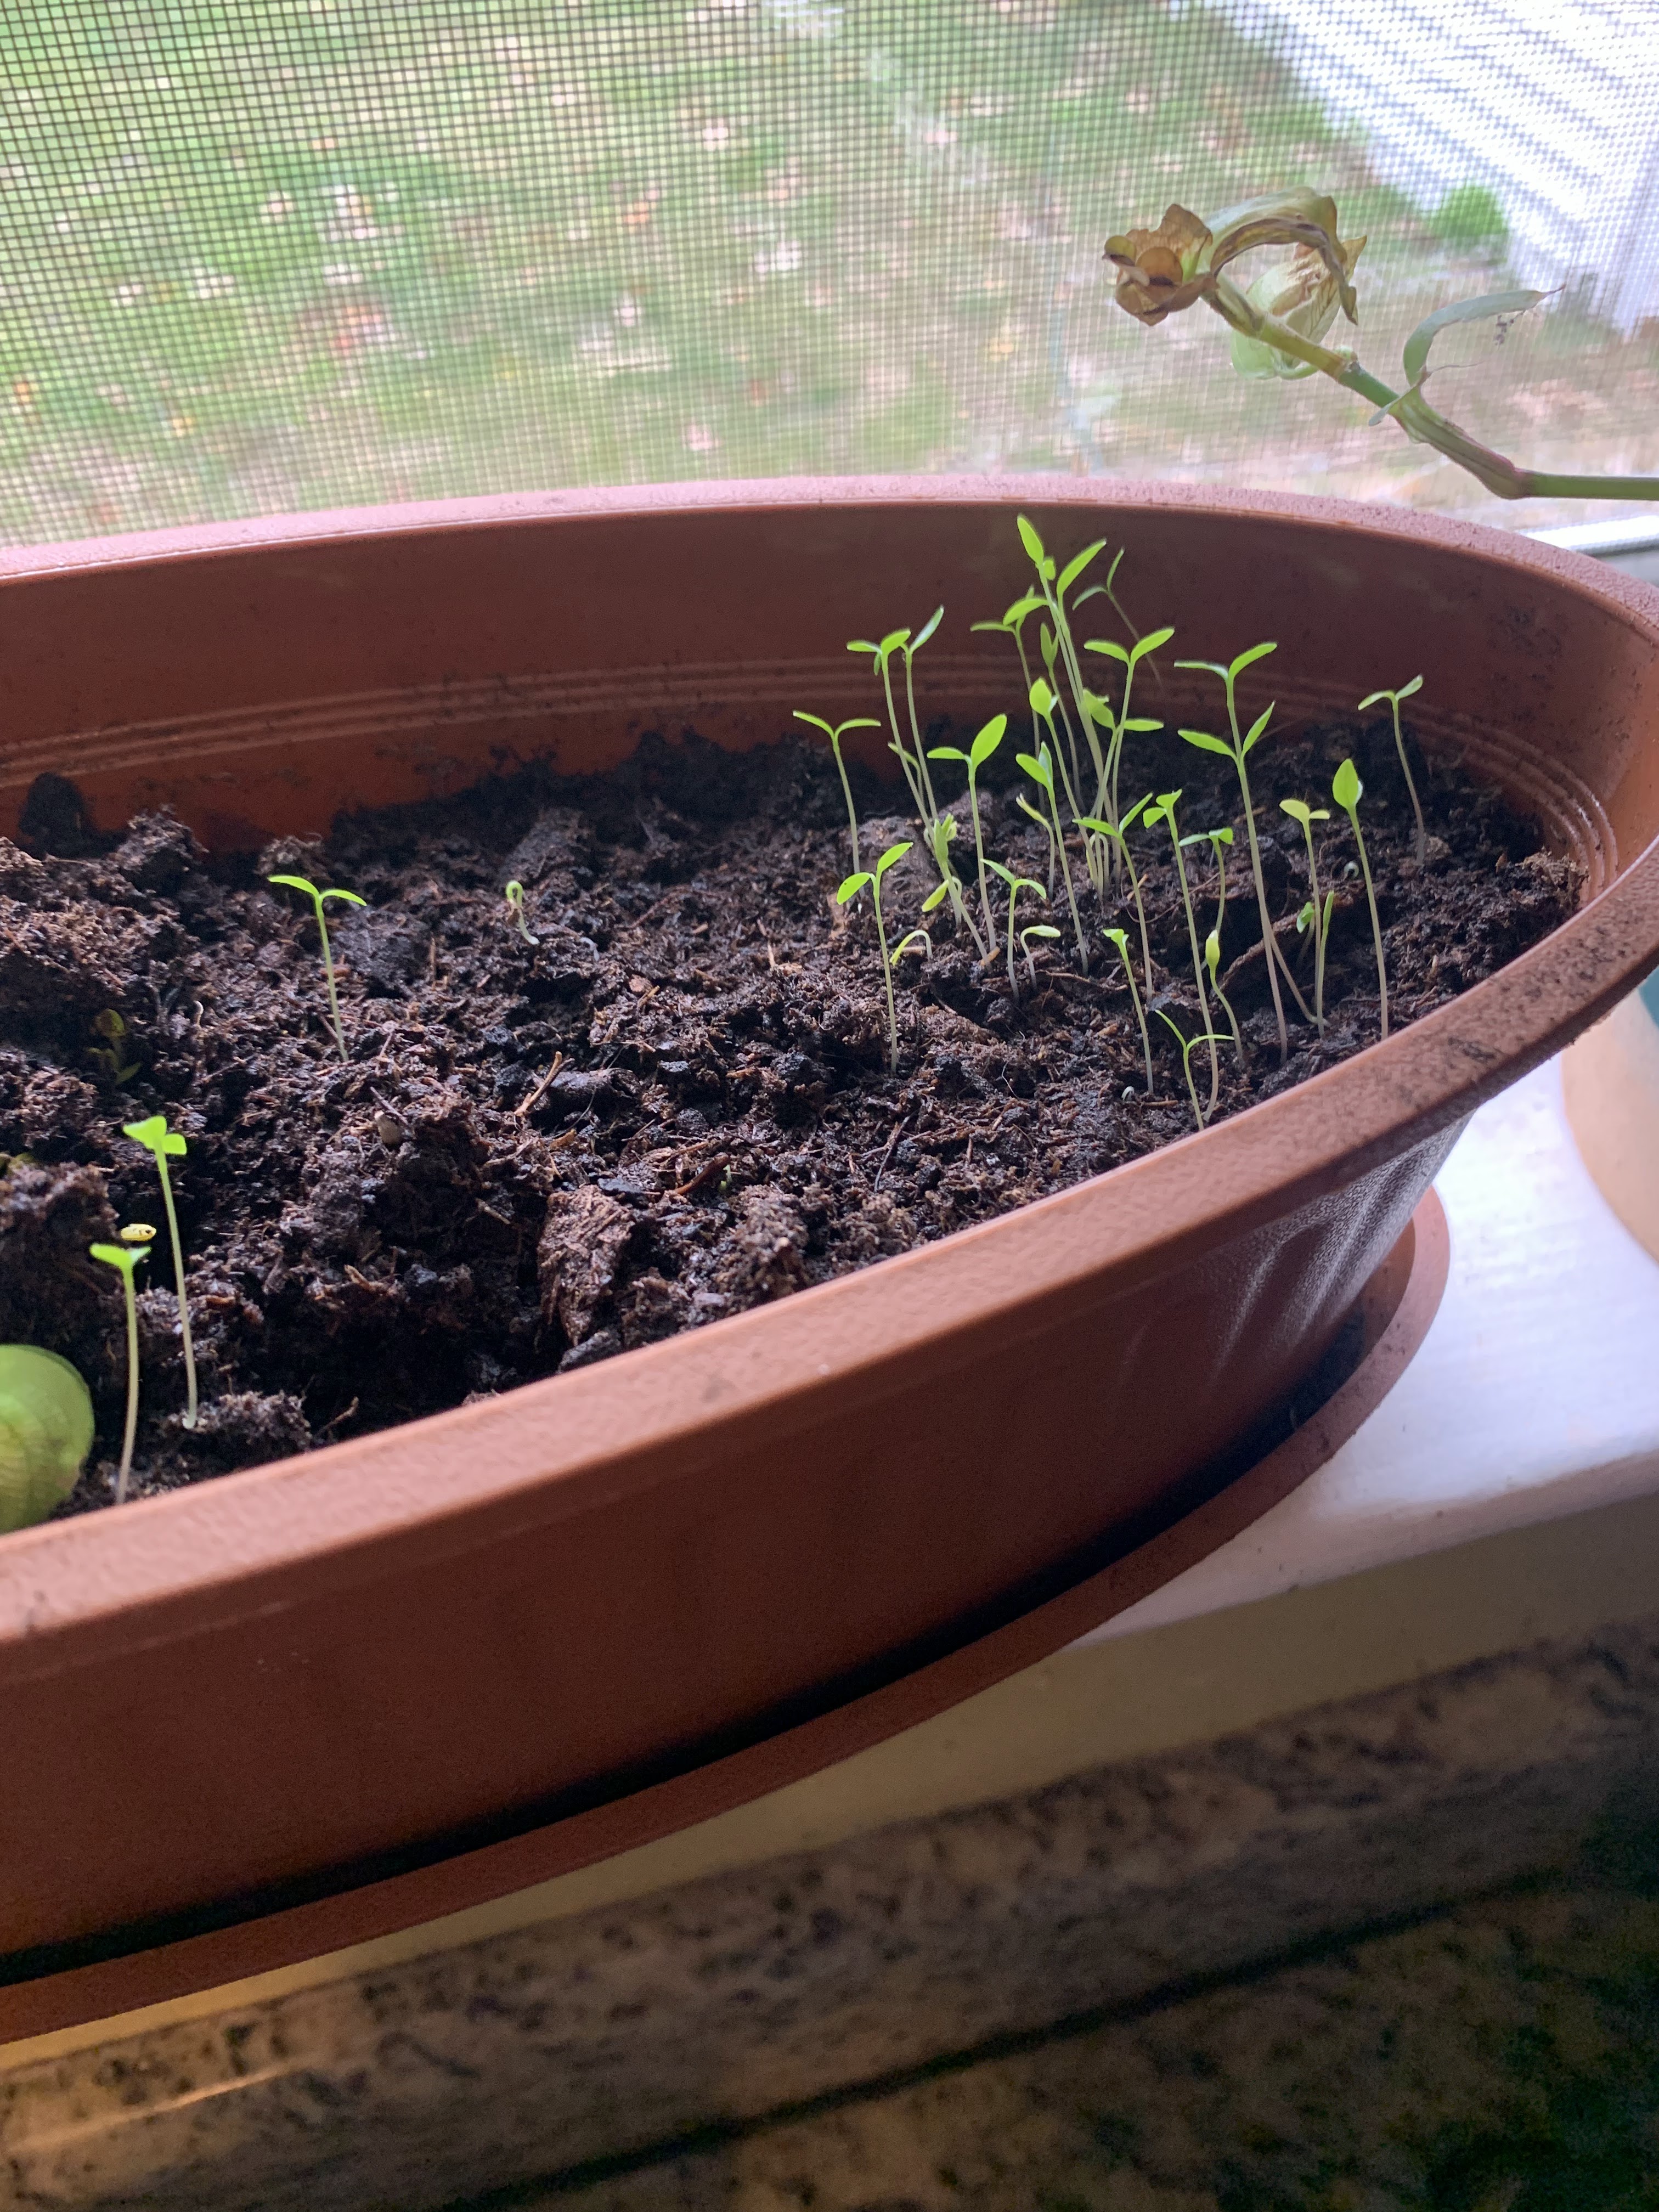
Brand New Baby Herbs reaching out of the soil to say hello!


Friday, October 28, 2022

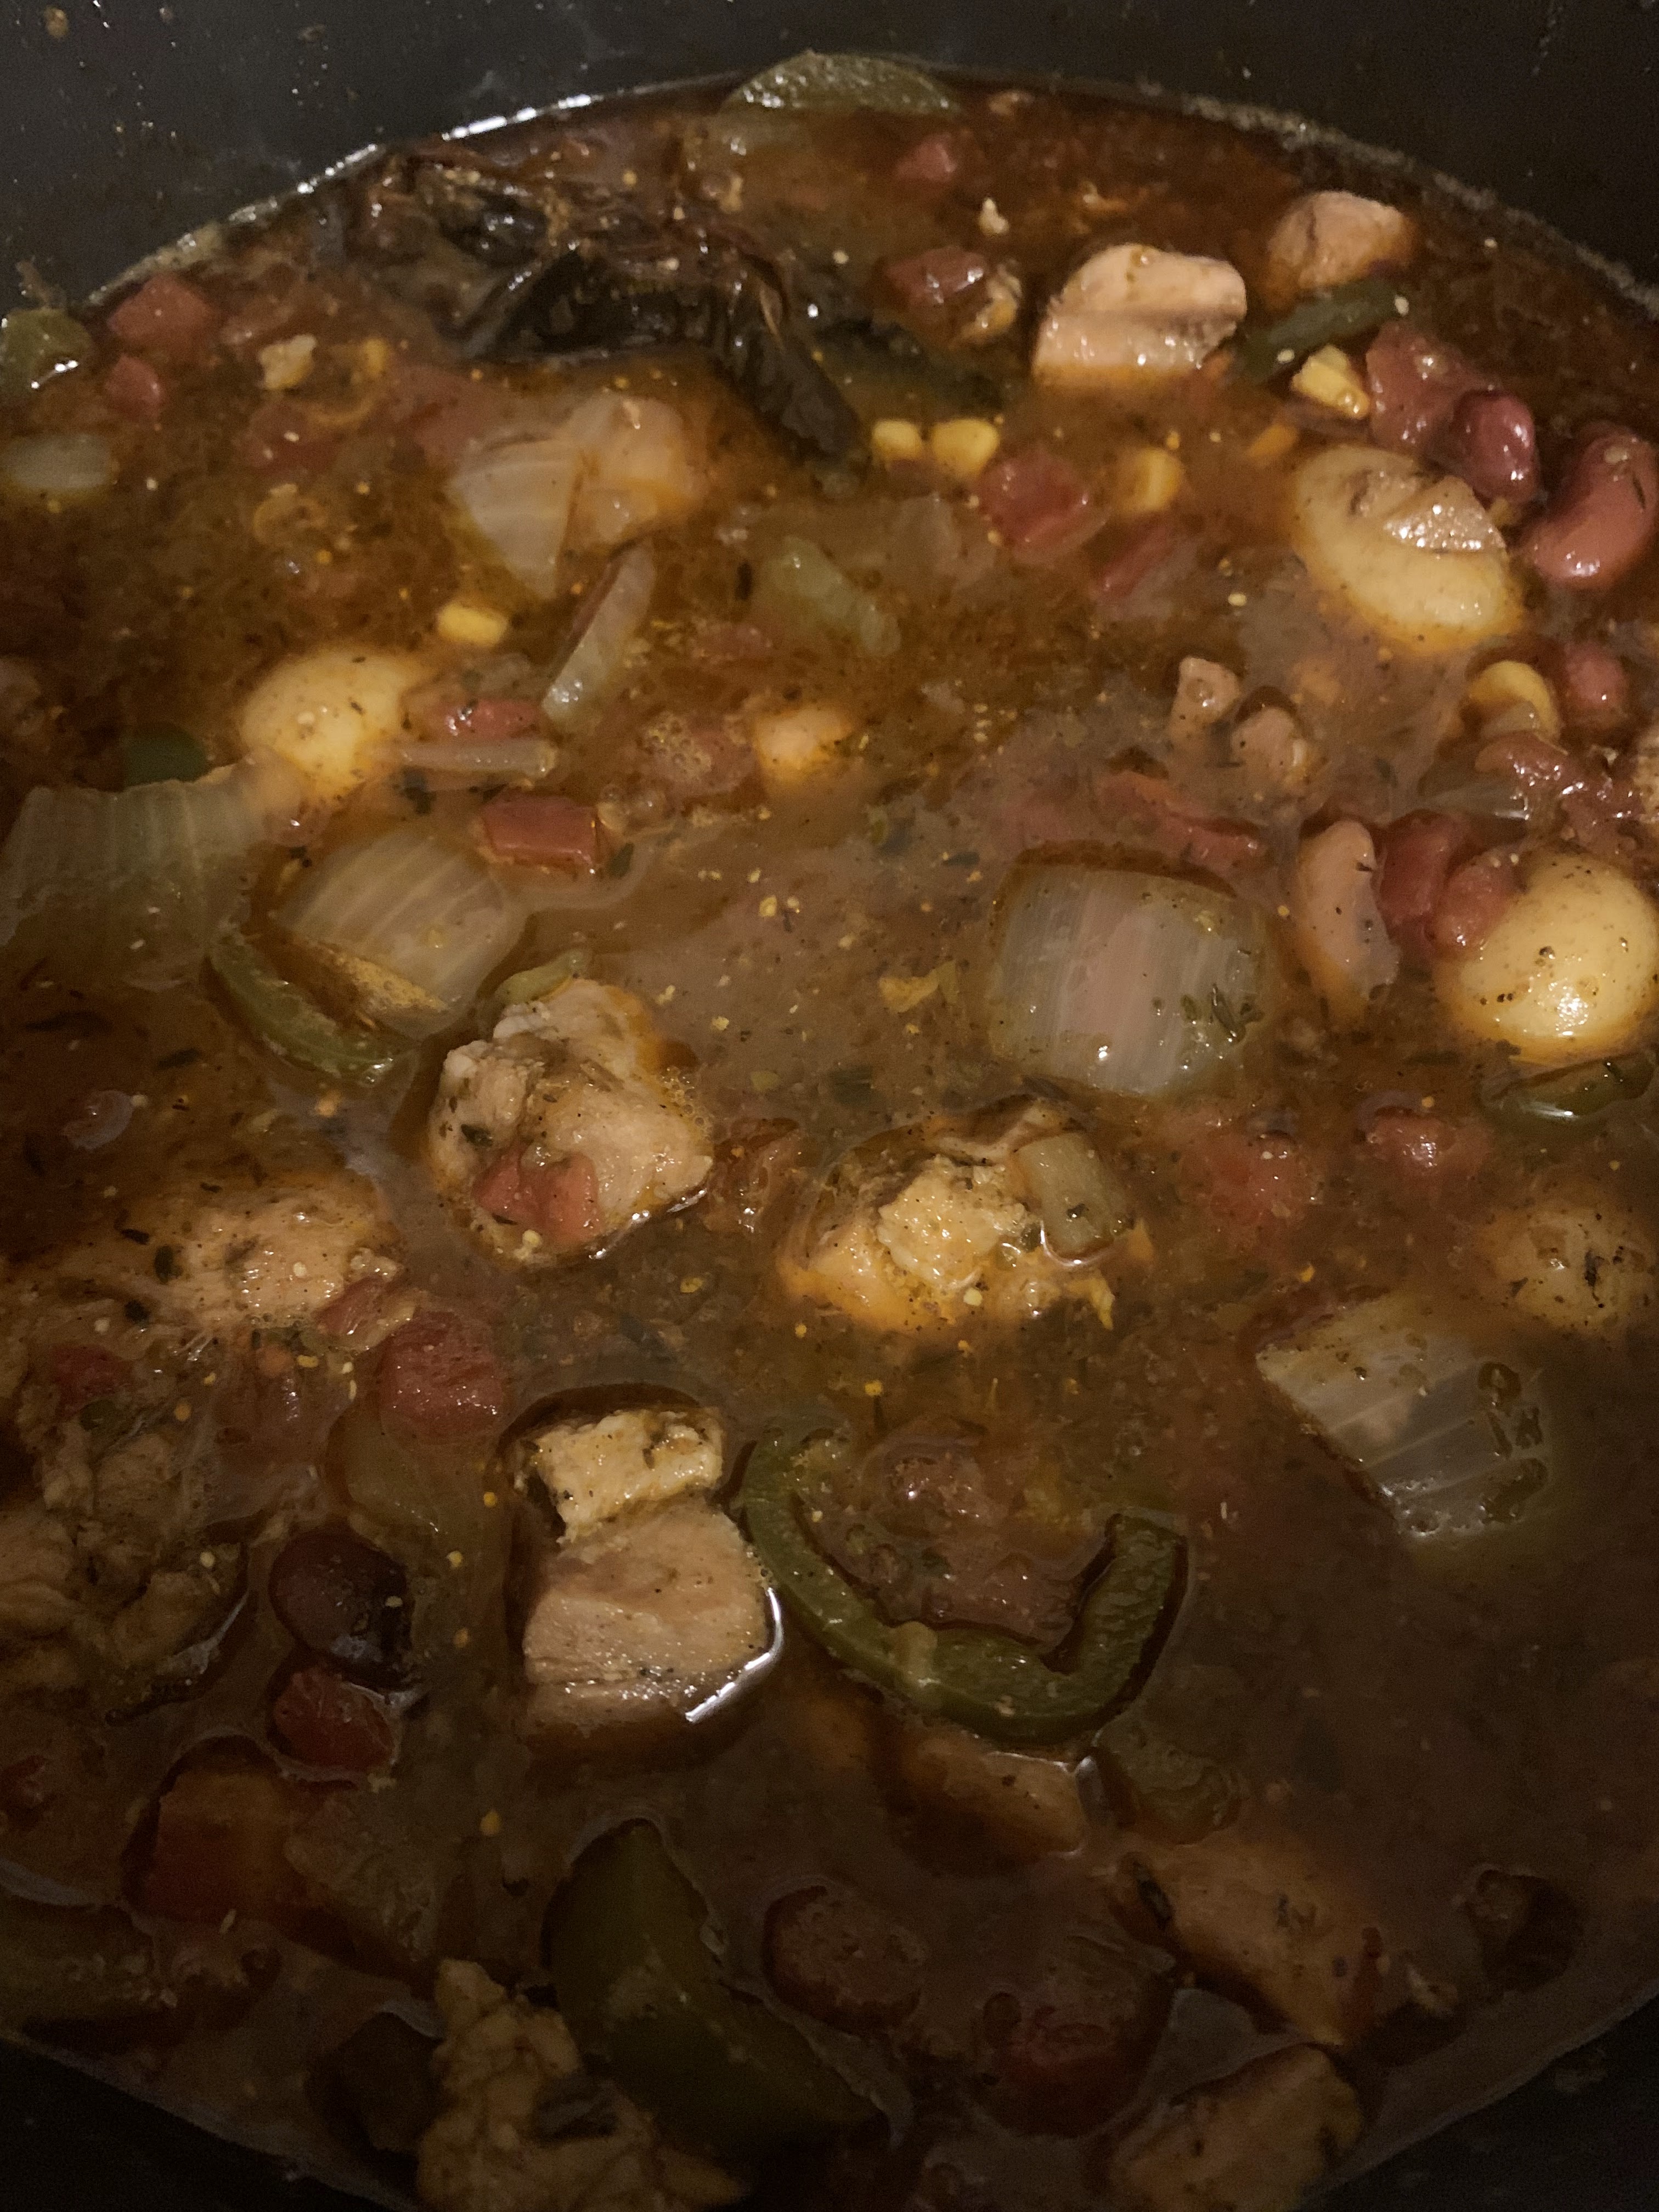
Chile Chicken Soup


Chile Chicken Soup


The holidays are approaching, winter is not far behind, and you may be feeding your family, friends and neighbors!  I have, here, a fantastic recipe perfect for the feasts and fun frivolity approaching! This recipe can be altered to meet your specific needs, even as a vegan soup.  Let's get to it!


Ingredients

1 package, or, 6 good sized chicken thighs, cubed

1  16oz can diced tomatoes 

1 small can of fire roasted green chiles

2 large or 3 medium dried Chile Ancho pods, stemmed and seeded

1 16 oz can of whole kernel corn

About 16 small baby Yukon Gold potatoes

1/2 head garlic, halved and salted

1 large or 2 medium onions, coarsely chopped

1 rounded tablespoon (or two) oregano

1 rounded teaspoon thyme

Smoked Paprika

1 rounded tablespoon black pepper 

Salt 

Pickled Jalapeno juice, 1/4 cup 

                                   1 20 oz can rinsed kidney beans

Your favorite braising oil (I used evoo)

If you want to Ingredients

I wanted my chicken soup to be a bit fiery, so I added some of these below.  You could not add them if you want your soup more traditional.  In addition, you could change the chicken to tofu or, leave it out altogether. 


Jerk Seasoning (strongly recommend) 

Sliced, pickled Jalapenos (sorry, I don't know how to add the omniglot)

Pickled Jalapeno juice, 1/4 cup

Chipotle powder or your favorite chile powder


This was the hard part.  The rest is a breeze. 

****

Add three generous rounds of oil to a large pot over high heat.  Add the onions, dried Ancho chile pods, and the garlic halves.  Place the garlic halves cut side down.  Any cloves that may have escaped, peel them and throw them in, too!  Add salt and a little black pepper and stir, about three minutes.  Add the pickled jalapeno juice (or, white wine vinegar is fine, too) and stir the ingredients around. Next, move the ingredients to the sides of the pot.  Add the cubed chicken thighs.

(You could use chicken breasts for this, especially because it is a soup, but I almost exclusively use chicken thighs because they are softer and juicier. In my advancing age, I prefer thigh meat because it is easier on my aging teeth, too.)  

Allow the cubed thigh meat to caramelize, about three or four minutes one side, then the other.  It is easy to use a spoon or spatula to swish them around rather than to turn each one over with a pair of tongs.  Monotonous, isn't it? Add a little salt and pepper and swish those babies around!

After about eight minutes, add a cup of hot water and stir and scrape the bottom of the pot for those cooked on dark bits.  Those are flavor!!!  Morgan and I call those "nibbly bits".  Add the potatoes along with a good pinch of salt and pepper.  Now, add a second cup of hot

water and stir.  


THIS is the time to add jalapenos and chipotle powder or your favorite ground chile. I did use chipotle powder. Smells so good! Add the can of diced green chiles and diced canned tomatoes. Add the jerk seasoning (whether it is from a rub or in soft form) and thoroughly combine Everything! For merry measure, you could add a half a can or bottle of beer. I didn't this time, but I usually do. If the mixture is too thick, add an extra cup or two of hot water.  Water is essential to help the flavors marry and distribute throughout the pot.  


Bring the mixture to a boil and then reduce the heat to low and simmer for two hours. An hour into the simmer, I add fresh oregano and thyme.  They add tremendous aroma, flavorings and beauty!  Stir and cover again and let simmer another hour. 


Voi La!  It's time to serve!


I had purchased a bag of "hint of lime" corn chips and they went perfectly with this meal.  I garnished with fresh oregano.  

I hope you enjoyed this recipe. It is much simpler than I am making it sound. 😅 The prep work is less than half an hour, and the simmering allows you to go about your evening.  This recipe is also Perfect for a crock pot!  Set it on low for eight hours and enjoy your day! 

****

Thank you very much for sticking with my humble little blog and myself. I appreciate you all more than you know!  Now, file this recipe in your recipe box and Go Cook For Someone You Love! ❤

~ Martin

In-House Cook


Udon with Tamarind~Teriyaki Chicken

  Udon with Tamarind~Teriyaki Chicken and scallions and eggs These days families are super busy, especially if you have school age children ...